OBSBOT UVC to NDI Adapter First Use Guide
Upgrade your streaming with the UVC to NDI Adapter. The adapter ensures that the OBSBOT Webcam can deliver high-quality video output with minimal latency, enhancing its usability in sophisticated streaming scenarios, from online education to high-end live event coverage.
Now, embrace the power of NDI with this first-use guide for the adapter.
Before you start, ensure you've prepared:
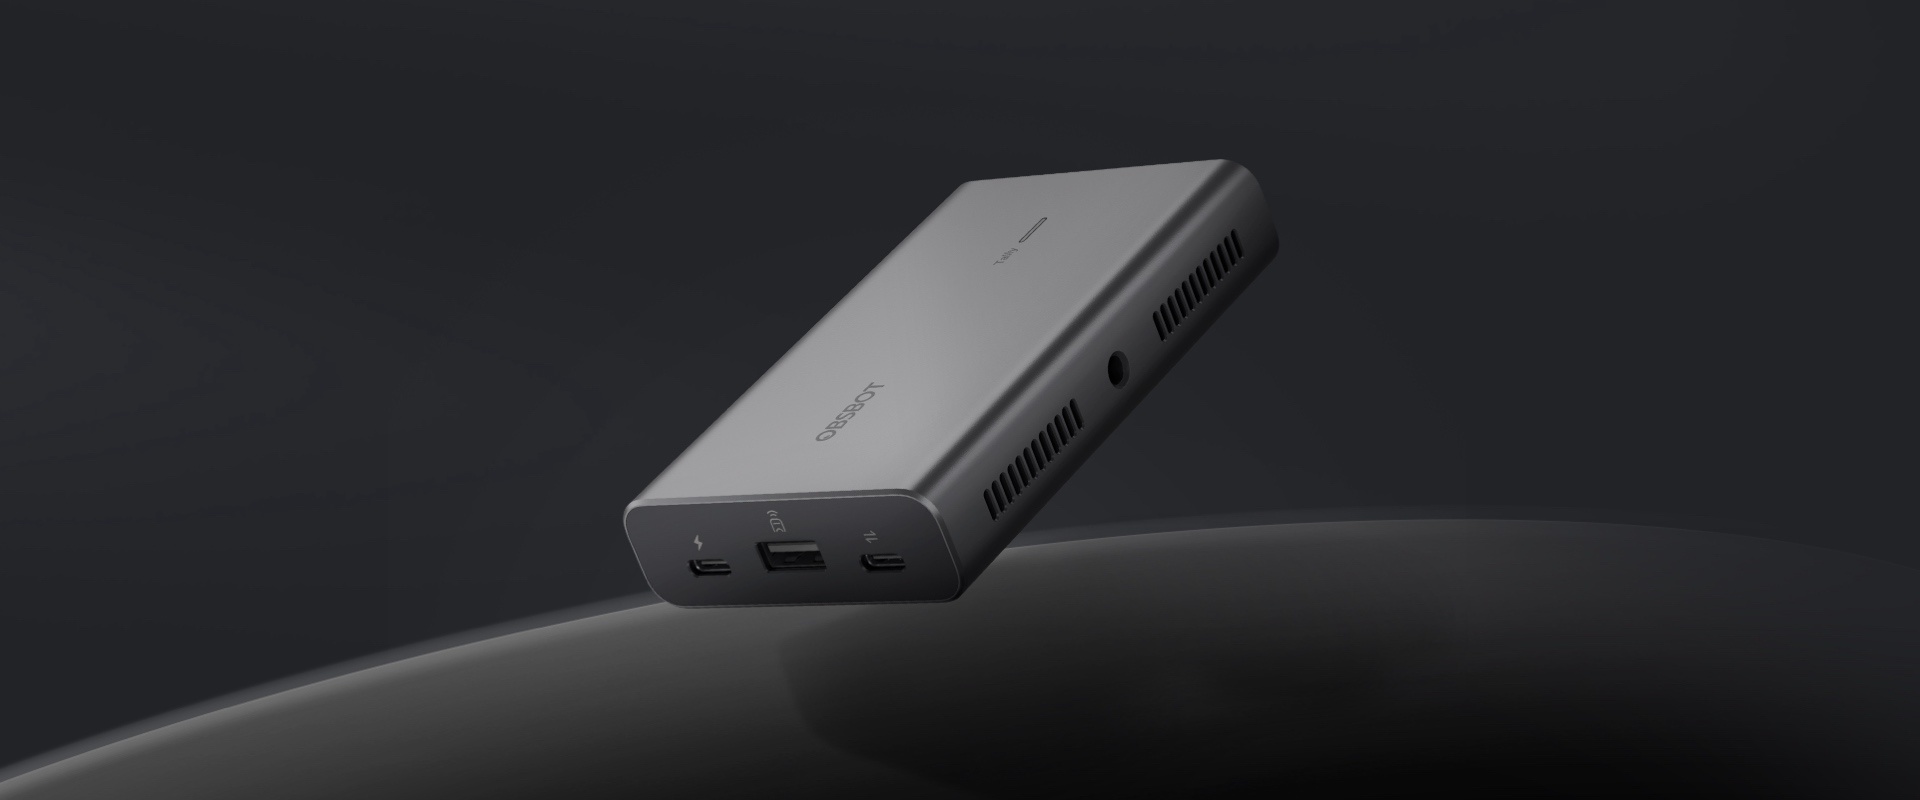
- OBSBOT UVC to NDI Adapter *1
- OBSBOT Tiny 2 *1
- Router/Switch *1
- Ethernet Cable *1
- USB-C Cable *1
- Charging Cable *1
- Micro SD Card *1 (If necessary)
- OBSBOT Tiny Smart Remote 2 *1 (If necessary)
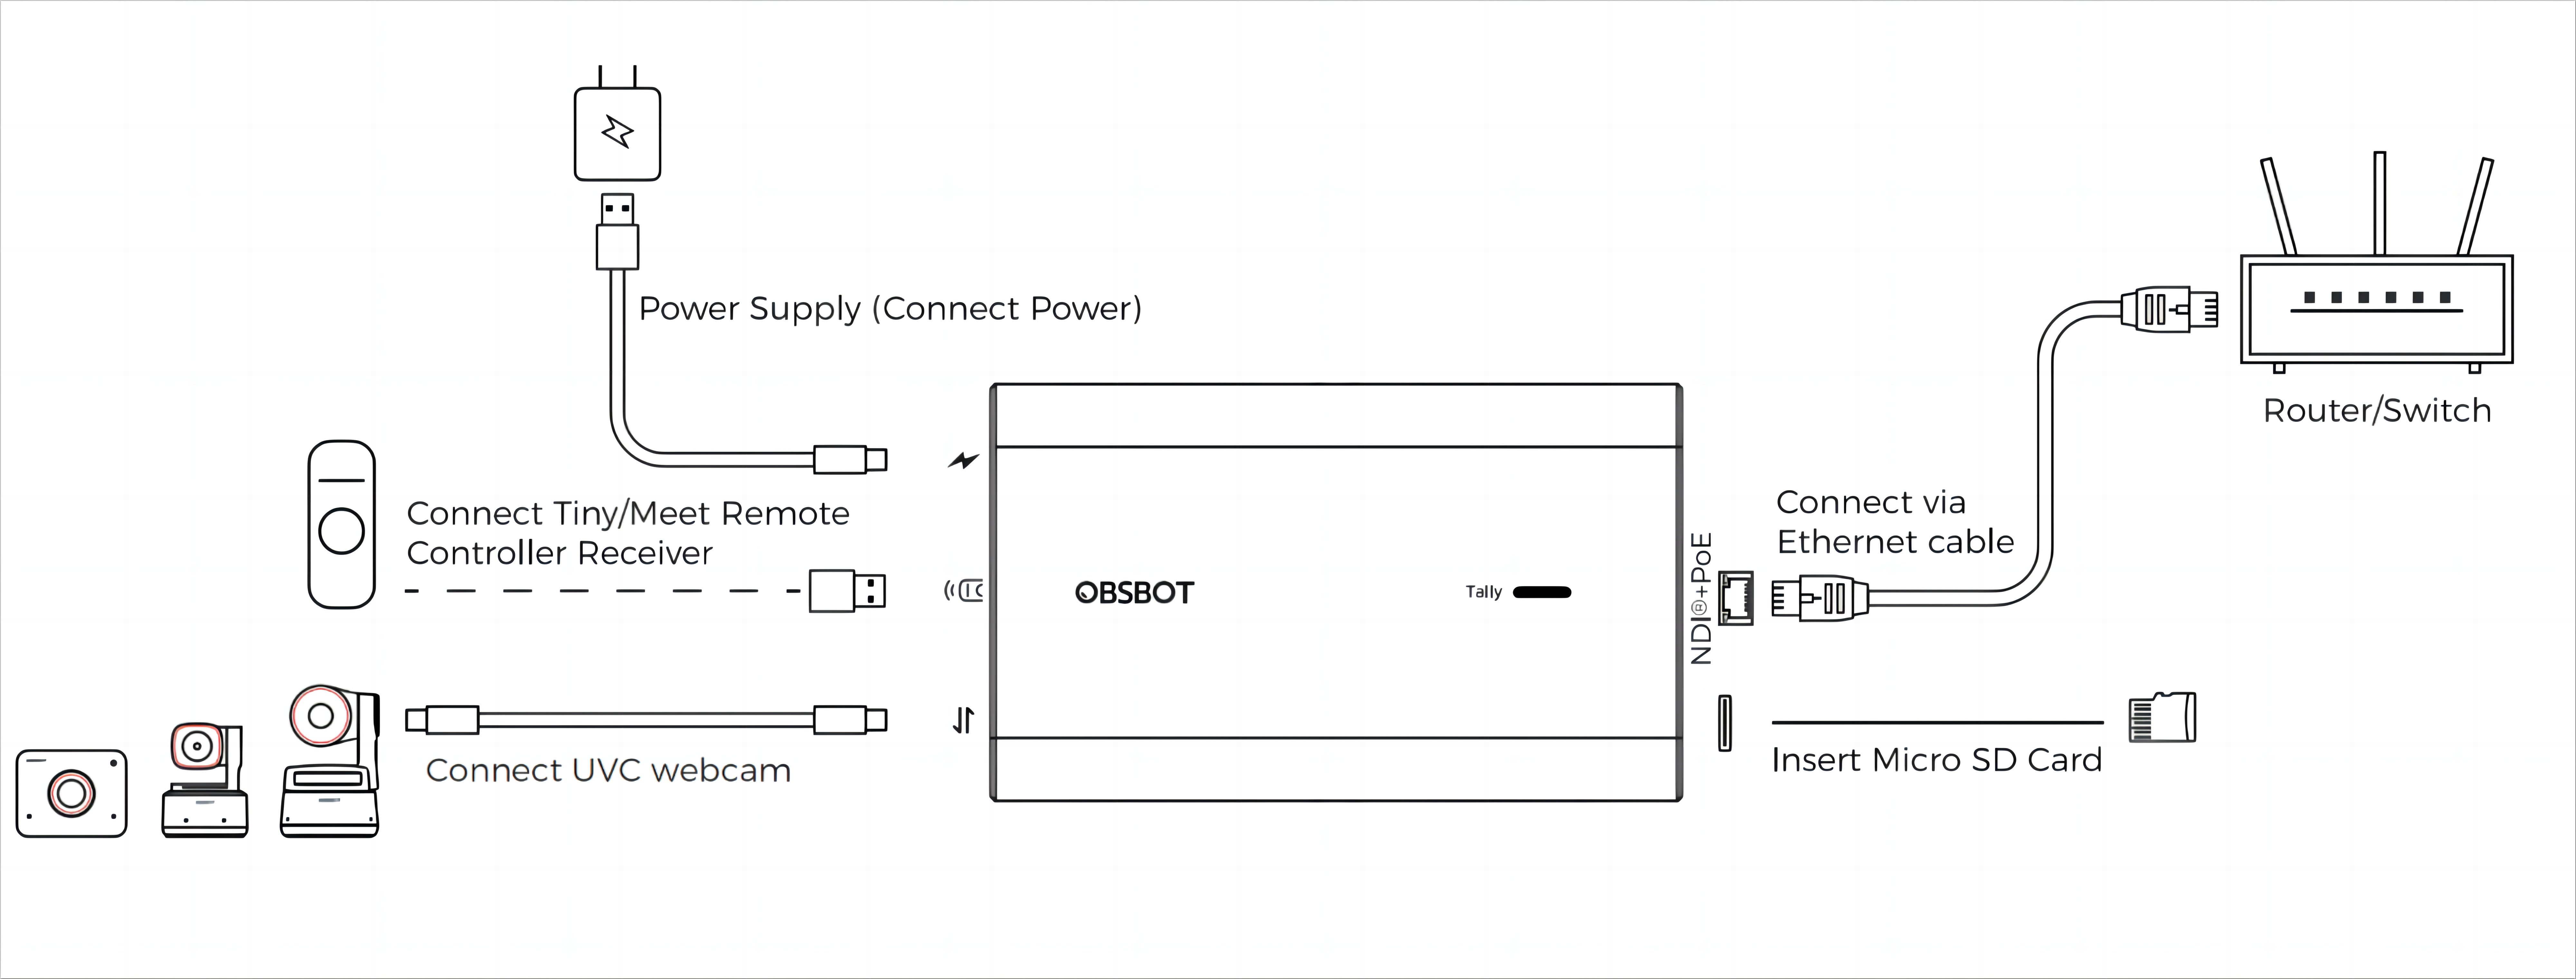
Connect UVC to NDI Adapter with OBSBOT Device:
Step 1: Insert the power supply into the power input port of UVC to the NDI Adapter.
Step 2: Bridge the NDI+PoE port to your router or switch by employing an Ethernet cable.
Step 3: Affix the Tiny 2 to the USB-C input port with a USB-C cable.
Step 4: Plug the Tiny Smart Remote 2's receiver into the specific port. (If necessary)
Step 5: Slide the Micro SD card into the slot on the adapter. (If necessary)
The connection method is shown below.
Control the Webcam via Web UI
After connection, you can access Web UI to monitor or control the webcam through three methods:
Method 1: Employ the "NDI Studio Monitor" Program
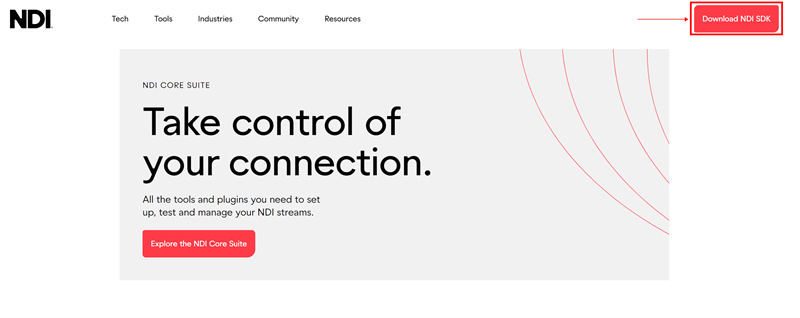
1. Ensure that the computer and the adapter are in the same local network and install NDI Tools.
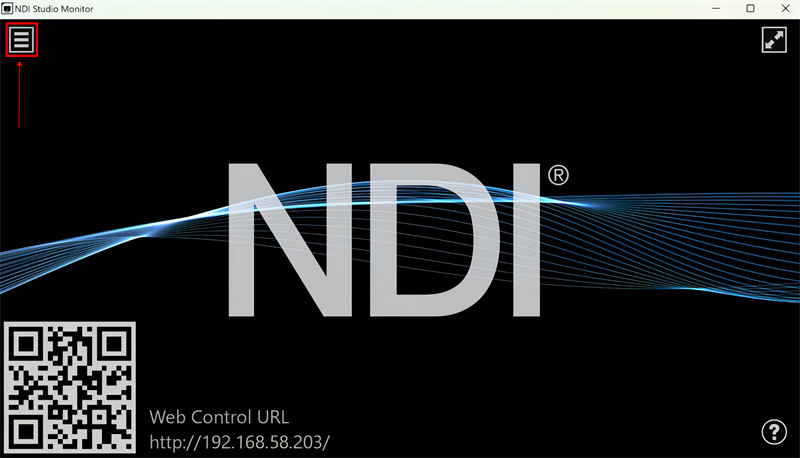
2. Open "NDI" software and enter "NDI Studio Monitor".
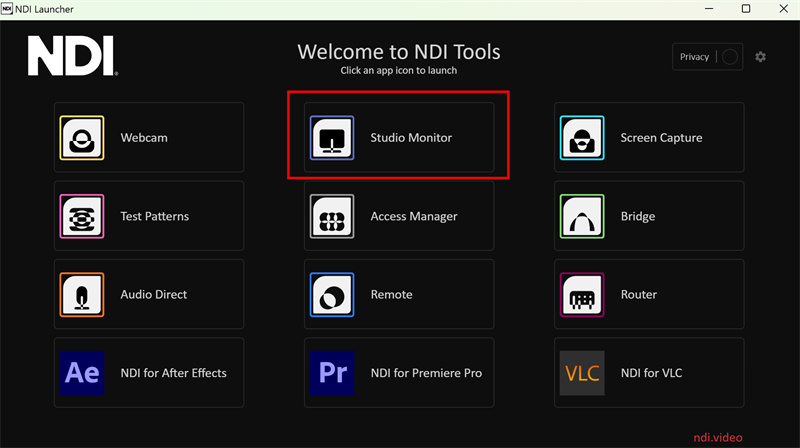
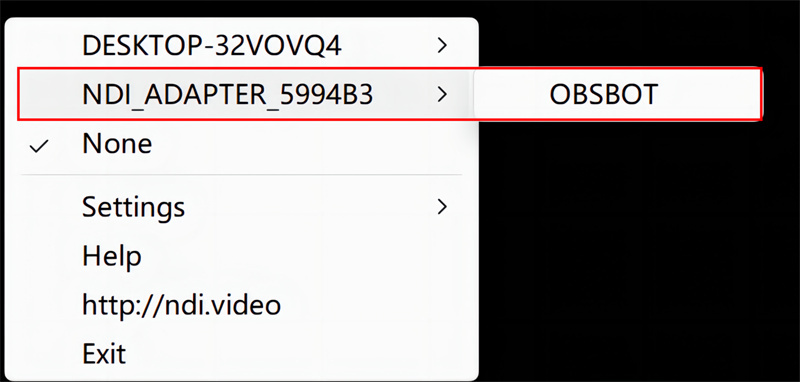
3. Click on the "Menu" icon in the upper left corner and select the NDI source.
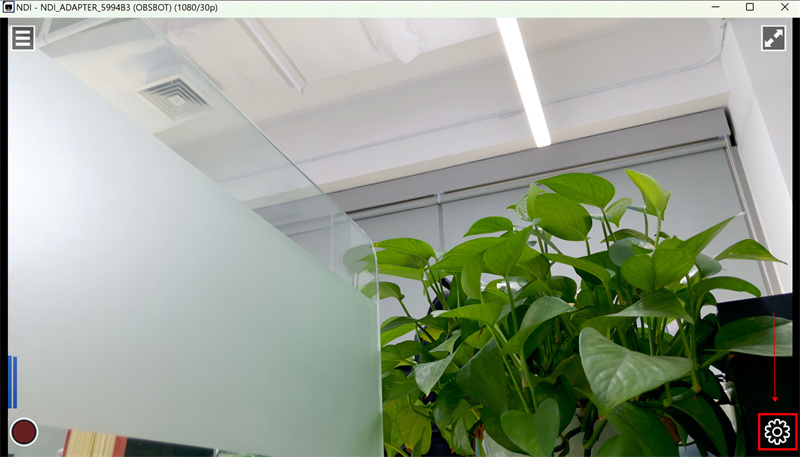
4. Click on the "Setting" icon in the lower right corner, and you can directly access the Web Ul.
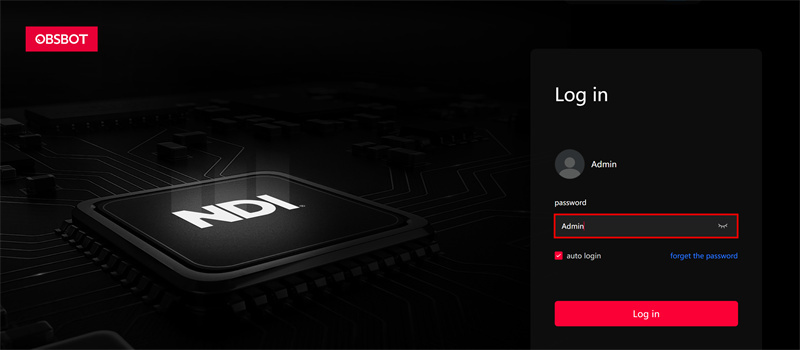
5. After entering the Web UI, enter your user name and password on the "Log in" interface.
Default user name: Admin
Default password: Admin
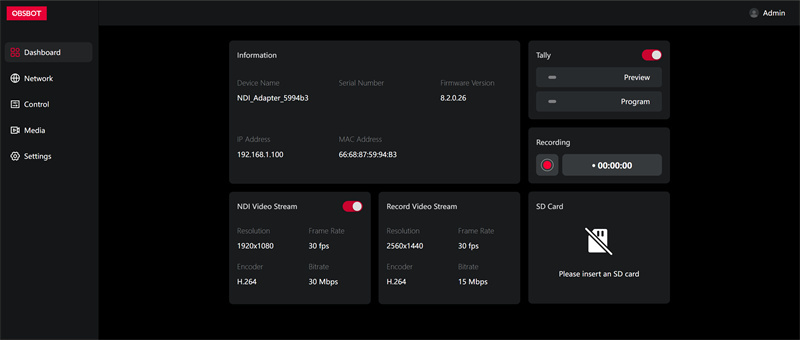
6. UVC to NDI Adapter supports monitoring and controlling devices through Web UI.
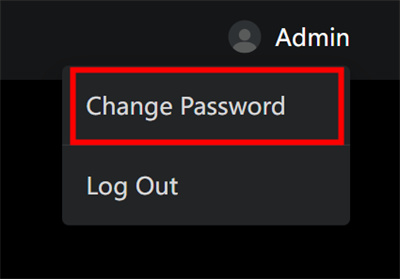
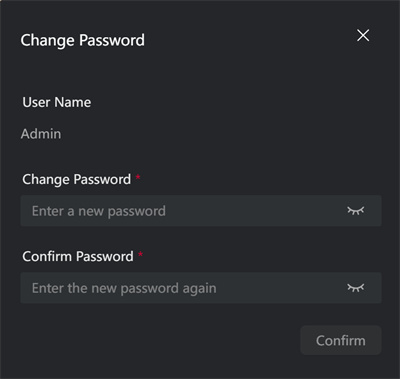
7. It is recommended to change your password after the first login to improve security.
Method 2: Interface with the OBSBOT Center
- Make sure your computer and the adapter are in the same local network and open the "OBSBOT Center" software, it will automatically connect to the adapter.
- After entering the software, click "Settings".
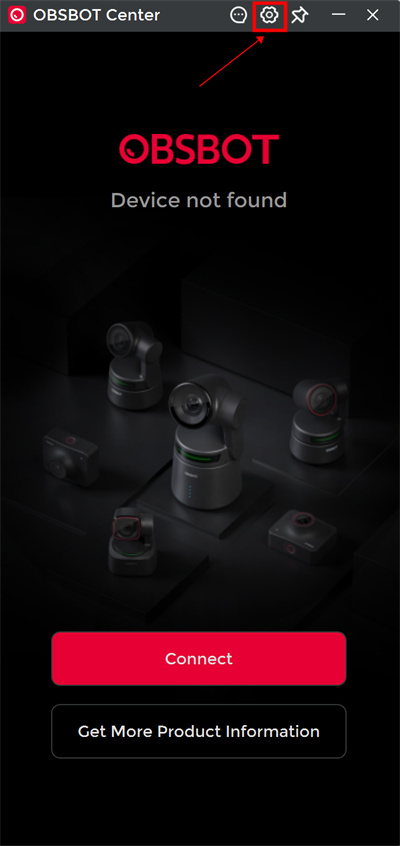
3. Click "Enter NDI Web" in the software, and the Web UI will automatically open in the browser.
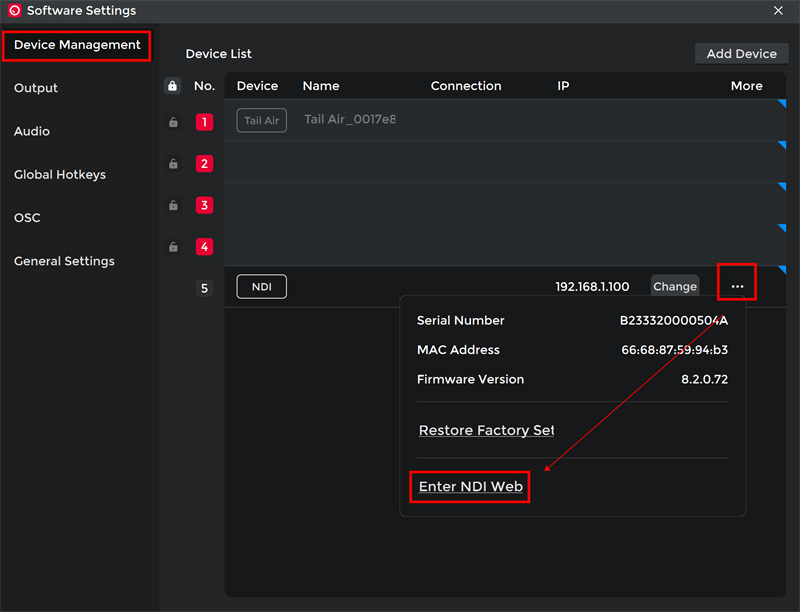
The Web UI accessed through the OBSBOT Center is the same as the one opened in Method 1.
Method 3: Directly Use the Device Name
1. Connect the computer and adapter to the same local network.
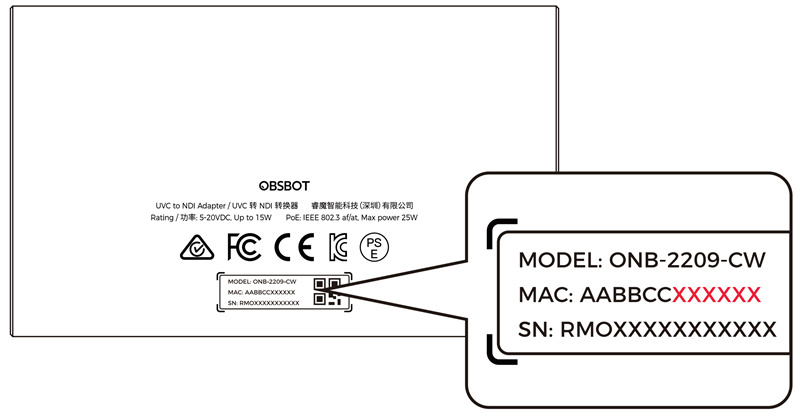
2. Go to "http://device_name.local" in the browser, like "http://ndi_adapter_5994b6.local". The default device name is "NDI_Adapter_XXXXXXXX", where "XXXXXX" is the last six digits of the adapter's MAC address, visible on the device.
3. You will be able to directly enter the Web UI and log in with the default user name and password shown in method 1.

Note:
- When you are unable to enter the Web UI using the device name, check if your computer has the required plugin, or verify that you've entered the updated name.
- If you already know the device's IP address, you can also enter "http://IP address" on the browser to open the Web UI.
- After changing the IP address, you may have trouble accessing the Web UI through the above methods. You can connect the adapter's USB-C input port to your computer using a USB-C cable. Run the "OBSBOT Center" software, click "Restore Factory Settings" to reset the device, and try to access it again.


