The Best Home Studio Setup Guide in 2026

Nowadays, more people are building home studios. A good home studio setup can help you stay focused, feel comfortable, and get things done faster. Whether you're making videos, doing remote work, or starting a new hobby, having the right setup at home makes a big difference.
In this guide, we will explore how to build a comfortable and efficient home studio setup for anyone working or creating from home.
Part 1: Must-Have Equipment for a Home Studio Setup
Here is the list of home studio equipment. If you're recording vocal parts, instruments, or podcasts, these home recording essentials are a must. For those looking to build a professional video production studio, having the right visual and audio gear is equally critical:
- Space
- Acoustic Treatment
- Computer
- Camera (for content creators)
- DAW
- Audio Interface
- Microphones
- Headphones
- Studio Monitors
- Monitor Controller
- Accessories
- MIDI Controller Keyboard
Now that you know what gear you need, here is how to realistically allocate your budget across three different setup tiers.
| Equipment Item | Beginner / Budget Tier (~$500) | Creator / Intermediate Tier (~$1,500) | Professional / Advanced Tier ($3,000+) |
|---|---|---|---|
| Space | Spare Bedroom / Corner of Room | Dedicated Room / Home Office Setup | Acoustically Isolated Studio Room |
| Acoustic Treatment | × | Elgato Wave Panels / Auralex Starter Kit | GIK Acoustics / Primacoustic London 12 |
| Computer | Existing Laptop or PC | MacBook Air M3 or Above/ Mid-tier Custom PC | Mac Studio / High-End Workstation |
| Camera (for creators) | × | OBSBOT Tiny 3 Lite / OBSBOT Meet 2 4K | OBSBOT Tail 2 Live Production Camera |
| DAW (Audio Software) | Reaper / GarageBand | Logic Pro / Ableton Live Standard | Pro Tools Ultimate / Ableton Live Suite |
| Audio Interface | Focusrite Scarlett Solo (4th Gen) | Focusrite Scarlett 2i2 (4th Gen) / MOTU M4 | Universal Audio Apollo Twin X |
| Microphones | Audio-Technica AT2020 / Shure SM58 | Shure SM7B / Rode NT1 5th Gen | Neumann TLM 103 / AKG C414 XLII |
| Headphones | Audio-Technica ATH-M20x | Audio-Technica ATH-M50x / DT 770 Pro | Sennheiser HD 600 / DT 1990 Pro |
| Studio Monitors | × | JBL 305P MkII / KRK Rokit 5 G5 | Genelec 8030C / Focal Shape 65 |
| Monitor Controller | × | × | Mackie Big Knob Studio / RAM 2000 |
| Accessories | AmazonBasics XLR Cable & Desk Stand | Gator Frameworks Stand & Mogami Cables | Triad-Orbit Stands & Mogami Gold XLR |
| MIDI Keyboard | Akai MPK Mini MK3 / Launchkey Mini | Arturia KeyStep 37 / Launchkey 49 | NI Komplete Kontrol S61 / KeyLab 61 |
Part 2: 12 Steps to Help You Build a Home Studio
Creating a functional space can be a game-changer for your workflow. Whether you are focusing on music production or a dedicated YouTube studio setup, following these steps will help you build a professional environment.
Step 1. Choose a Space
The foundation of any successful home studio setup begins with choosing the right room. While creating your home studio is appealing to anyone, not every room is suitable. Taking the time to evaluate your options now will save you when you start your home studio setup.

Key considerations when selecting your home studio room:
- Room Size: Room size should be 8–12 m²; this size strikes a balance between manageability and acoustic flexibility.
- Room Shape: Avoid square rooms whenever possible, and rectangular rooms with asymmetrical features, which help scatter sound more evenly.
- Ceiling Height: Low ceilings cause early reflections that muddy recordings and make mixing unreliable.
- Noise Control: Choose a room that is away from busy streets, bathrooms, or kitchens. Consider installing heavy curtains if the space is particularly noisy.
Step 2. Treat the Acoustic Treatment
Acoustic treatment is not about blocking outside noises, it's about what happens inside your studio, how your sound waves bounce, and where they land.
For this, you can use bass traps to calm the low-end rumble, foam panels to tame reflections, and diffusers to break up unwanted or harsh echoes. You would want to focus on spots like the first reflection points on your ceilings and walls.
Step 3: Pick a Studio Computer
Your computer is the central hub of your studio setup — handling tracks, plugins, and more. As one of the most essential pieces of home recording equipment, it must be powerful and stable. Choosing the right computer specifications ensures a smooth, uninterrupted workflow as your project's complexity grows.

- CPU: A quad-core i5/Ryzen 5 or higher ensures responsive performance in most DAWs.
- Storage: Opt for a Solid State Drive (SSD) to speed up boot times and sample loading.
- Desktop vs. Laptop: Desktops offer more power per dollar, while laptops are great for portability.
- Operating System: Both macOS and Windows work well- choose based on your preferred DAW and plugin compatibility.
Step 4: Set up a Camera (if you need to make video content)
To record high-quality videos or livestream from your studio, consider using a good camera with tracking features. OBSBOT Tail 2 live production camera is an ideal choice to enhance your creative effects with its intelligent tracking function and high-quality performance.
Key features:
- 4K at 60fps Recording
- AI Tracking 2.0
- Multiple Connectivity
- Low-Light Adaptability
- 5x Optical and 12x Hybrid Zoom
- 90° Rotatable Gimbal
Step 5: Install the DAW
A DAW can help you record, edit, mix, and arrange. If you're a beginner, you can start with trial versions to test the interface and workflow.

Here are some intuitive options:
- Ableton Live: Excellent for live performances and loops
- Logic Pro: Only for Mac users, great all-rounder
- FL Studio: Great for electronic and hip-hop music
- Reaper: Affordable and powerful for all levels
Step 6: Connect the Audio Interface
An audio interface converts analog signals into digital signals and vice versa, connecting your microphones and instruments to your computer. It even plays back audio with higher fidelity than built-in sound cards.

Features to Look For:
- Input/Output Configuration: For beginners, a 2-in/2-out interface is perfect, enough for a mic and an instrument.
- Connection Type: USB is most common and compatible; Thunderbolt offers lower latency but is recommended for splurge buys.
- Phantom Power Support: This is required if you're using condenser microphones.
- Trusted Brands: Start with Focusrite Scarlett, Audient EVO, Motu M2, or PreSonus Studio series. If you're on a budget, some brands also offer the cheapest studio equipment options without compromising essential features.
Step 7: Choose a Good Microphone
A good microphone captures every detail, from your voice and tone to your emotion. Hence, choosing the right mic depends on your use case and recording environment. This category doesn't need you to splurge as you find pretty good, reasonable options out there.
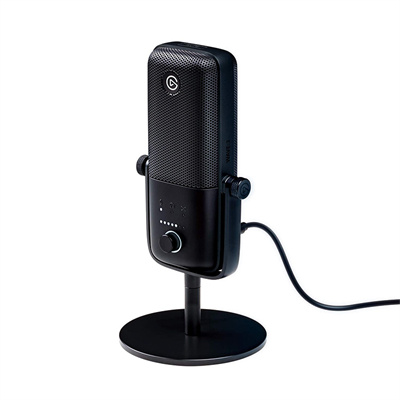
Here are some basics that you need to understand before buying a microphone:
- Condenser vs. Dynamic: Condenser mics are ideal for vocals and acoustic instruments, whereas dynamic mics are better in untreated or noisy spaces.
- Phantom Power: Condenser microphones need 48V phantom power, supplied by most audio interfaces.
- Application Fit: Choose based on whether you're recording vocals, guitar, podcasts, or a mix of all.
- Recommended Entry-Level Mics: Audio-Technica AT2020, Rode NT1, Shure SM58 (dynamic), or MXL 990.
Step 8: Select a Good Headphones
Good headphones are imperative for tracking and mixing, especially in untreated spaces.

Some tips to keep in mind are:
- Closed-Back Design: To prevent sound bleed into your mic during recording.
- Neutral Sound Signature: For helping you make accurate mixing decisions.
- Skip Wireless: Avoid AirPods or Bluetooth headphones as latency and colorization make them unreliable for production.
- Recommended Models: Audio-Technica ATH-M50x, Beyerdynamic DT 770 Pro, Sony MDR-7506.
Step 9: Place Studio Monitors
Studio monitors let you hear your mix as it truly sounds—no exaggerated bass, no flattery. They reveal flaws and help you create balanced tracks. Even a basic pair of studio monitors can transform how you produce and mix.

When choosing studio monitors, keep these factors in mind:
- Monitor Size: For small rooms, 5" - 6" woofers are recommended.
- Speaker Placement: Form an equilateral triangle with your head and ensure tweeters are at ear level.
- Distance from Walls: Keep at least 6 - 12 inches between the back of the monitor and the wall to avoid bass buildup.
- Starter Picks: Yamaha HS5, KRK Rokit 5, JBL 305P MkII.
Step 10: Add a Monitor Controller
If you plan to use multiple audio sources, speakers, or need easier volume control, a monitor controller streamlines your workflow. It's not essential at the start, but it becomes helpful as your setup grows.
Who needs it and why:
- Primary Functions: Controls speaker volume, switches between monitor pairs, and mutes sound instantly.
- Ideal For: Intermediate users with multiple monitors, external gear, or complex routing needs. If you're using one set of monitors and managing volume through your interface, you might not need this in your setup.
Step 11: Organize the Accessories
Accessories are often overlooked, but your home studio depends on them. From mic stands to pop filters, each piece plays an important role in performance, safety, and sound quality.

Essential accessories checklist:
- Cables: Use XLR for mics, TRS for balanced line-level connections.
- Mic Stands: A boom stand gives better positioning than a basic straight stand.
- Pop Filters and Shock Mounts: These reduce plosives and handle noise in vocal recordings.
- Power Conditioning: Surge protectors or power conditioners keep your gear safe from voltage spikes.
Step 12: Get a MIDI Keyboard Controller
If you produce melodies, beats, or compose orchestral music, a MIDI controller gives you real-time creative control. While it doesn't generate sound, it gives you hands-on control over virtual instruments.

MIDI keyboard buying guide:
- Sizes: If you are a beginner, consider 25, 49, or 61 keys, depending on your space and skill.
- Extra Features: Look for models with pads, knobs, and sliders to control effects and automate parameters
- Ideal For: These are perfect for composers, beatmakers, and anyone who prefers playing over clicking.
- Popular Models: Arturia MiniLab, Novation Launchkey, Akai MPK Mini.
Part 3: FAQs About Home Studio Setup
Q: What do I need to start recording music?
A: To start recording music at home, you only need four essentials: a computer, a Digital Audio Workstation (DAW), an audio interface, and a microphone (or instrument). These core elements are all it takes to track your very first song.
Q: What is the best way to record music?
A: The best way to record music is to capture a clean source signal from the start. This means setting your audio interface gain properly to avoid distortion, using a pop filter, and recording in a quiet room. It is always better to get a great natural take than to try and "fix it in the mix" later.
Q: Do I need a camera for a modern home studio setup?
A: While not required for pure audio tracking, a dedicated camera is essential for promoting your music today. Most modern creators run "hybrid studios" using smart webcams to stream live performances, record YouTube tutorials, or shoot short-form videos (TikToks/Reels) to build an audience.
Conclusion
A well-equipped home studio setup can unlock several possibilities. Whether you're building from scratch or simply upgrading your current workspace, the right gear, layout, and environment can elevate your recordings to a professional level. With the right tools and efficient setup, your home studio can become an ideal place to shoot content.


