How to Test Webcam and Microphone (Complete Guide)
Nothing derails a meeting, interview, or livestream faster than realizing your camera or mic isn't working — after everyone's already staring at a frozen screen. The good news is that you can test webcam and microphone hardware in under a minute, without installing anything.
This guide walks through the fastest browser-based method, followed by device-level checks for Windows and Mac, browser permission fixes, and what to do if your webcam or mic still isn't cooperating.
Part 1: Quick Way to Test Webcam and Microphone Online (No Download)
This is the quickest way to test webcam and microphone online, and it doubles as a simple way to check camera and mic online whenever you switch to a new laptop or headset. Online test tools like:
- Riverside Webcam Test and Mic Test: Riverside provides separate browser-based tests for your webcam and microphone. You can grant access, view your camera feed, and check whether your microphone picks up sound.
- Clipy Webcam and Mic Test: This combined tool lets you check your camera preview and microphone level in one place, with options to switch between connected devices.
- ToolNova Mic & Webcam Test: This tool combines webcam preview, real-time microphone level monitoring, recording/playback, and speaker testing in one browser-based interface.
Step 1: Open a browser-based webcam and mic test page.
Step 2: Click "Start Test" or the equivalent button on the page.
Step 3: When your browser prompts you, click Allow to grant camera and microphone access.
Step 4: Check that your live video feed appears on screen.
Step 5: Speak normally and watch for a microphone level indicator to react to your voice.
If your video shows up clearly and the microphone level bar moves while you talk, both devices are working.
If the screen stays black, the feed freezes, or the level meter doesn't move no matter how loud you speak, something is blocking one of the devices — usually a permission setting or a device selection issue, both covered below.
Part 2: Test Webcam and Microphone on Windows
If the online test doesn't detect your devices, checking them directly at the system level will usually tell you whether the problem is the hardware, the driver, or a permission setting. This is also the more reliable way to test mic and webcam hardware.
Test the Webcam (Windows Camera App)
Step 1: Open the Start menu and type Camera.
Step 2: Launch the built-in Camera app.
Step 3: Check the preview window. If your webcam is working correctly, you should see a live video feed.
Test the Microphone (Via Sound Settings)
Step 1: Open Settings → System → Sound.
Step 2: Under Input, select the microphone you want to test.
Step 3: Click Test your microphone and speak normally.
Step 4: Watch the input level bar. It should rise and fall as you talk.
If neither device shows activity, go to Settings → Privacy & Security → Camera and Microphone, and confirm that access is turned on for both apps and your browser.
Part 3: Test Webcam and Microphone on Mac
You can test your webcam on Mac with Photo Booth or QuickTime Player. If your camera is not working on Mac, check your camera connection and privacy permissions before trying the test again.
Test the Webcam:
Method 1: Via Photo Booth
- Step 1: Open Photo Booth to test your webcam.
- Step 2: Check the camera preview. If your webcam is working correctly, you should see a live video feed.
Method 2: Via QuickTime Player
- Step 1: Open QuickTime Player.
- Step 2: Select File → New Movie Recording.
- Step 3: Check the camera preview. If the webcam is working correctly, you should see a live video feed.
Test the Microphone via System Settings
Step 1: Open System Settings → Sound → Input.
Step 2: Select the microphone you want to test.
Step 3: Speak into your microphone and watch the input level indicator. It should move in response to your voice.
Part 4: How to Test Webcam and Microphone in Zoom, Google Meet, and Microsoft Teams
Zoom
Open Settings → Video to see your camera preview, then go to Audio and click Test Speaker & Microphone to confirm sound input and output.
Google Meet
Before joining a call, Meet shows a self-preview screen with your live camera feed.
Click the microphone and camera icons on that screen to switch devices or confirm they're active.
Microsoft Teams
Go to Settings → Devices to see a camera preview and a microphone level bar, or use Make a test call to check both at once.
If your devices passed the browser-based test earlier in this guide, they'll typically work in these apps without any extra setup, since all three rely on the same camera and microphone access your browser already granted.
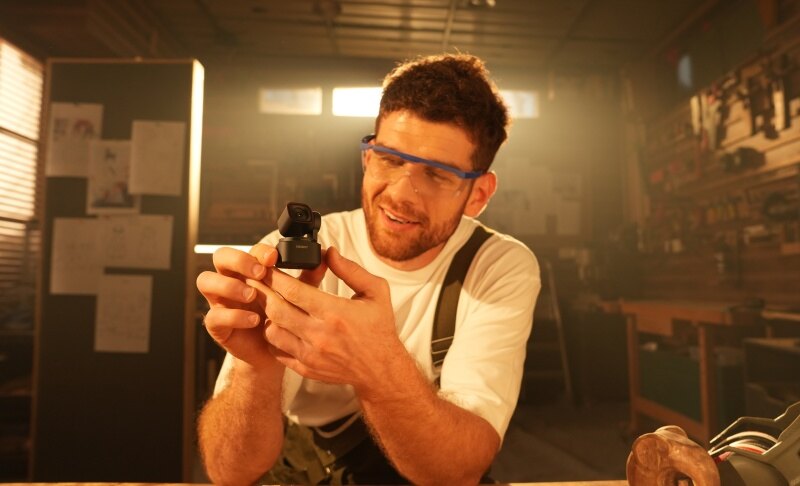
Bonus: Best Webcam for Sharp Video and Clear Audio - OBSBOT Tiny 3 Lite 4K PTZ Webcam
Even after passing every test above, two issues can still remain: a flat, poorly framed webcam feed, and a thin mic that picks up keyboard clicks or background noise. The OBSBOT Tiny 3 Lite fixes both in one device — a single USB webcam-and-mic combo that's detected and tested the same way as any device in this guide.
Key Features:
- 4K image quality with fast autofocus — a 1/2" CMOS sensor captures 4K@30fps or 1080p@120fps, with phase-detect autofocus that keeps you sharp even when you move around.
- Built-in tri-mic audio system — picks up clear voice audio without needing a separate microphone.
- AI auto-framing — AI Tracking 2.0 keeps you centered in the frame automatically, so you don't need to manually reposition the camera during a call.
- Plug-and-play USB connection — detected like a standard webcam, so it works right away in Zoom, Google Meet, and Microsoft Teams.
Part 5: Troubleshooting: Webcam or Microphone Not Working
| Issue | Likely Cause | Fix |
|---|---|---|
| Black screen / no feed | Camera in use by another app | Close other apps using the camera |
| Black screen / no feed | Physical lens cover closed | Open the camera cover/shutter |
| Black screen / no feed | Outdated driver | Update the camera driver |
| No sound detected | Wrong input device selected | Select the correct mic in sound settings |
| No sound detected | Mic muted via hardware switch | Unmute the physical switch |
| No sound detected | Input volume set to zero | Raise input volume in settings |
| Device not detected at all | Loose or faulty connection | Reconnect, or try a different USB port |
| Device not detected at all | Browser/system glitch | Restart the browser, then restart the computer |
| No permission prompt appears | Permission previously denied | Reset permissions in browser site settings, then reload |
FAQs About Testing Webcam and Microphone
1. Can I test my webcam and microphone without installing software?
Yes. Browser-based test tools use your device's existing hardware and browser permissions, so no download or account is needed.
2. Why does my webcam work but not my microphone (or vice versa)?
This usually happens when only one device has browser or system permission enabled, or when the wrong input device is selected in your sound settings.
3. How do I know if my microphone is too quiet or distorted?
Watch the input level meter while speaking at your normal volume. If it barely moves, the input volume may be too low; if it spikes into the red constantly, it may be set too high.
4. Does testing on one app (e.g., Chrome) guarantee it'll work in Zoom or Teams?
Not always, but it's a strong indicator. If your browser test passes, the main things left to check are device selection and in-app permissions within Zoom, Meet, or Teams.
5. How do I check camera and microphone permissions in my browser?
Even when a device works fine at the system level, a browser can still block it individually. Click the lock or site-information icon at the left of the address bar, open Site settings, and set both Camera and Microphone to Allow, then reload the page. This is the fastest way to check camera and microphone access if a device suddenly stops working mid-call, and the steps are nearly identical across Chrome, Edge, Firefox, and Safari.
Conclusion
Testing your webcam and microphone only takes a minute, whether you use a quick online tool or check your device settings directly. Start with the browser-based test, fall back to your operating system's built-in tools if a device isn't detected, and check browser or app permissions if either device still won't respond. Running this check a few minutes before your next call is the simplest way to avoid technical surprises once you're already live.