Video Village Setup Guide: Two Practical Systems for Film Sets
A director needs to see the frame, the client wants a clean picture, and nobody wants another cable crossing the set. A practical video village setup solves that problem by sending the camera feed to monitors placed away from the shooting area. This guide gives you two systems you can copy: one screen for a small crew and separate screens for the director and client.
Choose the Right Video Village Layout
A video village is the off-camera monitoring area where the director and selected crew members watch the live camera feed. Video assist is the person or system that receives, records, plays back, and distributes that feed. On a small set, one monitor may do both jobs; a larger production usually separates the director's screen from the client area.
| Setup | Viewers | Receiver Plan | Best Fit |
|---|---|---|---|
| Single Screen | Director plus one or two crew members | One receiver at the monitor | Interviews, shorts, small branded shoots |
| Director + Client Screens | Director near set; clients in a separate area | Two receivers, or one receiver plus SDI loop-out | Commercials, music videos, larger crews |
Choose by people and distance, not by screen count alone. If the director and client sit beside each other, one receiver can feed two monitors through an SDI loop-out or distribution amplifier. If they need separate locations, plan one receiver for each viewing area.
A practical seating example: give the director, DP, and script supervisor a clear view of the main monitor because they regularly judge performance, framing, lighting, and continuity. Seat the 1st AD at the side where they can communicate with the director and move back onto set quickly. Place producers and clients behind the working crew or at a separate screen. Hair, makeup, wardrobe, and art department members can step in briefly when they need to check visual continuity.
Two Video Village Setups You Can Copy
Small-Team Single-Screen Setup
This is the simplest useful video village. The director gets a dedicated picture without building a full cart, and the monitor can move when the camera changes position.
Equipment list:
- Camera with SDI or HDMI output
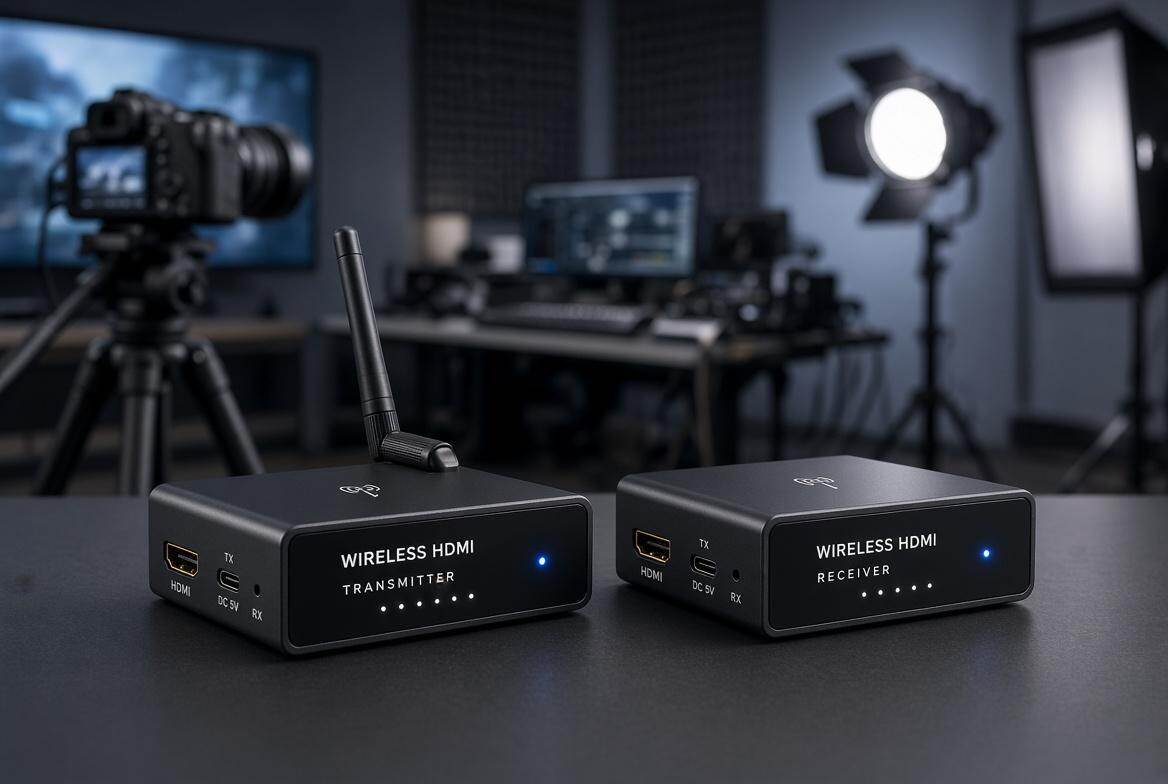
- One SDI/HDMI cable, or one wireless transmitter and one receiver
- One 7- to 10-inch monitor with a sun hood and headphone output
- Monitor stand, light stand with a secure mount, or compact rolling stand
- Two charged monitor batteries and separate receiver power, or one V-mount battery with regulated outputs
- Headphones plus one spare signal cable and one spare battery
Choose wired or wireless first: use a cable for a fixed interview or studio setup when the route is short and does not cross a working path. Add a wireless link when the camera moves frequently, a cable would obstruct the crew, or the viewing area must move independently. Two adjacent monitors can still share one wireless receiver through SDI loop-out or a distribution amplifier.
Wired signal chain
Camera SDI/HDMI → Director Monitor → Headphones
Wireless signal chain
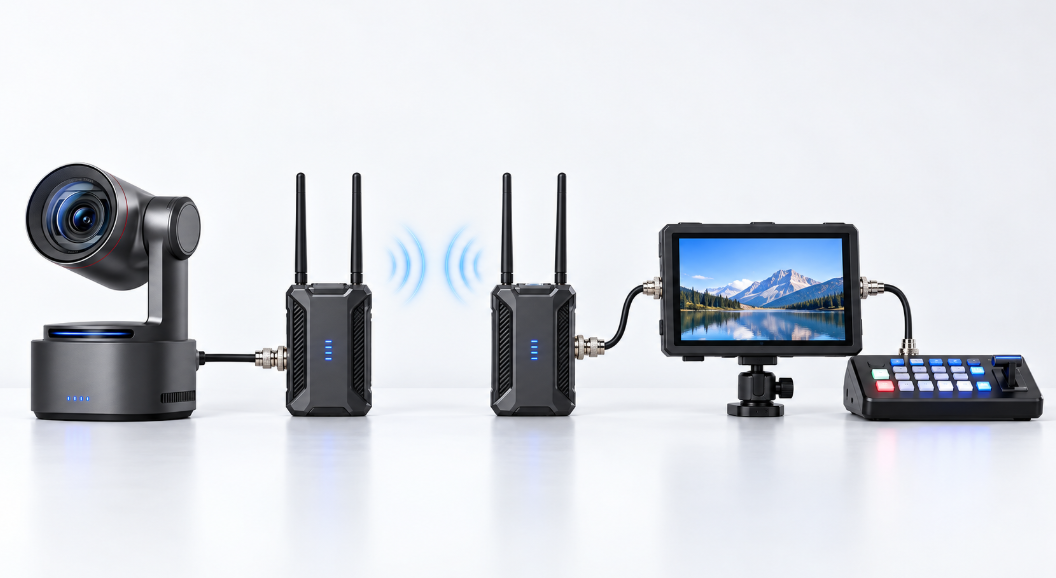
Camera → Wireless TX ))) Wireless RX → Director Monitor → Headphones
Mount the receiver on the monitor stand so the whole station moves as one unit. Keep its antennas above metal cases and clear of bodies. For a fixed interior interview, AC power is convenient. For a moving set, a V-mount battery can power both the monitor and receiver if every output supplies the correct voltage.
Director + Client Separate-Screen Setup
Use this layout when the director needs a responsive monitor close to set while agency, producer, or client viewers need a larger screen farther back. The separation keeps conversation away from the director and reduces crowding around one display.
Equipment list:
- Camera with SDI or HDMI output and one wireless transmitter
- Two compatible receivers when the viewing areas are separated
- One 7- to 10-inch director monitor
- One 17- to 24-inch client monitor
- Two secure stands or a director cart plus a client cart
- V-mount/Gold-mount batteries for mobile use, or AC strips and protected extension cables
- Short SDI/HDMI patch cables, spare cables, monitor hoods, headphones, and an IFB receiver if production audio is required
Best layout for separated viewing areas
Camera → TX ))) RX 1 → Director Monitor
             ))) RX 2 → Client Monitor
Lower-cost layout when both screens are together
Camera → TX ))) RX → Director Monitor SDI Out → Client Monitor
The second layout works only when the first monitor has a compatible loop output and both displays are close enough for a cable. Add an SDI distribution amplifier when you need several local screens. Use separate receivers when the director must move independently, the client area is across the room, or a cable would cross a working path.
How to Build and Test the Video Village
Assign one person to own the video village before equipment is unpacked. On a small shoot, this can be a camera-department member who builds the signal chain, checks batteries and picture quality before each setup, and responds to dropouts during filming. On a larger production, the video-assist operator manages signal distribution, recording, playback, monitor feeds, and communication with the camera and sound departments. The director should always know who to call when a feed fails or a take needs replaying.
- Count viewers and camera feeds. Decide who needs a screen, whether they require the live feed or playback, and whether the village must show one camera or several.
- Choose the location. Place the director close enough to speak with the 1st AD and department heads, but outside camera moves, lighting paths, and sound recording. Put clients behind the working crew or in a separate area.
- Match the signal. Confirm the camera output, transmitter input, receiver output, and monitor input use the same connector, resolution, and frame rate. A 1080p59.94 feed must remain supported through the complete chain.
- Assign receivers. Label each unit by destination: DIRECTOR, CLIENT, DIT, or FOCUS. Pair and test one path at a time before powering the whole system.
- Build the power plan. Secure batteries, strain-relieve power leads, and keep charged replacements at the same station. For AC, protect cable crossings and place every village device on the same planned power distribution.
- Test the real set. Walk the camera route, close doors, let crew members cross the signal path, and test at the intended distance. Check picture, audio, playback, color, and battery changes before the first take.
For battery planning, divide battery watt-hours by the combined watt draw, then multiply by 0.8 for a practical estimate. A 98Wh battery powering a 30W monitor-and-receiver load gives about 2.6 hours: 98 ÷ 30 × 0.8 ≈ 2.6. Prepare enough charged batteries for the shooting block plus one spare cycle.
Outdoors, add a hood or tent and place the monitor so direct sun does not hit the panel. Indoors, raise the picture to the director's eye level and leave a clear path behind the chairs. For more detail on sending camera feeds without a long cable run, see this guide to a wireless video transmitter.
Bonus: a compact camera source for a small live-production village
OBSBOT Tail 2 can feed a monitor, switcher, or network-based production from a fixed position while its tracking handles presenter movement. It is useful when a small crew needs an additional controlled angle without assigning another camera operator.
- HDMI 2.0 and 3G-SDI: connect to common monitors, switchers, and video transmitters.
- AI Tracking 2.0: keeps a presenter framed while the director watches the program.
- 4K60 and 1080p120 capture: supports detailed production and slow-motion options.
- 5× optical zoom: reframes a speaker without cropping the image digitally.
- Ethernet, PoE+, and NDI support: fits networked and multi-camera workflows.
Limitation: Tail 2 has no built-in microphone, so production sound must come from an external microphone or mixer.
Video Village Audio Setup and Playback
The easiest video village audio setup sends scratch or program audio with the camera picture. Audio travels through SDI or HDMI, passes through the wireless link, and reaches the monitor's headphone jack. This lets the director hear dialogue without adding a separate receiver.
Use headphones during takes. A monitor speaker can leak dialogue or playback into the production microphones. When several people need clean sound, the production mixer can send an IFB or Comtek feed to the director and client area. Keep that feed for listening; the recorder operated by the sound department remains the master audio source.
Simple audio: Camera scratch audio → TX/RX → Monitor → Headphones
Production audio: Sound mixer → IFB transmitter → Director/client receivers
Playback: Camera/receiver → Video-assist recorder → Director and client monitors
If the picture and audio use separate wireless paths, perform a lip-sync check before shooting. Match the audio delay to the final monitoring picture, not only to the camera. For instant review, place a recorder or video-assist system before the monitor distribution. The operator can then replay the last take while the camera department resets.
Common Video Village Problems and Fixes
| Problem | Likely Cause | What to Do |
|---|---|---|
| No Picture | Format mismatch or wrong input | Set one supported resolution and frame rate across camera, TX, RX, and monitor; then check the selected input. |
| Wireless Dropouts | Blocked antennas or interference | Raise antennas, restore line of sight, rescan channels, and move access points away from the receiver. |
| Two Screens Look Different | Different LUTs or picture modes | Load the same viewing LUT, disable vivid modes, and match brightness before clients arrive. |
| Client Screen Has No Feed | Loop output or second receiver is not configured | Test the client monitor directly from the receiver, then add the loop cable or pair the second RX. |
| Battery Dies Mid-Take | Load was estimated from the monitor alone | Include the receiver in the watt calculation and swap batteries during planned resets. |
| Audio Leads the Picture | Video and audio use different paths | Add delay to the faster audio feed or monitor embedded audio from the final receiver. |
| Outdoor Screen Is Hard to See | Direct sunlight and insufficient brightness | Add a hood or tent, rotate the display away from the sun, and use a high-bright monitor. |
| Too Many People Around the Director | Director and client viewing share one screen | Move clients to a second monitor and give that area its own receiver or cabled feed. |
FAQs About Video Village Setup
What is the difference between video village and video assist?
Video village is the physical viewing area. Video assist is the operator and equipment used to receive, record, replay, and distribute the camera feed.
Can one wireless transmitter feed two monitors?
Yes. Use two compatible receivers for separated monitors, or feed a nearby second monitor from the first monitor's SDI loop output. Confirm the transmitter supports the required receiver count.
Does video village record the master footage?
Usually no. The camera records the master. A video-assist recorder may capture lower-resolution files for playback, continuity, notes, or remote viewing.
Can clients watch video village remotely?
Yes. A video-assist system or production computer can send the feed through a secure review platform. Test delay, audio, access permissions, and internet upload speed before the shoot.
Who should sit at video village?
Give the director the closest position. The script supervisor and key creative crew may sit nearby, while producers and clients should use seats behind them or a separate screen.
Conclusion
A useful video village setup starts with the number of viewing areas. Use one monitor and one receiver for a compact crew; give the director and client separate receivers when they need independent positions. Match every signal format, plan power by total watt draw, keep audio in headphones, and test the system along the real camera route before the first take.