How to Record Gameplay on PC [Beginner's Guide]

In the world of gaming, capturing gameplay footage has become essential for sharing epic moments, wins, tutorials, and even just for personal enjoyment. Recording gameplay will allow you to showcase your skills, share strategies, and create engaging content for your audience.
So you might be asking, "How do I record my PC gameplay?" In this guide, we'll explore easy-to-follow yet effective methods for recording gameplay on PC. From built-in recording features to third-party software and optimizing your settings for high-quality recordings, we'll cover everything you need to know to start capturing your gaming adventures effortlessly.
Things Need to be Considered Before Recording
Before we proceed to show you how to record PC gameplay, let's explore some of the factors you need to consider if you want to make it big in the online gaming platform. If you already know this information, please skip to the method part to learn how to record gameplay on PC directly.
| Resolution |
|
| Frame Rate |
|
| Audio Channels |
|
| Overlay |
|
| Game Facecam |
|
| Recording Software |
|
Bonus: Record Gameplay with the Best Webcam - OBSBOT Tiny 3 Lite 4K PTZ Webcam
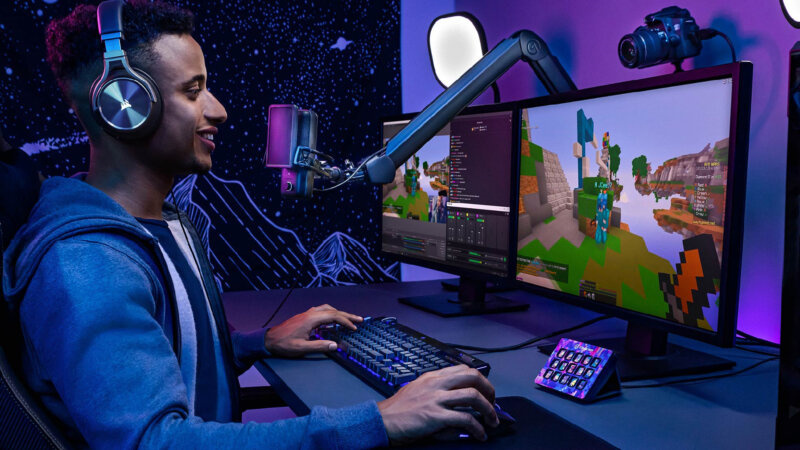
For gamers who want to capture every moment with clarity and precision, the OBSBOT Tiny 3 Lite is the smallest 4K PTZ webcam built to deliver professional-quality gameplay recordings. Despite its small size, it packs studio-grade spatial audio, high-resolution imaging, and advanced AI tracking to keep you perfectly framed, even during fast-paced action. Lightweight and versatile, Tiny 3 Lite is designed to fit on any desk or monitor, making it an ideal choice for solo streamers, competitive gamers, and content creators alike.
Key Features:
- Spatial Audio & Voice Locator: 3-mic array captures clear voice and game sounds; camera automatically tracks your voice.
- Advanced Imaging System: 4K@30fps and 1080p@120fps options deliver sharp, smooth gameplay videos.
- Industry-Leading AI Features: AI Tracking 2.0 keeps you centered during gameplay, even with multiple people or moving objects.
- Compact and Versatile Design: Tiny size (41×41×58 mm, 73g) fits easily on desks, monitors, or tripods.
Method 1: Use Professional Game Recording Software (EaseUS RecExperts)
If you want a simpler yet powerful way to record gameplay on PC, EaseUS RecExperts offers a dedicated Game Mode that detects your game window for smooth, low-lag capture. It supports up to 4K resolution, customizable frame rates, separate system and mic audio recording, and built-in trimming tools, delivering high-quality results without complex setup. Follow the steps below to record gameplay on PC with EaseUS Game Recorder:
Step 1: Go to EaseUS RecExperts website, download, and launch it on your PC. Click the "Menu" icon in the upper-right corner to open the "Settings" panel.

Step 2: Navigate to the "Video" and "Audio" sections to customize your recording preferences. Here, you can adjust the frame rate (from 1 to 144 fps), video quality, output format, and bitrate according to your needs. If you want to optimize your gameplay capture further, click the "Game" tab to configure overlay settings and other in-game recording options.

Step 3: Return to the main interface and select "Game Mode." The software will automatically detect running games. Choose the game window you want to record, then select your webcam and audio source if you plan to include commentary or facecam footage. Click "REC" to start recording your gameplay.

Step 4: During recording, a small floating toolbar will appear to show the recording duration. You can take screenshots while recording or click the clock icon to set an automatic stop time for your session.

Step 5: Once you finish recording, click "Stop." Your gameplay video will open in the built-in player, where you can preview, trim, or make basic edits before saving the final file to your PC.
Method 2: Use Built-in Recording Software (Game Bar)
You can record gameplay for free on a Windows 10 PC by using the Windows built-in free game recording software called Game Bar. For a more detailed walkthrough, see our guide on how to record video on Windows 10. Though it's important to note that the Game Bar is only available on Windows 10 and later. To learn how to capture gameplay on a PC with Game Bar, please follow the steps below.
Step 1: If you're using the Game Bar for the first time, then you need to enable it. Go to the "Start" menu, select "Settings", then "Gaming", and choose the "Game Bar". Toggle the switch under "Record game clips, screenshots, and broadcast using Game bar" to on.
Step 2: Click the "Windows + G" keys on your keyboard simultaneously to open the Game Bar. When prompted, click "Yes, this is a game".

Step 3: Select the "Gear" icon to open the "Settings" panel, and then scroll to "Capturing". Select "Record in the background while I'm playing a game", then close the dialog.
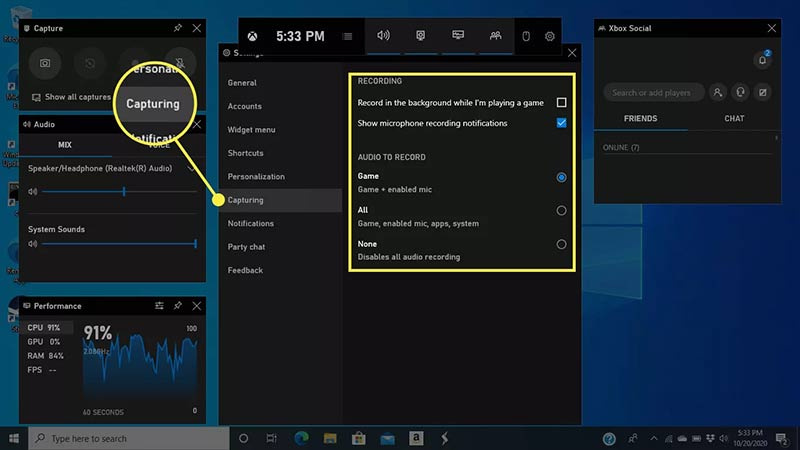
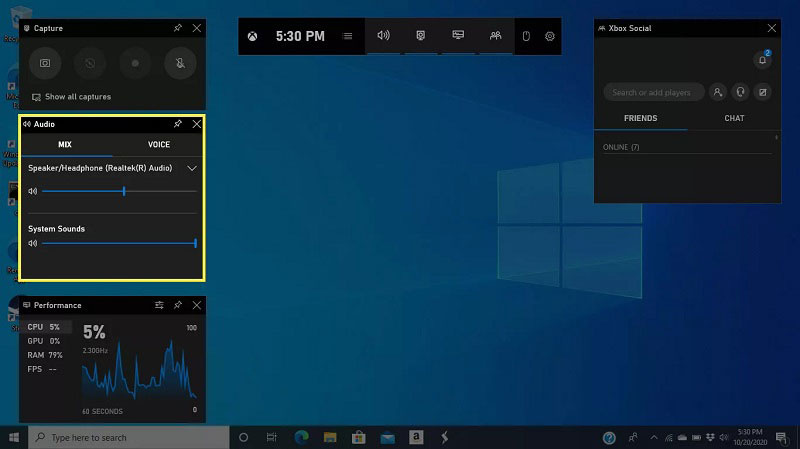
Step 4: Adjust the parameters on the "Audio" panel on the left side. You can also set your video frame rate, which is automatically set to 30fps, which is recommended. Then, you can update the video from "Standard" to "High" for better quality. Plus, you can choose to capture audio immediately when recording gameplay. You can even make a recording to test the volume too.
Step 5: When you are ready, click the "Record" button to automatically start recording gameplay. The gameplay recorder will turn into a small bar.
Step 6: To stop the gameplay recording, select the blue "Stop" button. By default, the recording will be saved as MP4 files in C:\Users\[your username]\Videos\Captures.

Method 3: Use Third-party Software (OBS Studio)
There are several third-party software programs that you can use to record gameplay on PC, but for this guide, we'll be exploring OBS Studio, a powerful free video recording tool. Here's a step-by-step guide on how to screen record gameplay on PC using OBS Studio:
Step 1: Go to the OBS Studio website, download, and install the software for your operating system.
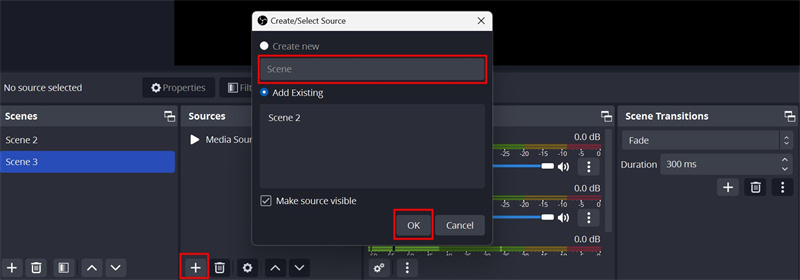
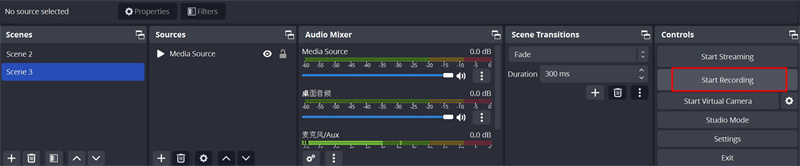
Step 2: Launch OBS Studio. Click on the "+" icon under the "Scenes" box give your scene a name and press "OK".
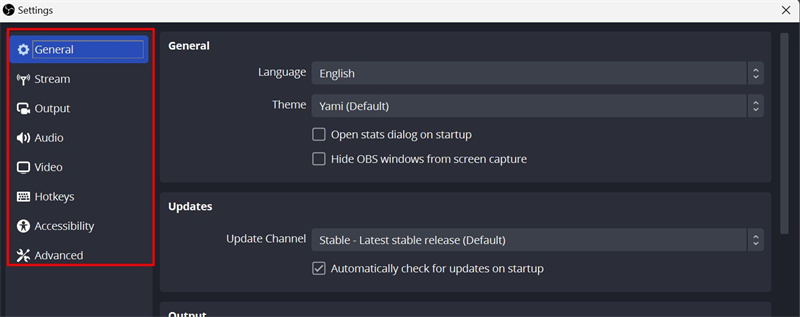
Step 3: Go to "Settings" if you want to do some customization before recording your gameplay.

Step 4: Here, you can edit and adjust your "Output", "Audio", "Video", and "More". Learn the best recording settings for OBS recording.
Step 5: Return to the main interface and locate the Source box. Click the "+" icon, select "Game Capture," and name your source.
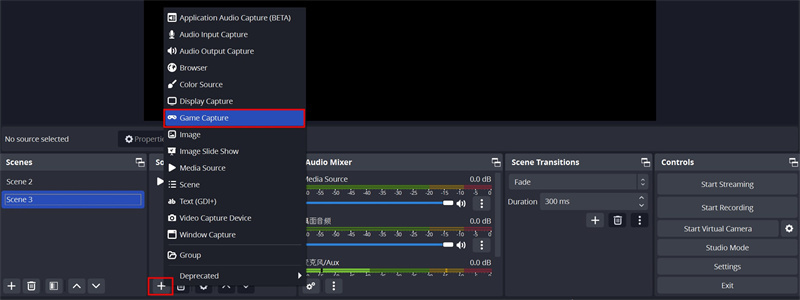
Step 6: After that, choose the desired game capture mode based on your recording needs. Click "Start Recording" when ready. OBS Studio will commence recording your gameplay as configured.
Step 7: Once done, click the "Stop Recording" button to finish your gameplay recording.
FAQs About Record Gameplay on PC
1. How Do You Record Gameplay on PC?
You can record gameplay on PC using built-in or third-party software. Windows 10 and later versions include Game Bar, a free tool activated by pressing Windows + G. For more advanced features, use OBS Studio, which offers customizable resolution, frame rate, and audio settings. Game Bar is user-friendly for beginners, while OBS Studio provides professional-quality recordings with greater control over output quality, format, and streaming capabilities for serious content creators.
2. How Can I Record Video on My PC?
You can record video on your PC using multiple methods. Windows built-in Game Bar allows you to record gameplay and screen activity by pressing Windows + G. Alternatively, OBS Studio offers more advanced recording capabilities, including simultaneous gameplay and webcam capture with devices like OBSBOT Tiny 3 Lite. Both options let you adjust video quality settings, including resolution (1080p or 4K), frame rate (30fps or 60fps), and audio channels for optimal recording quality.
3. How to Clip the Last 2 Minutes on PC?
You can clip the last 2 minutes on PC using Windows Game Bar's background recording feature. Enable Game Bar in Settings > Gaming, then activate "Record in the background while I'm playing a game." This feature automatically captures recent gameplay footage. Press Windows + Alt + G to save the last 30 seconds to 10 minutes of gameplay. You can customize the recording duration in Game Bar settings to capture your desired timeframe effortlessly.
4. Can I Screen Record for 1 Hour?
Yes, you can screen record for 1 hour or even longer on PC. Both Game Bar and OBS Studio support extended recording sessions. Game Bar allows continuous recording with no strict time limits, though performance depends on available storage space and system resources. OBS Studio offers unlimited recording time and is ideal for lengthy gameplay sessions, streaming, and professional content creation, provided your PC has sufficient RAM, CPU power, and storage capacity.
5. How Many GB Is a 60 Minute Video?
File size varies based on recording settings. A 60-minute gameplay video typically ranges from 2GB to 8GB, depending on resolution, frame rate, and compression. Recording at 1080p with 30fps creates smaller files around 2-4GB, while 4K at 60fps can exceed 8GB. Using OBS Studio or Game Bar, you can customize video quality settings to control file size while maintaining acceptable visual and audio quality.
Final Words
Understanding how to record gameplay on your PC is a fantastic way to share your gaming adventures with others. By following the steps outlined in this guide, you can easily capture and share your favorite moments with friends, family, and the gaming community. Remember to choose the right software, adjust settings for optimal performance, and consider your audience's preferences. With practice and patience, you can become proficient at recording gameplay on your PC. Additionally, for the best recording experience, consider investing in OBSBOT Meet 2, a top-notch game-recording webcam. With its high-quality video and convenient features, it's the perfect tool for you to level up your game recording experience.