[2026] How to Screen Record with OBS: Everything You Need to Know
Are you tired of struggling to find the perfect OBS recording settings? Do you want to create high-quality videos with clear audio and stunning visuals? Look no further! Our comprehensive guide on how to start screen recording on OBS is here to help you optimize your OBS settings for recording.
This blog will provide detailed instructions on recording with OBS Studio, ensuring you capture the best possible video and audio quality. We will also cover recording separate screen and audio tracks, giving you even more flawless recording. Get ready to elevate your recording game with the best OBS settings!
Part 1: How to Screen Record with OBS
Recording your computer screen using OBS is straightforward. Here's how to start recording on OBS in a step-by-step guide:
Step 1: Go to the OBS Project's official website. Then download and install OBS by following the prompts to install OBS Studio on your computer.
.jpg)
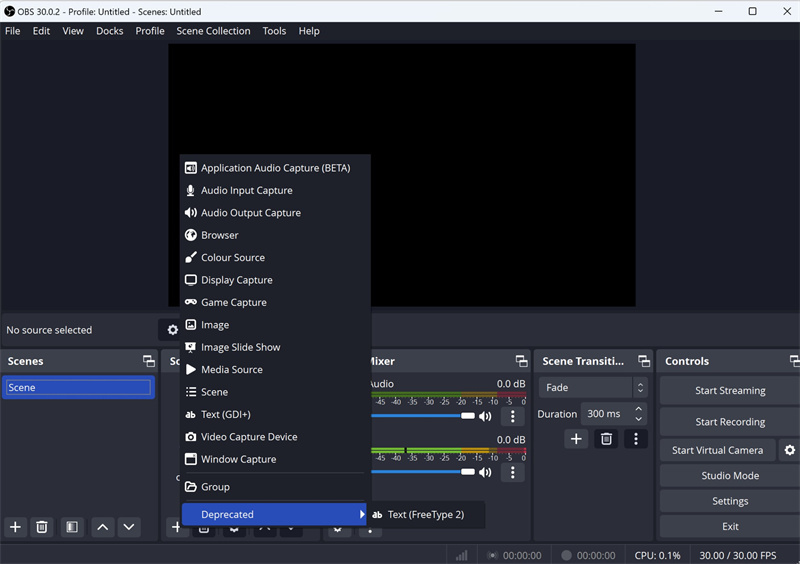
Step 2: Launch the program. In the "Scenes" box, click the "+" icon to add a new scene and name it relevantly, like "Screen Recording". Then, click the "+" icon in the "Sources" box to add what you want to capture (e.g., "Display Capture" for your entire screen).

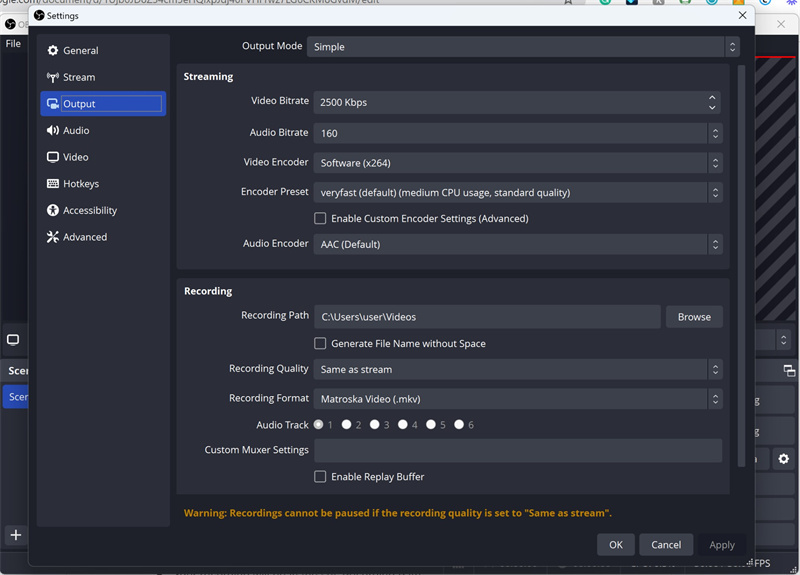
Step 3: Next, click "Settings" in the lower-right corner. In the settings menu, choose the "Output" tab. Set your preferred file saving location under "Recording Path". Choose from presets like "High Quality" or "Indistinguishable Quality". For more nuanced settings, opt for a hardware encoder for better performance (e.g., NVENC). Here you can learn more details about the best OBS settings for recording.
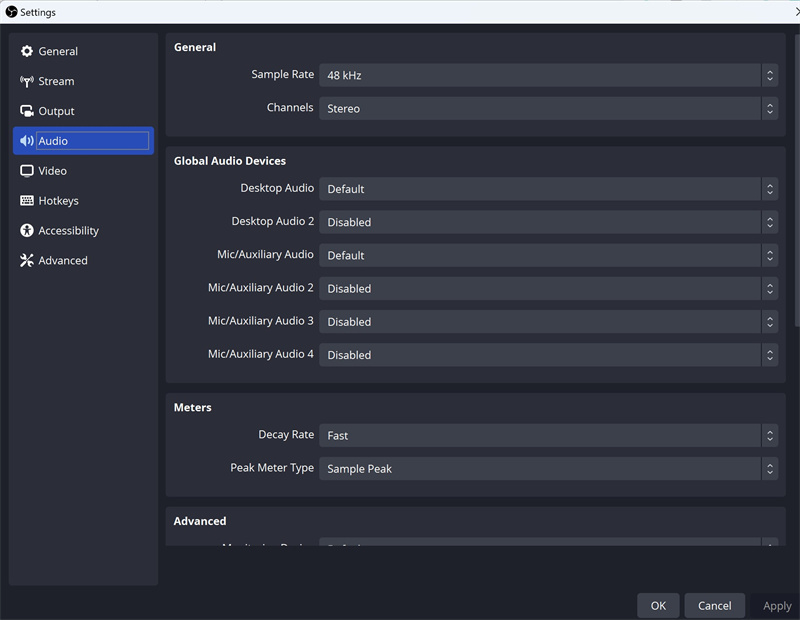
 Step 4: In settings, click "Audio". Then, choose your playback device and select your microphone device. Then, click "Video" and adjust the base (canvas) and output (scaled) resolutions as needed.
Step 5: This step is optional to set up hotkeys. In "Settings", set up hotkeys for starting/stopping recording, muting audio, etc.
Step 6: Now, you need to check your setup in the OBS preview window. Once you're ready to start, click "Start Recording". When you're done, click "Stop Recording," and your recording will be in the set "Recording Path".
Part 2: How to Record My Screen and Webcam with OBS?
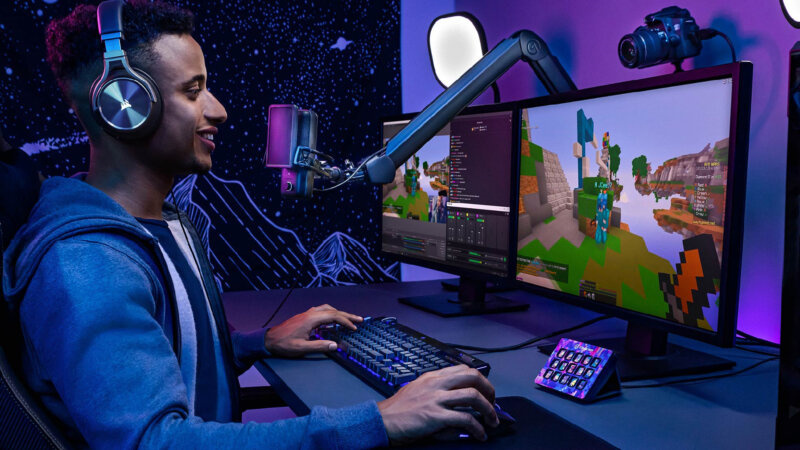
For a seamless OBS recording experience, the OBSBOT Tiny 3 4K PTZ Webcam delivers crisp 4K video at 30fps, built-in studio-grade spatial audio, and intelligent human tracking& voice tracking to keep you perfectly framed. Its plug-and-play USB design ensures quick setup on any laptop, letting you focus on creating tutorials, webinars, or gaming content without worrying about technical hassle. Enhance your recordings with professional-quality video and audio, all in one compact, user-friendly webcam. If you want to learn more about recording just your webcam and get detailed tips, check out our record webcam guide.
Step-by-Step Guide:
Step 1: Connect the OBSBOT Tiny 3 to your computer and launch OBS.
Step 2: Add Webcam Source: Click the "+" button in OBS under the " Sources" window. Now, select "Video Capture Device". Name the source (e.g., "OBSBOT Tiny 3") and click "OK". Now, from the device dropdown, select "OBSBOT Tiny 3". Configure the webcam settings as desired and click "OK".
Step 3: Click and drag your webcam source in the preview window to position it. Resize it as needed by dragging the corners.
Step 4: Click the "+" button in the "Sources" window. Choose "Display Capture" or "Window Capture" depending on your needs. Configure the properties and click "OK".
Step 5: Next, go to "Settings" > "Audio". Ensure your microphone and desktop audio are correctly configured.
Step 6: Lastly, to start recording, check the setup in the preview first and then click "Start Recording". Click on "Stop Recording" when finished.
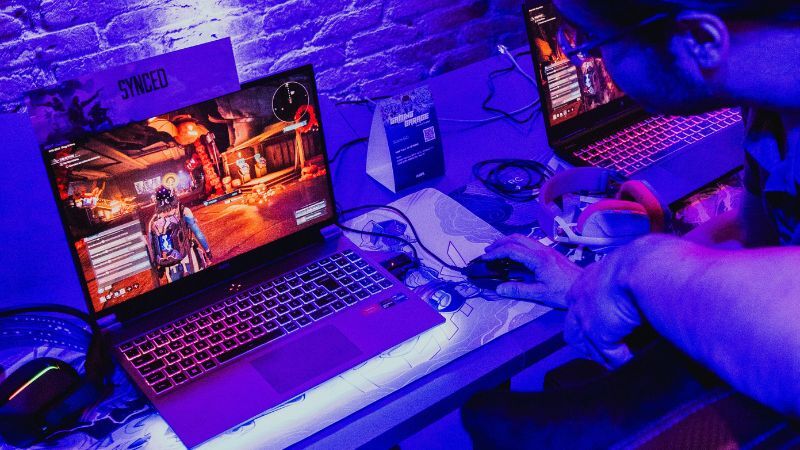
Part 3: How to Record Gameplay and Audio with OBS?
Recording gameplay and audio using OBS (Open Broadcaster Software) involves a few steps to ensure the game visuals and audio are captured effectively. Learn to capture high-quality gameplay and audio effortlessly using OBS, which is ideal for gamers and content creators. ( If you plan to record gaming videos for YouTube, there are additional setup tips worth knowing, such as facecam placement, audio balance, and export settings. You can find a more detailed walkthrough in our guide on how to record gaming videos for YouTube.)
Here's a guide on how to set up OBS for recording gameplay:
Step 1: Open OBS Studio
Start the OBS application on your computer. Create a New Scene for Gameplay. In the "Scenes" window, click the "+" button. Name the scene, for example, "Gameplay".
Step 2: Add Game Capture Source
Click the "+" button in the "Sources" window. Choose "Game Capture". Name the source and click "OK". Select "Capture specific window" and choose the game from the window dropdown list.
Step 3: Configure Audio Sources
Go to "Settings" > "Audio". Set "Desktop Audio" to capture game sound. Choose your microphone under "Mic/Auxiliary Audio" to record your voice.
If you want to record from multiple cameras at the same time, check out our guide on record two cameras at the same time in OBS for a seamless multi-angle recording setup.
Step 4: Adjust Audio and Video Settings
Ensure your audio levels are balanced in the OBS mixer. Check "Settings"> "Video" to confirm the video resolution and frame rate.
Step 5: Start/Stop Recording
Click "Start Recording" in the main OBS window before starting your gameplay. Click "Stop Recording" when your gaming session is over.
Part 4: FAQs about Recording Screen with OBS
1. Is OBS Good for Recording Video?
Yes, OBS (Open Broadcaster Software) is widely regarded as one of the best free software options for screen recording. It offers high-quality recordings, customizable settings, and a wide range of features for professional video capture. OBS supports various video sources, including webcams, capture cards, and desktop capture, making it versatile for recording games with OBS, as well as recording video content like tutorials or presentations.
2. Is OBS Recording Free?
Yes, recording with OBS is completely free. It is open-source software, meaning anyone can download, install, and use it without any cost. There are no hidden fees or premium versions, and you can even modify the software’s code to suit your specific needs for recording gameplay with OBS or any other recording purposes.
3. Can You Record More Than 60fps with OBS?
Yes, you can record the screen with OBS at frame rates higher than 60fps, depending on your hardware and settings. You can adjust the frame rate (FPS) in the settings under "Video" and choose options like 120fps, 144fps, or even 240fps if your system supports it. Keep in mind that higher frame rates may require more powerful hardware. This allows for smoother gameplay when recording games with OBS or capturing high-motion video.
4. Can I Record Only Audio with OBS?
Yes, OBS can record audio only. You can set up an audio source (e.g., microphone, desktop audio) and disable video capture. In the settings, simply choose "Recording" and select audio-only output in the file format options, such as MP3 or WAV. This is helpful if you're recording Discord audio with OBS or want to create podcasts or voice-overs.
5. Can I Record Zoom with OBS?
Yes, you can record Zoom meetings with OBS. To do this, you need to capture your Zoom window or screen with OBS. Use the "Window Capture" or "Display Capture" source to record your Zoom session. You can also use OBS to screen record with OBS while participating in a meeting. Note that you will need permission from the host or participants, depending on the meeting's settings, to record the session legally.
6. Is it Okay to Stream and Record at the Same Time?
Yes, OBS allows you to stream and record at the same time. You can also use OBS Virtual Camera to send the same feed to other applications without extra hardware. This feature is ideal for streamers who want to record gameplay with OBS while streaming live.
7. Where is the Video I Recorded on OBS?
The video you record with OBS is saved in the location specified in your settings. Go to "Settings" > "Output," and under the "Recording" tab, you’ll find the "Recording Path." This is where your videos are stored. You can change this path to your preferred location for easier access to your recorded videos with OBS.
Final Words
Mastering how to record with OBS opens a world of possibilities for content creation. It offers flexibility and high-quality output, making it a top choice for content creators and streamers. The steps are straightforward, whether you're figuring out how to record a screen using OBS for a webinar or creative projects.
Remember to optimize your settings for the best results and ensure your system can handle simultaneous streaming and recording tasks. With OBS, the possibilities for creating engaging, high-quality content are endless.