IRL Streaming Setup: Phone and Backpack Guide
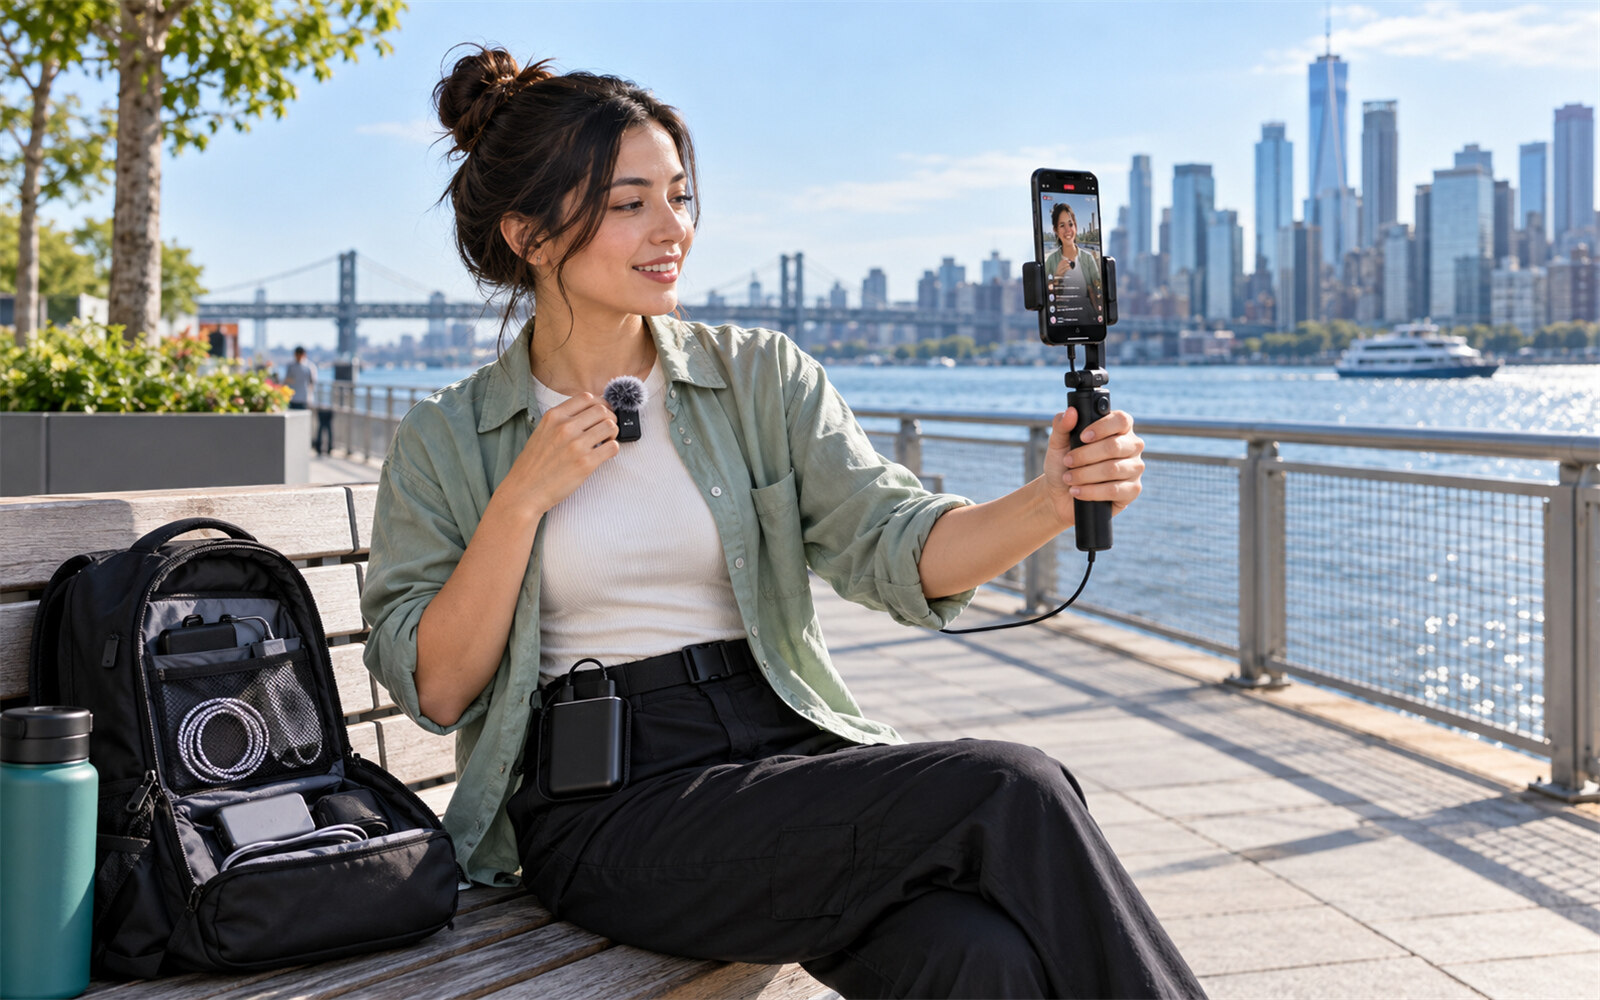
A stream that works at home can behave very differently once you start walking. Wind reaches the microphone, mobile coverage changes, and the phone may run low on power before you finish your route. A useful IRL streaming setup accounts for those problems before adding more equipment. This guide covers what to budget for, how to connect a phone- or camera-based rig, and what to test before your first outdoor broadcast.
IRL Streaming Setups: Equipment and Cost
Start with your existing phone unless you already need a separate camera or more advanced networking. A backpack is a way to carry and connect equipment, not a requirement for IRL streaming.
| Setup | Equipment | Planning Budget | Suitable Scenario |
|---|---|---|---|
| Existing phone | Phone, mobile data, platform app | $0 additional hardware | A short first stream |
| Phone with accessories | Mic, wind protection, grip, power bank | $100–$250 allowance | Regular walks and travel commentary |
| Camera and backpack | Camera, encoder, networking, batteries, mounting | $1,500–$4,000+ allowance | A dedicated camera workflow |
These are illustrative shopping allowances, not quoted bundle prices. The accessory and backpack budgets exclude a new phone, taxes, mobile plans, and recurring software or cloud fees. Professional bonded systems can exceed the backpack allowance substantially.
Before purchasing accessories, confirm three things: your phone's connector, the microphone's support in your chosen app, and whether audio input and charging can operate together. Buying a USB-C accessory does not establish all three.
For the broader introduction to formats and platforms, see our IRL streaming guide.
How to Set Up an IRL Stream with Your Phone
A phone combines the camera, encoder, and mobile connection. Complete this route first if you are starting without a dedicated camera.
1. Connect Your Microphone, Mount, and Power
- Secure the phone. Fit it into a grip that does not press the side buttons or cover the lens. Choose portrait or landscape before starting the stream.
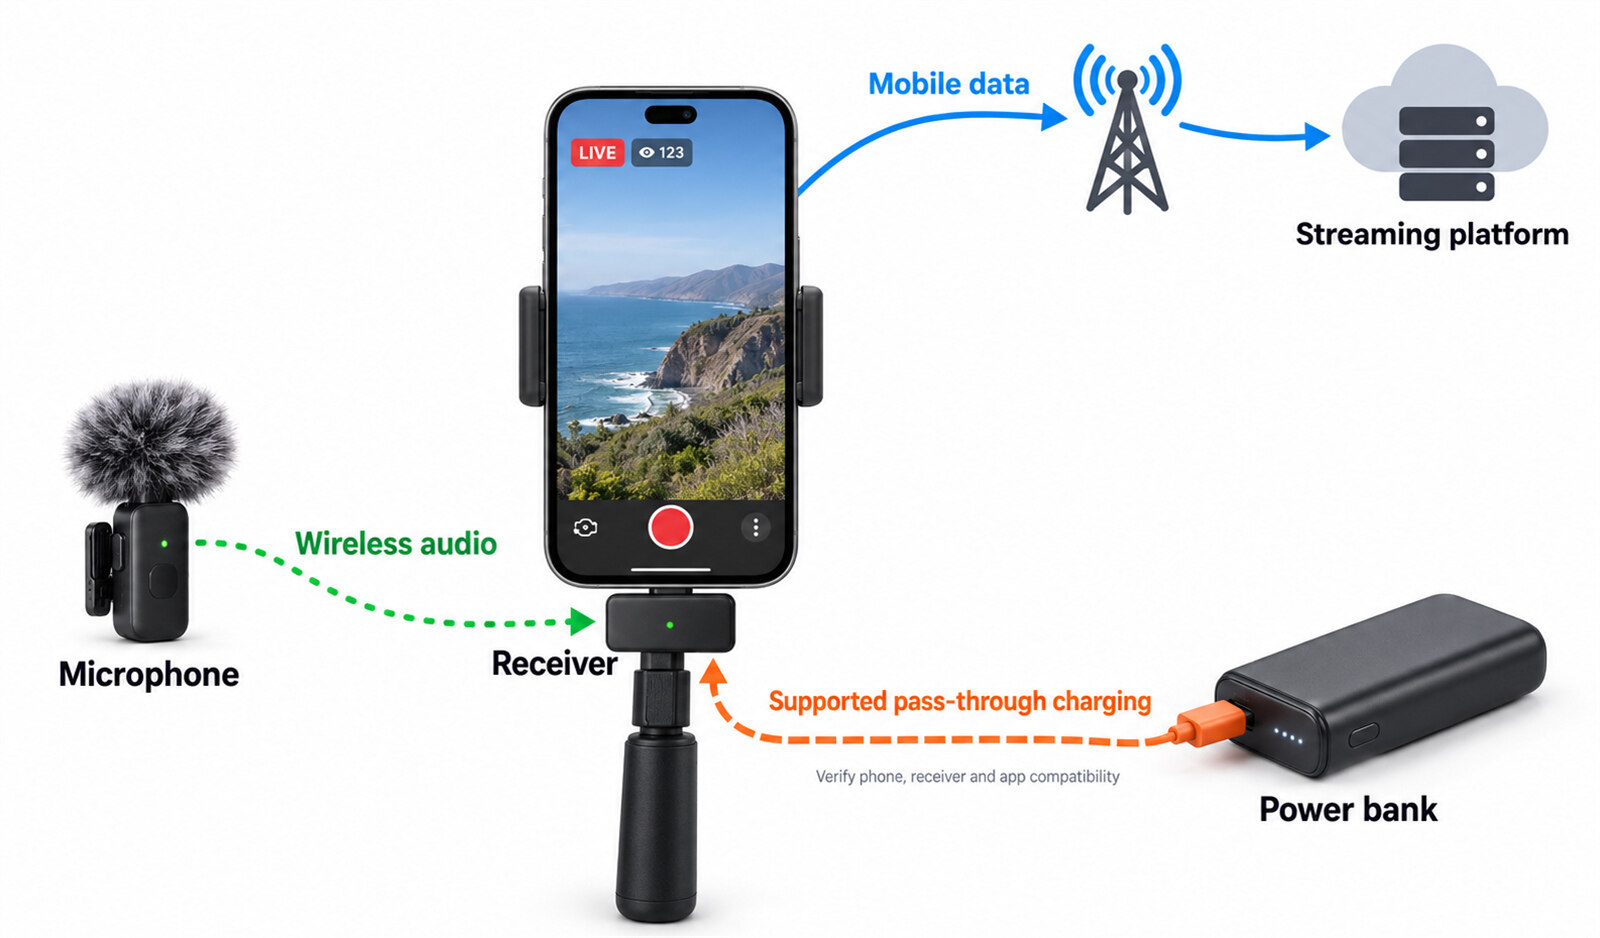
- Connect the microphone. Attach the compatible receiver or wired adapter, then grant microphone access in the streaming app. Clip the mic below your chin, clear of clothing that can rub against it.
- Fit wind protection. Use the microphone's compatible windscreen outdoors. Noise reduction cannot reliably remove strong wind hitting the capsule.
- Connect power. Use supported pass-through charging or a tested compatible adapter when the mic occupies the phone's port. Check that the charging indicator appears without disconnecting audio.
- Verify the actual input. Make a short recording or test broadcast in the app you will use. Speak near the external mic and listen back; a separate camera-app recording does not prove the streaming app uses the same input.
2. Connect Your Streaming App to Your Platform
Use the platform's own app for the simplest first broadcast. You do not need a stream key for these native-app routes.
Twitch:
- Sign in to the Twitch app and tap the + button.
- Choose the IRL or camera-broadcast option if a broadcast-type selection appears.
- Allow camera and microphone access.
- Enter a title and suitable category, then check the camera preview.
- Tap the broadcast control labeled Stream or Go Live when ready. This publishes your stream; do not assume it is private.
YouTube:
- Before your outing, open the YouTube app and select Create → Live.
- Complete channel verification and live activation if prompted. Native mobile streaming requires at least 50 subscribers and no live restrictions in the previous 90 days; first activation may take up to 24 hours.
- Edit the title, audience setting, and visibility. Choose Private or Unlisted for a test.
- Check the preview, then tap Go live. Tap Finish when the test is complete.
For a third-party app, add the destination through its account-login option. If it instead asks for a server URL and stream key, obtain those from your platform's encoder dashboard and enter them separately. Keep the key out of screenshots and live previews.
3. Set Video Quality and Plan Your Mobile Data
Native apps may manage quality automatically. Do not look for manual encoder settings that the app does not expose.
For a manual Twitch encoder workflow, a practical published starting profile is 720p at 30 fps, H.264, 3,000 kbps video, CBR, and a two-second keyframe interval. Use AAC audio, for example, 128 kbps.
That profile sends about 3.1 Mbps before network overhead. As a planning margin, aim for roughly 6 Mbps or more of sustained usable upload where you will stream. A single speed-test result is not a pass certificate: walking coverage and network congestion still need an actual broadcast test.
Allow about 1.4 GB per hour for the video and audio in this example, before overhead, retries, or monitoring traffic. A two-hour session therefore needs more than 2.8 GB available. Higher bitrates and redundant transmission increase usage; hotspot allowances may differ from your phone plan's main data allowance.
How to Build an IRL Streaming Backpack Setup
Use this route when you need a separate camera, dedicated encoding, or a networking system your phone alone cannot provide. Assemble and verify it on a table before packing it.
1. Confirm the Camera and Encoder Work Together
The camera must deliver a continuous video signal accepted by the encoder. Check the exact output connector, clean HDMI availability, supported resolution and frame rate, and continuous-power options.
An HDMI capture dongle is not a standalone streaming encoder. It normally needs a computer or compatible host to process and upload the feed. A dedicated encoder performs that job itself.
2. Connect Video, Audio, and Internet
- Connect camera output to encoder input. Use the correct cable for the camera's full-size, Mini, or Micro HDMI connector. Enable clean output so camera menus do not appear in the broadcast.
- Choose one audio route. Connect the microphone to the camera and carry its audio over HDMI, or connect it directly to a supported encoder input. Confirm the encoder's audio meters respond.
- Connect the encoder to the network device. Use Ethernet when both devices support it, or the encoder's documented hotspot connection method.
- Configure the destination. For direct platform delivery, enter the server URL and stream key. If using SRT to a cloud production system, configure that receiver first; it is an alternative route, not an extra step everyone needs.
- Match output settings. Select a codec, resolution, frame rate, and bitrate accepted by the destination, then confirm the receiving preview and sound.
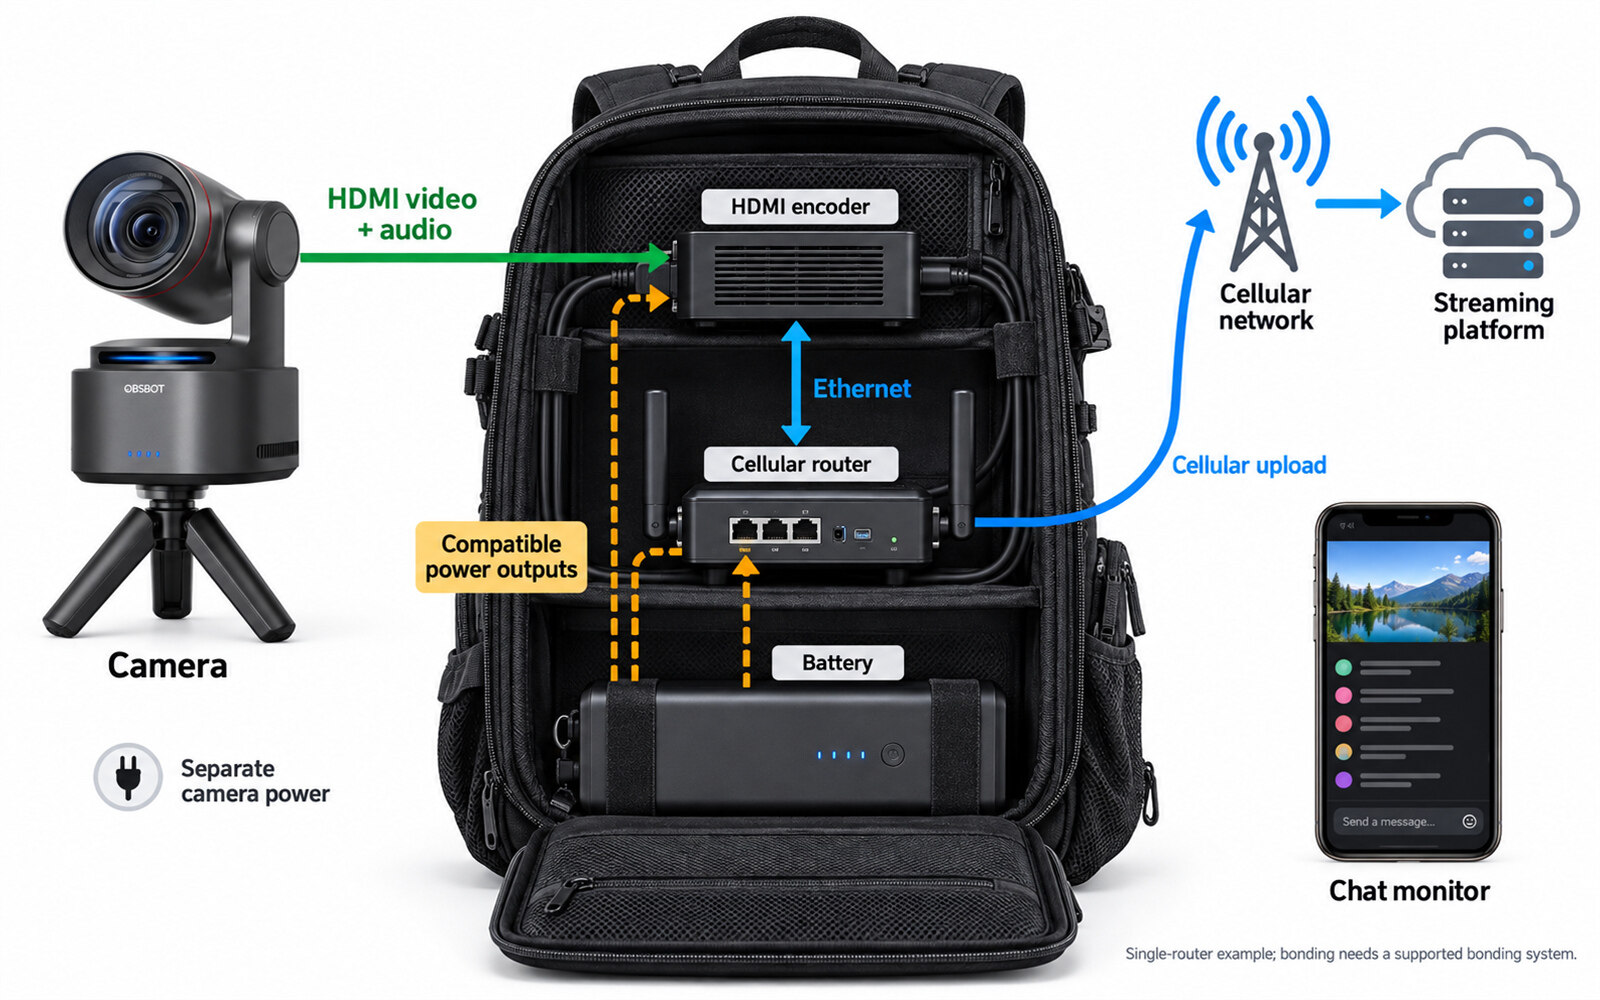
The diagram shows one camera, encoder, and cellular router. It illustrates connections, not a requirement to use that camera model.
Multiple SIM cards do not automatically mean bonding. A dual-SIM router may switch between networks rather than combine them. Bonding requires a supported system that coordinates multiple connections, often with a receiving service or server. Confirm simultaneous-modem support, subscriptions, and recovery behavior before buying.
3. Pack for Power, Cooling, and Chat
Check the voltage, connector polarity where applicable, and wattage required by every device. A power bank that charges your phone may not run your encoder or router.
Use labeled watt-hours to estimate runtime: usable battery Wh divided by total device watts. For example, 60 usable Wh supplying a 20 W rig suggests about three hours. Conversion losses and changing load make a full-system runtime test necessary.
- Secure devices so walking does not pull on HDMI or power connectors.
- Keep vents and antennas clear; do not seal hot electronics inside padding or an unventilated rain cover.
- Route cables away from zippers and leave enough slack to turn or remove the backpack.
- Use a phone for chat and status. Mute playback to prevent echo, and stop walking before reading or changing settings.
Bonus: A Camera for Stationary IRL Segments — OBSBOT Tail Air
If your outing includes a seated interview, cooking demonstration, or fixed-position conversation, putting the camera on a tripod frees you from holding the phone. OBSBOT Tail Air fits these stationary segments rather than replacing a handheld walking camera.
Key Features
- AI tracking: Follow a presenter moving within a demonstration area while the camera stays mounted.
- Remote pan and tilt: Adjust the composition without stepping into the shot to move the tripod.
- Micro HDMI output: Connect to a compatible HDMI encoder using the correct cable.
- 4K at 30 fps or 1080p at 60 fps: Select a supported camera output that matches the receiving equipment, independently of the final broadcast quality.
- Obsbot Start control: Check framing and adjust supported camera settings from your phone before the segment starts.
Test Your IRL Setup Before Going Outside
Test the packed rig on the intended route, not only beside your home router. Use a private or unlisted destination where supported; Twitch does not offer an ordinary private broadcast mode.
- Walk with the complete setup. Turn, sit, and change grip. If the image shakes excessively or cables tug, change the mounting and cable routing before a longer session.
- Check speech in wind and traffic noise. Ask a helper to listen on another device with headphones. Reposition a rubbing mic or improve wind protection if speech becomes difficult to understand.
- Check coverage transitions. Include the corners, indoor stops, and crowded areas you expect to visit. If the feed stalls there, change the route, connection, or encoding load rather than trusting the 5G icon.
- Run for the planned duration. Watch for thermal warnings, battery decline despite charging, or encoder shutdowns. Add ventilation or compatible power capacity based on the result.
- Practice recovery while stationary. Briefly interrupt and restore the connection during the test. Check whether the app reconnects, requires a restart, or needs the platform session reopened. Learn the stop control before you need it.
Before the public stream, enable Do Not Disturb, secure your stream key, and check that notifications, addresses, and other private details cannot appear on screen. Follow venue rules and stop broadcasting when filming would compromise safety or privacy.
FAQs About IRL Streaming Setups
What Is the Best Encoder for IRL Live Streaming?
Choose one that accepts your camera's actual output and supports your destination and network plan. If bonding is essential, verify the complete bonding workflow rather than assuming an encoder with several network ports includes it.
Can I Use Multiple Cameras During an IRL Stream?
Yes, but you need a compatible switcher, multi-input encoder, or software production system. Connecting two cameras to a router does not combine them into one broadcast. Account for the extra power, monitoring, and operator work.
How Do I Switch from My Computer to an IRL Backpack Without Stopping the Stream?
A persistent production system can keep the platform output running while switching between desktop and backpack inputs. This usually requires a configured studio or cloud workflow. Two devices independently using the same stream key are not a dependable substitute.
Do I Need a Second Phone to Read Chat?
Not always. With a phone-only setup, your app may show chat alongside the preview. A second device becomes useful when the main phone is mounted out of reach, or its screen must stay on camera controls. Mute its video playback and include its data use in your plan.
Conclusion
Build the smallest setup that completes your intended stream. Verify phone audio, charging, and platform access first; add a dedicated camera and backpack only when they solve a specific limitation. The final check is a full-duration route test with the equipment packed exactly as you will carry it.