How to Fix “Error Compiling Movie” in Premiere Pro (2026)
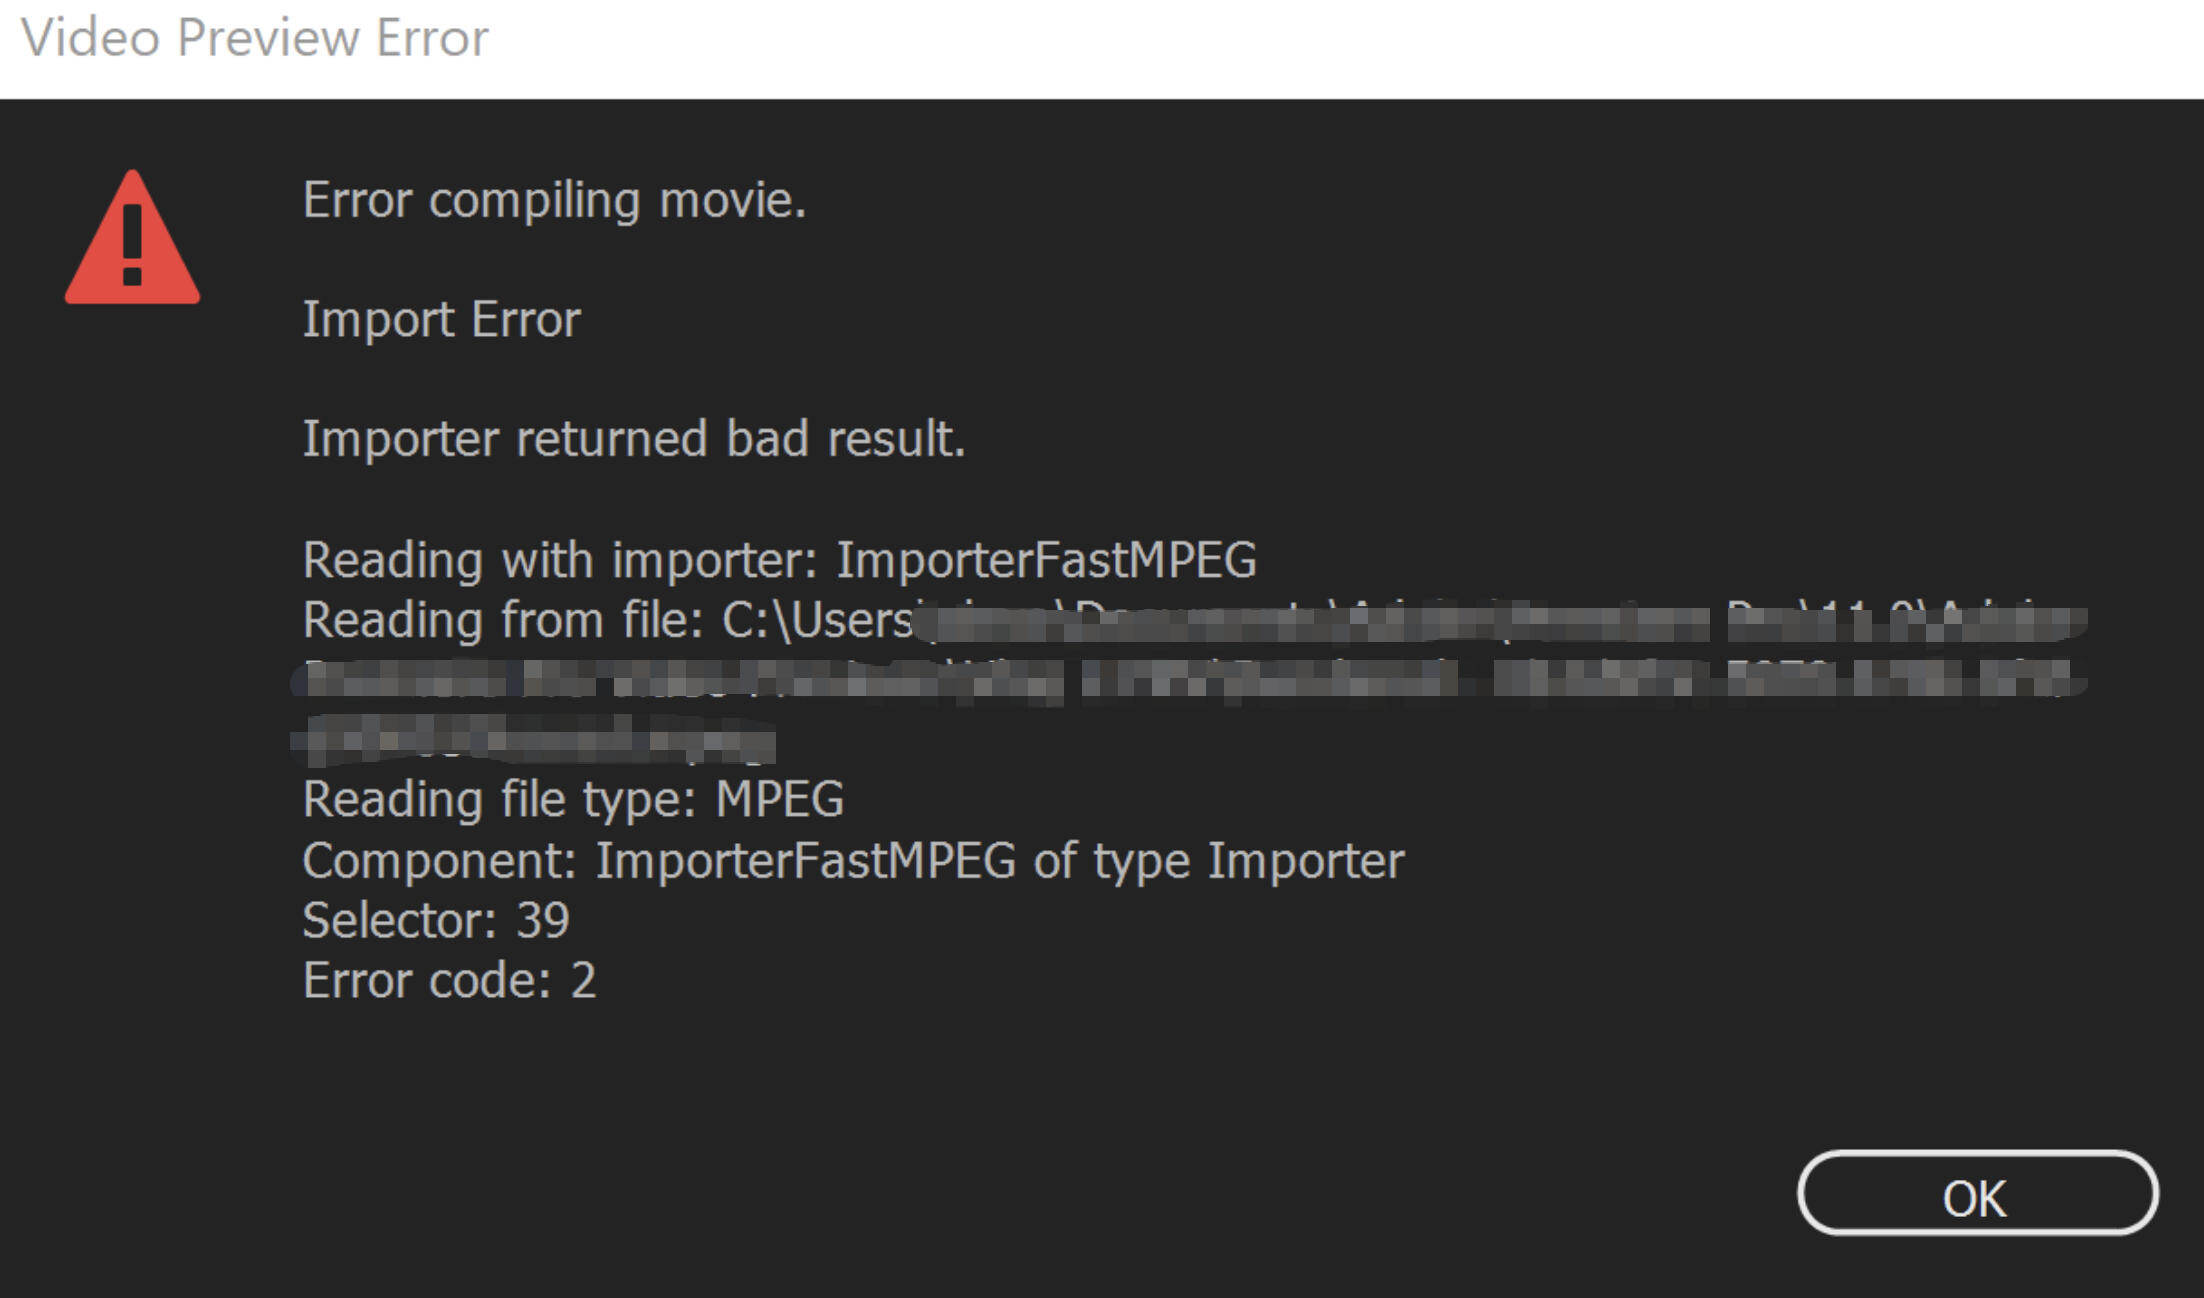
An export can reach 92%, stop, and give you little more than "Error Compiling Movie." Randomly clearing caches, reinstalling plugins, and changing several settings at once can waste more time than the error itself.
The faster approach is to save the error details, test only the suspected part of the timeline, and change one variable at a time. This guide follows that order for current versions of Premiere Pro, including what to do when an older tutorial points you to a setting that no longer exists.
- Before You Change Anything, Save the Clues
- Choose the First Fix From the Error Pattern
- If the Error Stops at the Same Timecode
- If You Get Error Code 3 or No Useful Timecode
- Fix Accelerated Renderer and GPU Errors
- Check Plugins, Including Film Impact
- Fix Cache, Output Path, and Storage Problems
- Decide Whether the Project or Premiere Is the Problem
- Verify the Fix Before Starting Another Full Export
- FAQs About Error Compiling Movie in Premiere Pro
Before You Change Anything, Save the Clues
Do not begin by deleting files or rebuilding the whole project. First, preserve the information Premiere gives you.
- Use File > Save As to create a troubleshooting copy, such as
project_export_test.prproj. - Take a screenshot of the complete error message.
- Write down any error code, timecode, frame number, exporter, selector, component, plugin, or file path shown.
- Note the export format and preset you were using.
- If a timecode is shown, place a marker at that point in the sequence.
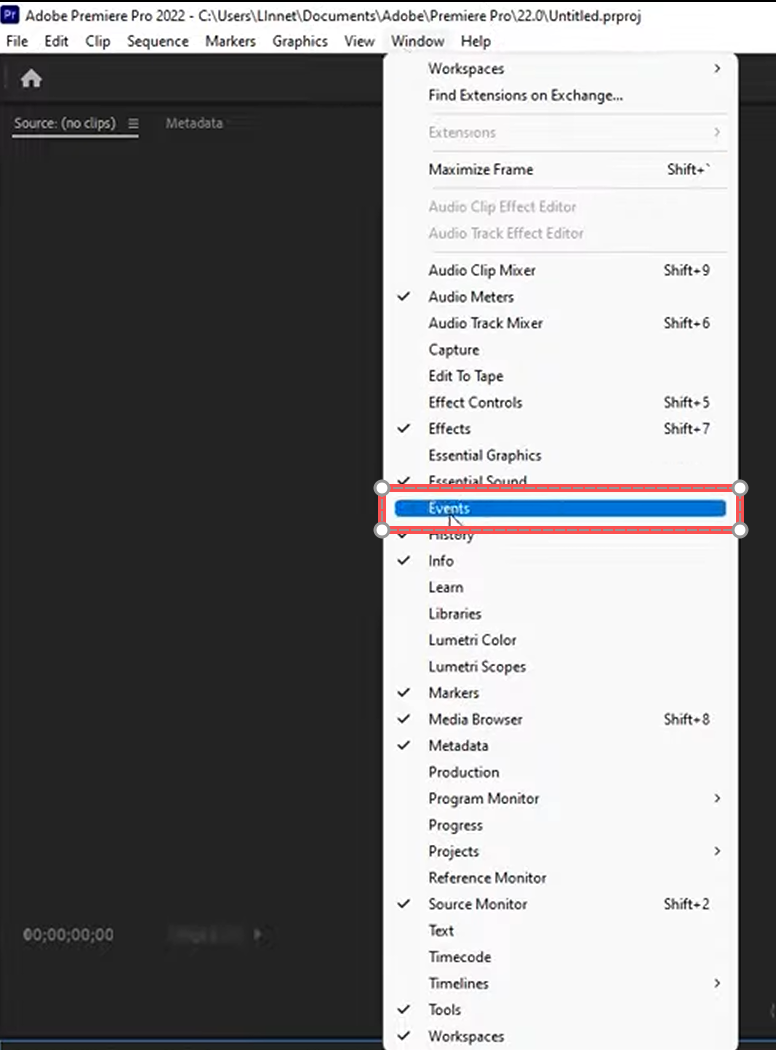
Premiere's Events panel can contain additional information about failed components and plugins. Open it through Window > Events, select the error, and inspect its details. Learn how to review these messages in Events panel guide.
The wording matters. A repeatable failure at one timecode usually points toward a clip, transition, graphic, or effect. A failure that moves between attempts is more likely to involve encoding, GPU processing, cache, memory, or another project-wide condition.
Choose the First Fix From the Error Pattern
Use the error pattern to decide what to test first.
| What You See | Likely Area | First Test |
|---|---|---|
| Export always stops at the same timecode | Clip, effect, transition, graphic, or damaged frame | Export 10–20 seconds around that point |
| Error Code 3 or an unknown error without a useful timecode | Timeline item or project-level issue | Divide the sequence into smaller export ranges |
| Accelerated renderer or unable-to-produce-frame message | GPU effect, decoding, or encoding path | Test Software Encoding and disable effects in the failing range |
| Writing, permission, or I/O error | Output folder, filename, storage, or drive access | Export a short file to a simple local folder |
| Film Impact or another plugin is named | Third-party transition or effect | Remove or disable that plugin in a duplicate sequence |
| Only one project fails | Sequence, media, plugin, LUT, or project file | Import the project into a new project |
| Every project fails | Premiere preferences, plugins, driver, or installation | Test a simple new project, then reset or update selectively |
Testing rule: Do not apply every fix in the table at once. Run one short export after each change. Otherwise, you may get a successful export without knowing what solved the problem.
If the Error Stops at the Same Timecode, Fix That Range
A consistent timecode is one of the most useful clues Premiere can provide.
Set an In point approximately five seconds before the reported timecode and an Out point five to ten seconds after it. Export only that range with the same format and preset that failed.
If the short export also fails, duplicate the sequence and test the elements around that position in this order:
- Disable the adjustment layer covering the problem area.
- Remove or replace the transition at the nearest edit point.
- Disable third-party effects applied to the clip.
- Test without speed changes, optical flow, frame holds, or stabilization.
- Disable graphics, captions, nests, or dynamically linked compositions crossing that point.
- Replace the source clip with a newly transcoded copy.
Change only one element before each test export. For example, if removing a transition makes the 15-second test succeed, you do not need to rebuild the entire sequence. Replace that transition, render the same range again, and then continue with the full export.
If the source clip fails even without effects, create a new copy in a reliable editing format and replace only that instance in the duplicate sequence. Keep the original media untouched until the project has exported successfully.
If You Get Error Code 3 or No Useful Timecode
Error Code 3 is usually too general to identify the damaged element by itself. When Premiere does not provide a reliable location, use the timeline as a search area.
Duplicate the sequence, then:
- Export the first half of the timeline.
- If it succeeds, export the second half.
- Divide the failing half into two smaller ranges.
- Repeat until the failure is narrowed to a short section.
- Inspect every active video and audio track at the boundaries of that section.
Practical example: For a 40-minute timeline, test 20 minutes, then 10, then 5, and finally about 2.5 minutes. Only a few exports can reduce a project-wide error to one manageable section.
Once the section is small, look for overlapping transitions, adjustment layers, third-party effects, graphics, unusually large still images, offline media, nested sequences, or a clip that ends exactly where the error begins.
If the failure appears at a different position every time, stop looking for one bad frame. Move to the GPU, encoding, cache, and storage checks below.
Fix Accelerated Renderer and GPU Errors
Start with the failing range rather than repeatedly exporting the entire project.
For an H.264 or HEVC export:
- Open the Export workspace.
- Expand Video > Encoding Settings.
- Find Performance.
- Select Software Encoding, if the option is available.
- Export the same short range again.
Hardware Encoding is normally faster, while Software Encoding moves the final encode away from supported hardware acceleration.
If the error continues, open Premiere's Media preferences, temporarily disable hardware-accelerated decoding, restart Premiere, and repeat the short-range test. On Windows, use Edit > Preferences > Media. On macOS, use Premiere > Settings > Media.
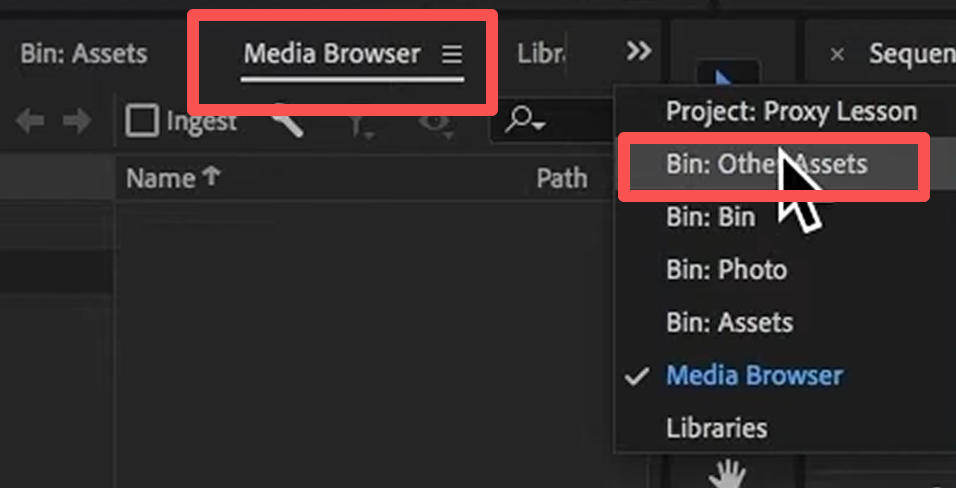
You can also temporarily disable GPU-intensive effects in the failing section, including noise reduction, stabilization, intensive blurs, third-party color effects, or effects placed on an adjustment layer.
Important for current Premiere versions: Premiere Pro 25.2 and later removed Mercury Playback Engine Software Only from Project Settings. Apple silicon versions never offered this renderer. This is different from Software Encoding in the Export workspace, which remains available for supported formats. Check Adobe's software rendering update.
If an older tutorial tells you to select "Mercury Playback Engine Software Only" and you cannot find it, do not reinstall Premiere just to recover that menu. Test Software Encoding and the affected effects instead.
Check Plugins, Including Film Impact
If the error names Film Impact or another plugin, start with the effect instance at the failing timecode.
In a duplicate sequence:
- Find every clip, transition, or adjustment layer using that plugin near the failure.
- Remove or replace one plugin instance.
- Export a short range around the same timecode.
- If it succeeds, update the plugin and confirm that its version supports your Premiere version.
- Reapply the updated effect or use a built-in alternative.
Premiere also provides a plugin manager under Window > Effects > Manage Video Effects. You can disable a third-party video effect for the next application launch without immediately uninstalling it.
For a broader test, launch Premiere while holding Ctrl/Command + 3 to disable third-party video plugins. If Premiere exports successfully in that state, re-enable and test plugins selectively.
Do not begin by reinstalling every plugin. A short export without the named effect gives you much stronger evidence and is easier to reverse.
Fix Cache, Output Path, and Storage Problems
Media cache files are disposable working files, not your original footage. Clearing them can help when cached audio, peak, or conform data has become inconsistent.
On Windows, open Edit > Preferences > Media Cache. On macOS, open Premiere > Settings > Media Cache, then use the Delete option. Close all projects first if you want Premiere to offer the option to remove all media cache files. Premiere will rebuild required cache files afterward.
If the error occurs while rendering previews, clear the preview files for the marked range and render that short section again.
Next, simplify the output test:
- Export to a local folder on an internal drive.
- Use a short filename such as
project_test_01.mp4. - Avoid special characters in the filename.
- Temporarily avoid cloud-synced folders, network storage, and removable drives.
- Check free space on both the output drive and the drive used for cache files.
- Try a built-in Premiere export preset.
- If H.264 continues to fail, test an intermediate format to determine whether the problem is limited to the final encoder.
If terms such as H.264, HEVC, and ProRes are unfamiliar, this guide to what a video codec is explains how codecs affect recording, editing, and delivery.
You can also use Queue to send the export to Adobe Media Encoder. It's also a great way to fix export trouble. A successful Media Encoder export can help meet a deadline, although it does not prove that the underlying timeline issue has disappeared.
Decide Whether the Project or Premiere Is the Problem
Create a simple new project with one known-good clip and export five to ten seconds.
If the new project exports successfully, the application can encode video and the original project is the more likely source of the problem. Adobe recommends creating a new project and importing the existing .prproj file when only one project refuses to export.
If simple projects also fail:
- First check Adobe's current known and fixed issues.
- Back up your preferences.
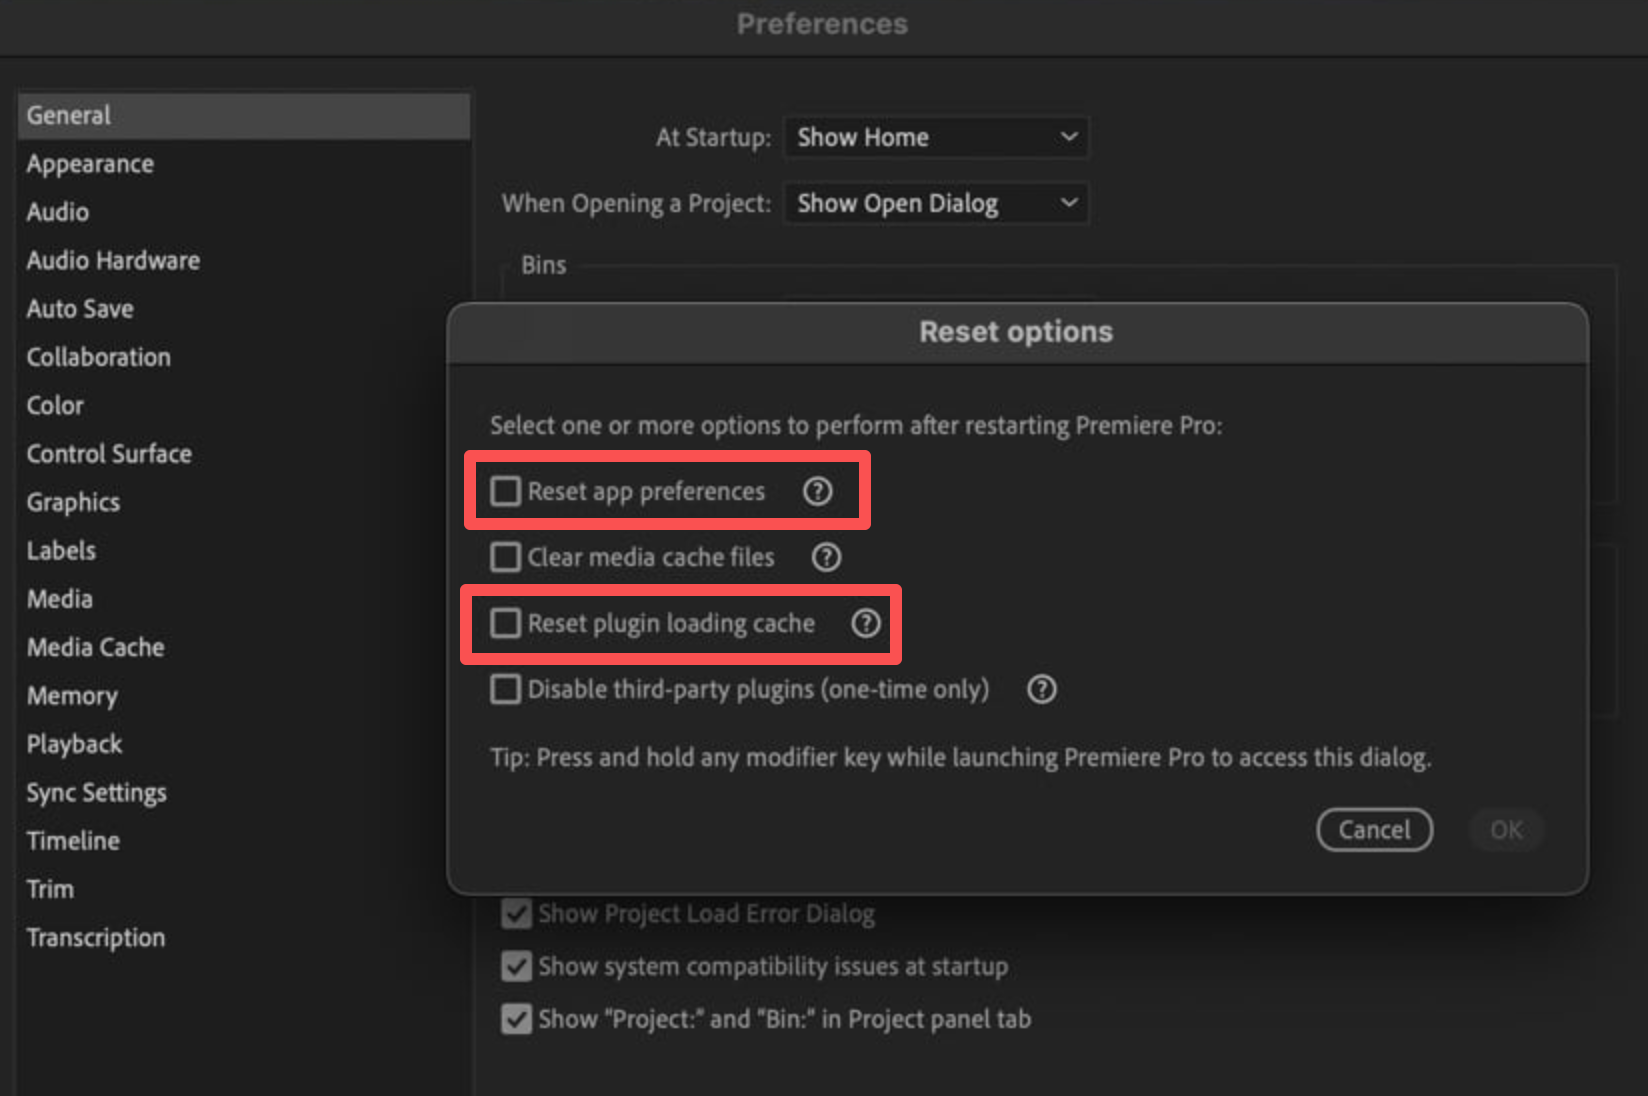
- Open Premiere's Reset Options dialog by holding a modifier key while launching the application.
- Reset preferences or plugin-loading cache separately.
5. Update Premiere and your GPU driver if the problem affects every project.
6. Consider an earlier Premiere version only if the error began immediately after an update and the current known-issues information supports that decision.
If repeated editing failures are also making you reconsider your software workflow, compare these Premiere Pro alternatives after the immediate project has been delivered.
Verify the Fix Before Starting Another Full Export
A successful five-second test is useful, but it is not the final verification.
- Export the original failing range with the intended delivery preset.
- Export a longer range covering one or two minutes around it.
- Start the full export only after both tests succeed.
- Play the finished file from the beginning, around the former failure point, and near the end.
- Check picture, audio synchronization, total duration, captions, and any sections containing replaced effects or transcoded media.
Record the change that solved the problem. If you temporarily disabled hardware decoding, replaced a plugin, or switched to Software Encoding, you will then know which setting should be restored or investigated after the deadline.
FAQs About Error Compiling Movie in Premiere Pro
Does Error Code 3 mean my Premiere project is corrupt?
Not necessarily. Error Code 3 is generally not specific enough to prove project corruption. First isolate the failing timeline range. If other projects export normally, import the affected project into a new project before rebuilding anything.
Why does Premiere fail at a different timecode each time?
A moving failure point is less likely to be one damaged frame. Test Software Encoding, hardware decoding, GPU-intensive effects, cache files, storage space, and a local output location.
Is Software Encoding the same as the Software Only renderer?
No. Software Encoding controls how the output file is encoded. The former Mercury Playback Engine Software Only option controlled project rendering. Premiere 25.2 and later removed the latter, while Software Encoding remains available for supported formats.
Should I export through Adobe Media Encoder?
It is worth testing. Media Encoder can provide an alternate export route and may help you complete a delivery. However, if Premiere continues to fail, keep the troubleshooting copy and identify the affected clip, effect, plugin, or encoding path afterward.
Does deleting the media cache delete my footage?
No. Using Premiere's Media Cache controls removes generated cache files, not the original media or project file. Premiere recreates the cache it needs, although the first playback after deletion may be slower.
What should I do when Premiere says "Error Finishing Encode"?
Test a built-in preset, a simple local output path, and Software Encoding for H.264 or HEVC. If an intermediate-format export succeeds while the MP4 export fails, the problem is more likely to be in the final encoding stage than in the timeline itself.
Final Takeaway
The quickest fix for "Error Compiling Movie" is usually not a complete reinstall. Preserve the error details, test the reported timecode, narrow unknown failures with progressively smaller ranges, and then check encoding, plugins, cache, and project health in that order.
Short, controlled exports turn a vague Premiere error into a specific clip, effect, plugin, or setting you can actually replace.