What Does ISO Mean? Complete Beginner Guide

When choosing a camera or webcam, you may have come across the term ISO. But what does ISO mean, and why does it matter for image quality? ISO is an important photography setting that controls how sensitive a camera sensor is to light. It affects how bright an image looks, especially in different lighting conditions.
Understanding ISO can help you make better decisions when using cameras for photography, video recording, streaming, or online meetings. In this guide, we will explain what ISO means, how it works, the difference between ISO settings in dedicated cameras and webcams, and when you should use different ISO levels.
Part 1: What Is ISO?
What Does ISO in Photography Mean?
In photography, ISO refers to the sensitivity of a camera sensor to light. In simple terms, ISO determines how much light the camera uses to create an image. A higher ISO value increases brightness, allowing cameras to capture clearer images in darker environments. However, increasing ISO can also introduce more image noise or grain.
A lower ISO setting produces cleaner and sharper images because the sensor receives less amplification. However, it usually requires more available light, such as outdoor sunlight or professional lighting setups.
Common ISO Values
Most digital cameras use ISO values ranging from ISO 100 to ISO 6400 or higher. Different ISO settings are suitable for different lighting conditions.
|
ISO Value |
Typical Use Case | Image Effect |
|
ISO 100 |
Bright outdoor environments | Clean image with minimal noise |
| ISO 400-800 |
Indoor environments with moderate lighting |
Balanced brightness and image quality |
| ISO 400-800 |
Low-light scenes or night shooting |
Brighter image but increased noise |
Part 2: How Does ISO Work?
ISO works by controlling how strongly the camera sensor's captured signal is amplified. It does not increase the amount of light entering the camera. Instead, it boosts the electrical signal generated by the sensor, making the final image appear brighter.
Step 1: The Camera Sensor Captures Light
When you take a photo or record a video, light enters through the lens and reaches the image sensor. Each pixel on the sensor collects photons and converts them into electrical signals that contain image information.
The amount of light captured depends mainly on factors such as aperture, shutter speed, and available lighting conditions. In bright environments, the sensor receives enough light to create a strong signal. In darker environments, fewer photons reach the sensor, resulting in a weaker signal and a darker image.
Step 2: The Sensor Converts Light Into an Electrical Signal
After capturing light, the camera sensor converts photons into electrical charges through a process called photoelectric conversion. These electrical signals are then processed and transformed into digital image data.
The process can be summarized as:
Light photons
↓
Electrical charge
↓
Analog signal
↓
Digital image data
A stronger light signal provides more image information, while a weaker signal contains less data. This is why images taken in low-light environments often appear darker before ISO adjustment.
Step 3: ISO Amplifies the Sensor Signal
This is where ISO comes into play. ISO increases the amplification of the electrical signal captured by the sensor, making the image appear brighter without changing the actual amount of light entering the camera.
For example:
| ISO Setting | Signal Processing | Image Result |
| Low ISO | Minimal signal amplification | Cleaner image with less brightness |
| High ISO | Stronger signal amplification | Brighter image, especially in low light |
By increasing ISO, cameras can capture usable images in darker environments where the original sensor signal is too weak. However, because the signal is being amplified, any unwanted electronic noise may also become more visible.
Step 4: The Amplified Signal Is Processed Into the Final Image
After ISO amplification, the camera's image processor converts and optimizes the signal to create the final image. During this stage, the camera applies various processing technologies to improve image quality.
Common image processing steps include:
- Noise reduction: Reduces unwanted grain caused by signal amplification.
- Color processing: Adjusts colors to create a more natural-looking image.
- Sharpness adjustment: Enhances image details.
- Dynamic range optimization: Balances bright and dark areas.
After these processes are completed, the camera generates the final photo or video frame that users see.
Part 3: ISO in Cameras vs Webcams: What's the Difference?
Although ISO is a common camera specification, it works differently between dedicated cameras and webcams. Traditional cameras usually allow users to manually adjust ISO settings, while most webcams automatically optimize brightness through software processing.
| Dedicated Cameras | Webcams | |
|---|---|---|
| ISO Control | Manual ISO adjustment is usually available | Usually controlled automatically |
| Exposure Adjustment | ISO, shutter speed, and aperture adjustments | Automatic exposure, gain control, and software processing |
| Low-Light Improvement | Sensor performance and ISO adjustment | HDR, AI processing, noise reduction, and image optimization |
| Main Users | Photographers, filmmakers, professional creators | Remote workers, streamers, online educators, content creators |
For most webcams, users do not need to manually change ISO settings. Instead, webcams rely on automatic exposure algorithms and image processing technologies to improve video quality. Features such as HDR, AI noise reduction, and low-light correction often have a bigger impact on webcam performance.
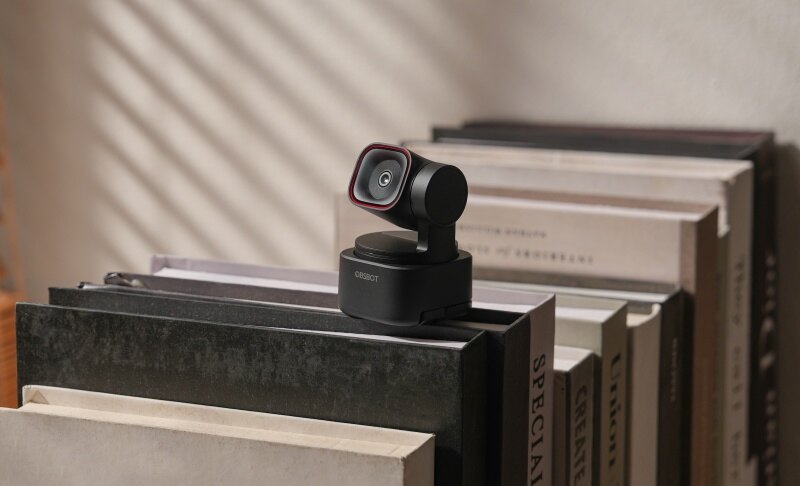
Bonus: Best Low Light Webcam - OBSBOT Tiny 3 Lite 4K PTZ Webcam
If you are looking for a webcam that performs exceptionally well in low-light environments without complex manual ISO adjustments, the OBSBOT Tiny 3 Lite is an outstanding choice for content creators, remote workers, and live streamers.
Key Features:
- ISO 6400 High Sensitivity: Adapts to changing lighting conditions, delivering clear and low-noise video even in dim environments.
- 1/2" CMOS Sensor: Captures more details and improves image clarity in challenging lighting.
- 4K Ultra HD Resolution: Supports 4K@30fps and 1080p@120fps for sharp and smooth video.
- AI Tracking 2.0 & Smart Framing: Keeps you centered and in focus automatically while moving.
- PDAF Auto Focus: Provides fast and accurate focusing even when lighting changes.
- Compact PTZ & Gesture Control: Enables flexible camera movement and hands-free control for streaming, calls, and presentations.
Part 4: Base ISO vs Low ISO vs High ISO: When Should You Use Each?
Choosing the right ISO depends on your lighting conditions, shooting environment, and the type of content you are creating. In general, use the lowest ISO possible when there is enough light, and increase ISO only when you need additional brightness.
Base ISO: Use It When Image Quality Matters Most
Base ISO is the lowest native ISO setting of a camera sensor and usually delivers the best image quality with the least noise. It is the ideal choice when you have sufficient lighting and want maximum detail and color accuracy.
When to use Base ISO:
- Outdoor photography in daylight
- Studio shooting with professional lighting
- Product photography
- High-quality video recording
Low ISO: Use It in Bright Lighting Conditions
Low ISO settings, typically ISO 100-400, are suitable for environments with plenty of light. They help maintain sharp details and reduce digital noise, making them a common choice for everyday photography and video recording.
When to use Low ISO:
- Sunny outdoor scenes
- Well-lit indoor environments
- Streaming setups with good lighting equipment
- Situations where image quality is more important than brightness
High ISO: Use It in Low-Light Environments
High ISO settings increase brightness when there is not enough available light. They are useful for capturing subjects in darker environments without slowing down the shutter speed too much. However, very high ISO values can introduce noise and reduce image quality.
When to use High ISO:
- Night photography
- Indoor events with limited lighting
- Concerts or sports events
- Recording videos in dim environments
Quick Summary: Which ISO Should You Use?
| Situation | Recommended ISO |
| Bright outdoor shooting | Base ISO / Low ISO (100-200) |
| Normal indoor lighting | Low ISO(400-800) |
| Low-light environment | High ISO(1600+) |
| Webcam meetings or streaming | Usually automatic adjustment |
Part 5: How to Change ISO Settings?
Changing ISO settings depends on the type of camera you are using. Dedicated cameras usually provide manual ISO controls, while most webcams automatically adjust exposure settings based on lighting conditions.
Most DSLR cameras and mirrorless cameras allow users to manually adjust ISO settings through the camera menu or dedicated control buttons. The exact steps may vary depending on the camera model, but the general process is similar.
Step 1: Turn on your camera and enter the shooting mode
Turn on your camera and switch to a shooting mode that allows manual adjustments, such as Manual (M), Aperture Priority (A/Av), or Shutter Priority (S/Tv). Some automatic modes may not allow ISO changes.
Step 2: Find the ISO button or camera menu
Look for an ISO button on the camera body, usually located near the control dial or function buttons. If your camera does not have a dedicated ISO button, open the camera menu and find the ISO settings option.
Step 3: Select your ISO value
Choose an ISO value based on your shooting environment:
- ISO 100-200: Best for bright outdoor scenes and situations where you want the cleanest image quality.
- ISO 400-800: Suitable for indoor environments with moderate lighting.
- ISO 1600 or higher: Useful for low-light shooting but may introduce more image noise.
Step 4: Adjust exposure settings if needed
After changing ISO, check your image brightness and adjust other exposure settings, such as shutter speed and aperture, to achieve the desired result. A higher ISO can make the image brighter, but balancing ISO with other settings helps maintain better image quality.
FAQs About What Does ISO Mean
1. Why Does Increasing ISO Create Noise?
Increasing ISO creates noise because it amplifies both the image signal and unwanted electronic noise from the camera sensor. In low-light conditions, the original signal is weaker, so higher ISO amplification can make grain, reduced details, and color inaccuracies more noticeable.
2. Does a higher ISO make photos brighter?
Yes. A higher ISO increases the camera sensor's sensitivity or signal amplification, making images appear brighter. However, higher ISO settings may also introduce more noise and reduce image clarity.
3. What does ISO certified mean?
ISO certified means that an organization, product, process, or system has been verified to meet the standards set by the International Organization for Standardization (ISO). In simple terms, it means an independent certification body has checked that certain requirements are followed and issued a certificate.
4. Can You Change ISO on a Webcam?
Most webcams do not provide a direct ISO adjustment option. Instead of manually changing ISO, webcams typically use automatic exposure, gain control, HDR, and software-based image processing to improve video quality.
For webcam users, factors such as sensor size, lens quality, HDR capability, and AI image processing often have a greater impact on video performance than ISO settings. This is why many modern webcams focus on features such as automatic framing, low-light correction, and AI-powered image enhancement rather than manual ISO controls.
Conclusion
So, what does ISO mean? ISO is a camera setting that controls light sensitivity and plays an important role in determining image brightness and quality. Lower ISO values usually provide cleaner images, while higher ISO values help capture brighter footage in low-light environments.
While ISO adjustment is an important feature in dedicated cameras, most webcams handle brightness automatically through exposure control, HDR, and AI-powered image processing. When choosing a webcam, users should consider overall image quality, sensor performance, low-light capability, and software features rather than focusing only on ISO settings.