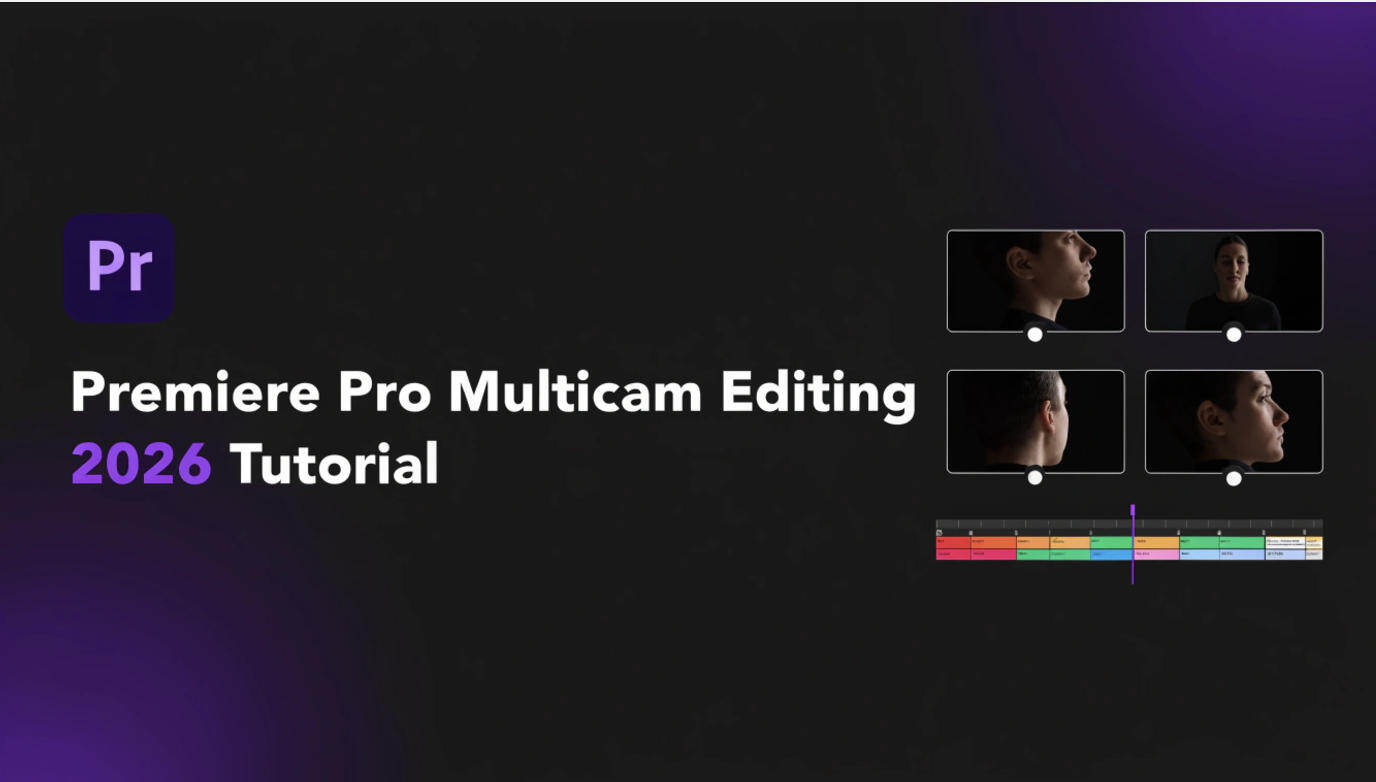
Premiere Pro Multicam Editing: From Sync to Final Cut
You have a wide shot, two close-ups, and one clean audio recording of the same interview. The files are all there, but cutting stacked tracks by hand turns every camera change into a small repair job. Premiere Pro multicam editing solves that by treating the synchronized angles as one source. The setup is quick once you know which audio and sequence options matter; choosing them blindly is what usually creates trouble later.
- What Premiere Automates—and What It Does Not
- Prepare the Footage Before You Sync
- Create a Multi-Camera Source Sequence
- Create the Editing Sequence and Enable Multicam View
- Switch Camera Angles and Refine the Cut
- Finish Audio, Color, and Timing
- Make 4K Multicam Editing Run More Smoothly
- Fix Multicam Editing That Is Greyed Out or Not Working
- FAQs About Premiere Pro Multicam Editing
What Premiere Automates, and What It Does Not
Premiere can compare audio waveforms or timecode and automatically line up compatible recordings. It can also record your camera choices while the sequence plays: press a number key or click an angle, and Premiere adds the edit.
It does not decide which shot tells the story best. Native multicam does not know that a reaction is more useful than the person speaking, that one camera is briefly out of focus, or that a wide shot should cover a repositioning move. In practical terms, Premiere automates synchronization and the mechanics of cutting; you still direct the finished sequence.
The working path is simple: prepare the recordings, create a multi-camera source sequence, place that source in an editing sequence, enable Multi-Camera View, perform a first switching pass, and then refine the edit.
Prepare the Footage Before You Sync
Copy the original media to your working storage, keep a backup, and place files into clearly named bins such as Camera A – Wide, Camera B – Host, Camera C – Guest, and Master Audio. Those names will make far more sense in Multi-Camera View than C0001, C0002, and C0003.
- Rename or label the angles: use names that describe the shot, not only filenames such as C0001. When one camera created several files, Camera Angle or Camera Label metadata can help Premiere keep those files on the same angle.
- Identify the master audio: choose the recorder, mixer feed, or camera track that should remain continuous under the final edit.
- Check the scratch tracks: audio synchronization needs recognizable sound on every angle. A clap at the start helps, but speech, music, or another clear shared event can also provide matching waveforms.
- Check the recordings: confirm that every file plays, has the expected duration, and contains audio before creating the multicam clip.
- Plan for performance: if several 4K H.264 or HEVC angles already struggle during normal playback, create proxies before attempting real-time switching.
If you are still planning how the cameras will be recorded or switched, the multi-camera live streaming setup guide explains camera roles, connections, and live-production workflows. For post-production, recording isolated camera files gives the editor the greatest freedom.
Create a Multi-Camera Source Sequence
Create the multicamera source from original media in the Project panel. Do not begin by selecting clips already stacked in a normal Timeline.
- In the Project panel, select the video clips and any separate master-audio file that belong to the same take or performance.
- Choose Clip > Create Multi-Camera Source Sequence, or right-click the selected files and choose the same command.
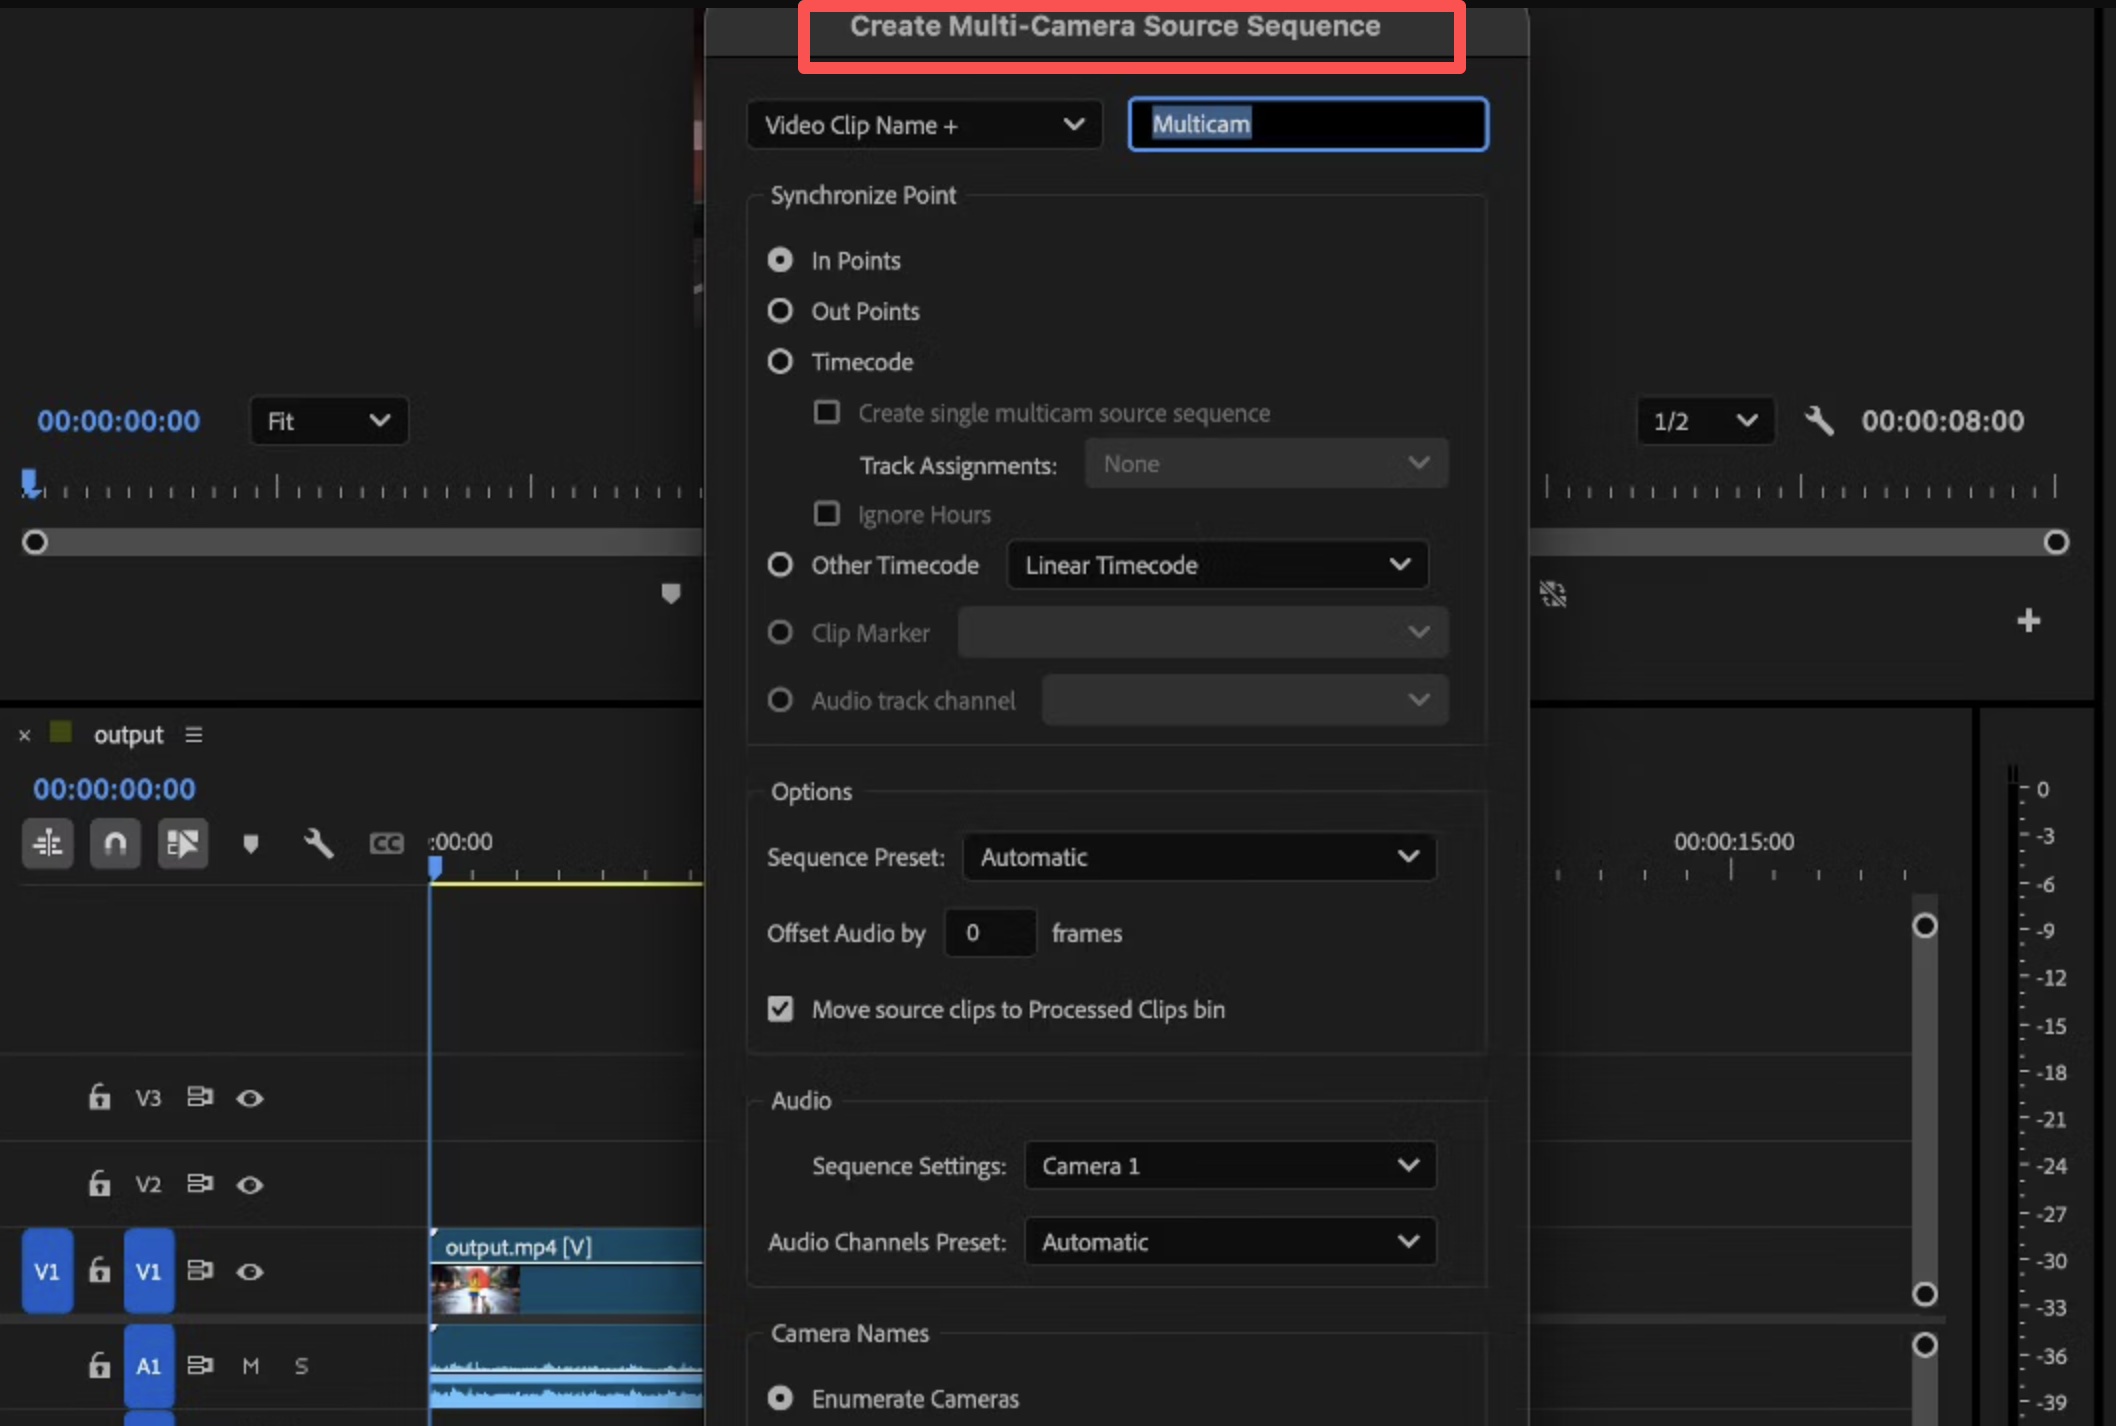
3. Enter a recognizable sequence name.
4. Choose the synchronization point using the table below.
5. Choose the sequence preset deliberately. Automatic uses the format of Camera 1, so check which clip Premiere treated as that camera when your sources mix 4K and 1080p or use different frame rates.
6. Choose the audio and camera-name settings, then select OK.
| Sync Method | Use It When | Check Before Continuing |
|---|---|---|
| Audio | Every camera recorded the same speech, music, clap, or room sound. | Each selected clip has a clear, overlapping waveform. |
| Timecode | Cameras and recorder used synchronized timecode. | The timecode overlaps and was not reset incorrectly. |
| Clip Marker | You manually marked the same visible or audible event in every source clip. | The markers are clip markers with matching names or positions. |
| In or Out Points | You manually set an identical event as the In or Out point on every clip. | Each point lands on the same exact frame or sound. |
Check the sync before you make any camera cuts
Open the new multi-camera source sequence and inspect one obvious event near the beginning, such as a clap, consonant, drum hit, or hand touching a table. Then check another event near the end of a long recording. A sequence can begin in sync and drift later if one device did not record at a stable rate.
If Audio sync fails, do not keep running the same command. Find one event that appears in both recordings and add a clip marker to each source. Align those markers with Snapping enabled. For a more precise check, solo the two audio tracks and listen: a short echo means they are close but not fully aligned. If the clips have no useful common audio, put one angle above another, lower the upper clip's opacity, and nudge it until a visible movement overlaps.
Choose the audio setting intentionally
The creation dialog also decides how audio behaves. This choice is harder to repair after a long edit, so use the option that matches the deliverable:
- Camera 1: use one camera's audio while switching only the picture. This is practical when that camera has the continuous program mix.
- All Cameras: retain all selected audio channels for later mixing while multicam switching affects only the video.
- Switch Audio: switch the linked audio with the camera angle. Use this only when you deliberately want sound to follow the selected camera.
If you included an external recorder, open and inspect the created source sequence before editing. Confirm that the intended track is audible and aligned at both the beginning and end. Adobe's current multi-camera source sequence guide explains the available synchronization and audio options in detail.
Create the Editing Sequence and Enable Multicam View
The multicamera source is not yet your final editing timeline. It behaves like a special clip containing several synchronized angles.
- Find the new multicamera source sequence in the Project panel.
- Right-click it and choose New Sequence from Clip. Rename this target sequence clearly, such as Interview_Main_Edit.
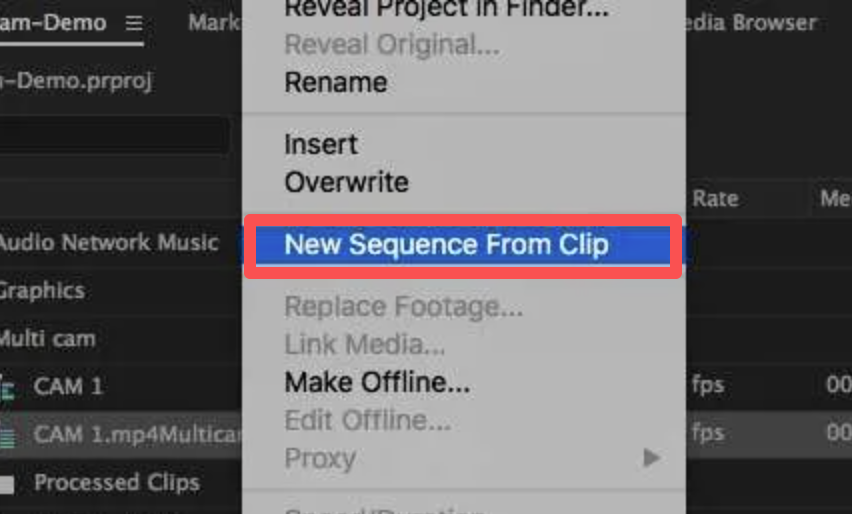
3. In the Program Monitor, open the Button Editor.
4. Drag Toggle Multi-Camera View into the Program Monitor button bar and close the editor.
5. Select the new button. You should see the available angles alongside the active program image.
6. Optional: open the Program Monitor settings and enable overlays so camera numbers or names remain easy to identify.
If the angles appear in an inconvenient order, open the Program Monitor settings and choose Edit Cameras. Rearrange the angles before doing a long switching pass so Camera 1, Camera 2, and the corresponding number keys remain predictable.
Switch Camera Angles and Refine the Cut
Make the first pass for content, not perfection. Play the target sequence and press 1, 2, 3, or another main-keyboard number to cut to that camera. You can also select an angle in Multi-Camera View. Premiere adds edit points while playback continues.
Pass 1: Build a watchable camera cut
- Begin on a safe wide shot before the speaker, performer, or action starts.
- Cut to a close angle after the subject begins a complete phrase, not halfway through a word or gesture.
- Use reactions, demonstrations, audience shots, or detail angles to cover pauses and visual repetition.
- Return to the wide shot when movement becomes unpredictable or another angle loses focus.
- Avoid changing cameras simply because several seconds have passed. Every cut should reveal information, emotion, or spatial context.
Pass 2: Replace weak angles without changing timing
Pause on a segment that uses the wrong camera, select that segment in the Timeline, and choose a different angle in the Program Monitor. This replaces the camera while preserving the existing edit boundaries. Use it to remove an obstructed shot, a focus miss, or a camera move that should stay off-screen.
Pass 3: Adjust the cut points
Use the Rolling Edit Tool to move a camera change earlier or later without changing the total sequence duration. For dialogue, let the sound lead when a reaction is more valuable than the person currently speaking. For music, place cuts on meaningful phrases, beats, gestures, or instrument changes instead of cutting mechanically on every beat.
Shortcuts worth learning for the second pass
You do not need a custom keyboard layout to work quickly. These default commands handle most multicam cleanup:
| Shortcut | What It Does |
|---|---|
| 1–9 | Select the corresponding camera; during playback, the selection creates a cut. |
| N | Activates the Rolling Edit Tool so you can move a camera cut without changing total duration. |
| Q / W | Ripple-trims the previous or next edit to the playhead. Check track targeting first so you do not trim a track that should remain continuous. |
| Ctrl/Cmd+K | Adds an edit at the playhead when you need a camera change at an exact frame. |
If these keys behave differently, check Edit > Keyboard Shortcuts on Windows or Premiere > Keyboard Shortcuts on macOS. Existing custom layouts can replace Adobe's defaults.
Finish Audio, Color, and Timing
Lock the story and camera timing before doing detailed finishing work. A sensible order is audio continuity, color matching, reframing, graphics, and then export.
- Protect the master audio: listen across every camera cut. Unless you intentionally enabled audio-follow-video, the program sound should remain continuous.
- Check long-recording drift: compare a clear lip movement, clap, or drum hit near the beginning and end. If an angle slowly drifts, correct that source inside the multicamera source sequence rather than moving dozens of finished cuts.
- Match each camera once: open the multicamera source sequence in the Timeline and color-correct individual angle tracks there. The target edit then inherits the corrected source angles.
- Reframe only where needed: use position and scale to repair a slightly loose composition, but do not enlarge low-resolution footage so far that it becomes visibly soft.
- Watch the complete cut: look for flash frames, repeated actions, jumpy eyelines, accidental audio switches, and cuts that happen just before the important movement.
Export the target sequence as you would any normal Premiere sequence. If the export stops with an encoding message, use this separate guide to diagnose Error Compiling Movie in Premiere Pro without rebuilding the multicam edit unnecessarily.
Bonus: Capture More Editable Multicam Footage with OBSBOT Tail 2
Once your Premiere workflow is organized, the next improvement is to capture footage that is easier to cut.
For professional video shooting, including interviews, performances, and live events, the OBSBOT Tail 2 can serve as a flexible operated or unattended angle. It records up to 4K/60fps, uses AI Tracking 2.0 to hold a moving subject, offers pan, tilt, zoom, and rotation, and connects through HDMI, 3G-SDI, USB 3.0, or NDI|HX3. Its 5× optical zoom also helps vary framing without moving the camera.
Make 4K Multicam Editing Run More Smoothly
A computer that plays one 4K clip smoothly can still drop frames when Premiere has to decode four or six angles at once. If camera changes appear late during a live switching pass, fix playback performance before trying to correct every cut by hand.
- Create proxies: select the source clips, right-click, and choose Proxy > Create Proxies. Use lightweight proxy media for editing, then reconnect to the originals for finishing and export.
- Lower playback resolution: use 1/2 or 1/4 resolution in the Program Monitor. This changes preview quality, not the original media.
- Use fast local storage: keep active media and cache on drives that can sustain simultaneous reads from every angle.
- Close the extra multicam preview: if the multicamera source is still open in the Source Monitor while you cut in the Program Monitor, close or hide it. Asking Premiere to display both views can reduce playback performance.
- Close unnecessary panels and processes: scopes, background transcodes, and other GPU- or disk-heavy tasks can reduce real-time performance.
- Clear the media cache only when needed: if playback remains erratic after files have finished conforming, use Premiere's Media Cache settings and allow the application to rebuild its working files.
Adobe recommends its proxy workflow for smoother editing with high-resolution or computationally demanding footage. Toggle proxies off before judging focus, noise, fine detail, or final image quality.
When the cameras mix 4K and 1080p
Decide the delivery resolution before trusting Automatic. For a 1080p program built from a 4K wide shot and two 1080p close-ups, a 1080p multicamera source is usually easier to manage. Open the source sequence and apply Set to Frame Size to the 4K angle if Multi-Camera View shows an unexpected center crop.
The extra 4K resolution can also become a useful second angle: duplicate the wide shot on another camera track and reframe the copy as a medium shot. It is not a substitute for a real close-up, but it can give a two-camera interview one additional cutaway without reshooting.
Fix Multicam Editing That Is Greyed Out or Not Working
Start with the exact feature that is unavailable. "Multicam not working" can mean the creation command is greyed out, the view button is missing, synchronization failed, or only one camera appears.
| Problem | Likely Cause | What to Do |
|---|---|---|
| Create Multi-Camera Source Sequence is greyed out | The selection is in the Timeline, contains a bin or unsupported item, or lacks a video clip. | Select the original video and audio files in the Project panel. Exclude bins, still images, and unrelated items. |
| Multi-Camera View button is missing | The button is not in the Program Monitor toolbar. | Open Button Editor and drag Toggle Multi-Camera View to the toolbar, or choose Multi-Camera from the monitor's display settings. |
| Only one camera appears | You made a normal sequence or did not create the target sequence from the multicamera source clip. | Find the multicamera source in the Project panel, choose New Sequence from Clip, and enable Multi-Camera View in that target sequence. |
| Audio synchronization fails | A clip has no shared sound, very low scratch audio, or no overlapping section. | Sync with timecode or matching clip markers. For a manual fallback, align a visible event and its waveform before building the multicam clip. |
| Audio changes at every camera cut | The source sequence was created with Switch Audio or audio-follows-video enabled. | Use one continuous program track. If the project is still early, recreate the source sequence with Camera 1 or All Cameras. |
| Playback stutters or cuts register late | Premiere cannot decode all camera streams in real time. | Create proxies, lower playback resolution, wait for audio conforming to finish, and stop background encoding. |
- Play a clear sync event near both the start and end; lips, impacts, and waveforms should still agree.
- Switch through every camera while paused and confirm that each numbered angle shows the expected shot rather than black video.
- Record a 20-second switching pass. The edit points should land where you pressed the camera keys, not several frames later.
- Play across several cuts and confirm that the master audio remains continuous.
FAQs About Premiere Pro Multicam Editing
Can Premiere automatically switch cameras based on the speaker?
Premiere can synchronize the angles automatically, but its native multicam workflow does not choose shots by identifying the active speaker. You can record your own switches in real time with the number keys or use a third-party automation tool, then review its cuts for interruptions, reactions, focus problems, and overly frequent switching.
What is the difference between a multicamera source sequence and the target sequence?
The multicamera source sequence contains the synchronized angles and audio. The target sequence is the normal editing timeline that contains the multicamera clip, your camera cuts, titles, music, and other finishing work.
Do all cameras need the same resolution and frame rate?
No, Premiere can combine mixed sources, but matching frame rates, color settings, and aspect ratios reduces conversion work and visual inconsistency. Choose the delivery frame rate for the target sequence, then inspect motion from any mismatched source carefully.
Should I use audio sync or timecode for multicam editing?
Use synchronized timecode when the production recorded it correctly; it is efficient and does not depend on microphone quality. Use audio sync when every camera captured clear overlapping sound. For clips without usable scratch audio or timecode, place matching clip markers on the same event.
Can I add another camera after I start editing?
Yes. Open the multicamera source sequence, add the new recording on a new video track, and align it with the existing angles. It will appear as another camera in Multi-Camera View. If the new clip includes audio that you need to retain, check the source sequence's audio routing before continuing the edit.
Is Premiere Pro or DaVinci Resolve better for multicam editing?
Both support multicamera synchronization and angle switching. If the rest of the project already uses Premiere, moving solely for multicam usually adds unnecessary relinking and interchange work. Resolve may make more sense when the project's editing, color, and audio workflow already lives there.
Conclusion
A reliable multicam edit starts before the first camera switch. Organize the media, choose the sync method from the footage you actually have, and protect one continuous master-audio track. Once the multicamera source and target sequence are built correctly, the creative work becomes straightforward: switch angles for meaning, refine the timing, match the cameras, and use proxies whenever the system cannot play every stream smoothly.