How to Convert USB Webcam to HDMI [6 Easy Methods]
Video communication is essential for professional meetings, online learning, and connecting with loved ones. While USB webcams are convenient, there are times when connecting them to an HDMI display is necessary. Whether for video conferencing, streaming, or gaming, displaying your webcam feed on a larger screen can significantly enhance the experience. In this article, we'll explore how to convert a USB webcam to HDMI to unlock its full potential.
Part 1: Can You Plug a USB Webcam into HDMI?
Yes, you can convert a USB webcam to HDMI, but it requires a USB-to-HDMI converter or an HDMI capture card. For simpler setups, you can also see our guide on connecting a webcam directly to your TV.
Note: Please ensure that the USB-to-HDMI converter or HDMI capture card you choose supports your USB webcam's resolution and video format to achieve optimal performance.
Part 2: How to Convert a USB Webcam to HDMI?
Here we are in the most important part of the article, i.e., how to convert a USB webcam to HDMI. We will share not one but three different ways of dealing with USB to HDMI situations. Let us begin.
Way 1: Use a USB Webcam to HDMI Adapter
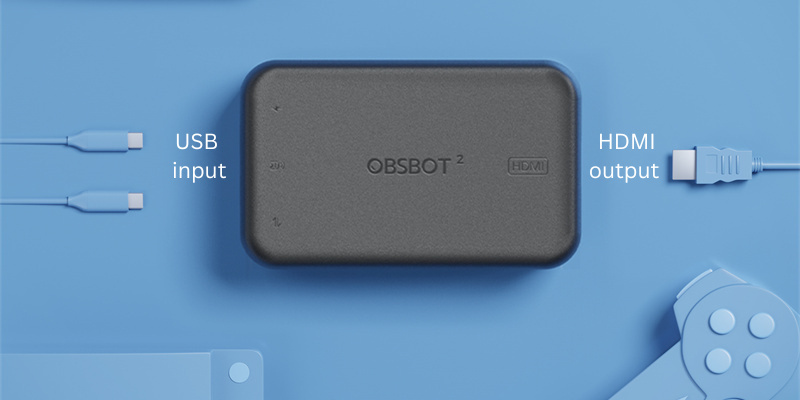
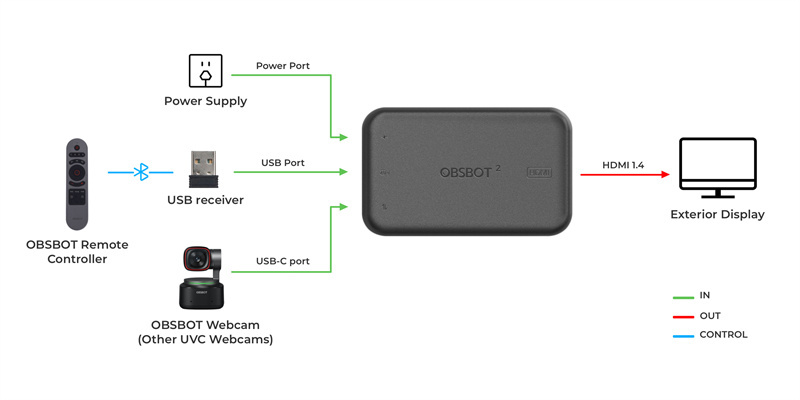
One of the most convenient ways to convert a USB webcam to an HDMI is by using a USB webcam to an HDMI adapter. A recommended option is the OBSBOT UVC to HDMI Adapter 2nd Gen. This adapter allows you to connect your USB webcam to an HDMI display effortlessly.
How to Use OBSBOT UVC to HDMI Adapter:
Step 1:Connect your USB webcam to the OBSBOT UVC to the HDMI adapter
Just grab the USB cable from your webcam and plug it into the adapter’s USB port. Make sure it's securely connected so you don’t run into any issues later.

Step 2:Connect the HDMI output of the adapter to your HDMI display
Now, connect an HDMI cable from the adapter’s HDMI output to your TV, monitor, or projector. Simple as that.

Step 3:Power on the OBSBOT UVC to HDMI adapter
Next, plug the adapter into a USB power source—either a wall charger or a USB port on your display. It needs to be powered on to work properly.

Step 4: Set up the webcam and activate the HDMI display
You might need to adjust things like resolution or frame rate on your webcam, depending on the model. Do this through the webcam’s software or the settings on your computer. Then, power on your display and make sure it’s set to the right HDMI input to show the webcam feed.
Additional Tips:
- Double-check that the OBSBOT UVC-to-HDMI adapter supports the resolution and video format of your webcam for optimal performance.
- If you’re having trouble, refer to the adapter’s user manual for troubleshooting or extra setup help.
Why Choose OBSBOT UVC to HDMI Adapter?
| Feature | What It Does |
|---|---|
| 4K UVC to HDMI Conversion | Supports up to 4K @ 30fps and 1080p @ 60fps, making your webcam look its best. |
| Plug-and-Play | No drivers or complicated setup—just connect your USB webcam to a PC, Mac, Smart TV, or ATEM device. |
| Low Latency | Ultra-low latency for smooth, real-time video calls without interruptions. |
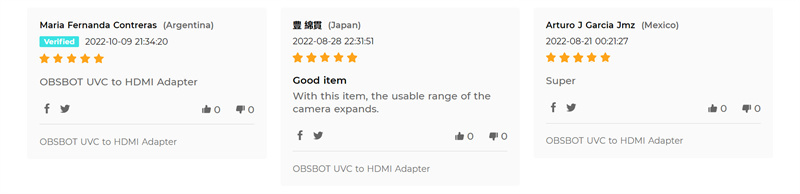
Customer Feedback:
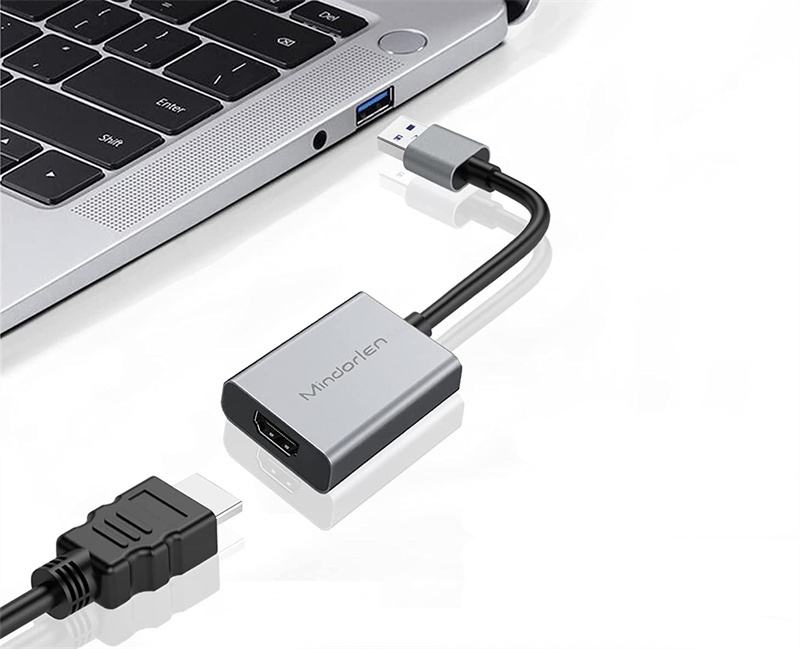
Way 2: Capture Card HDMI for USB Webcam
Convert your USB webcam to HDMI using both software and hardware configurations. Here's a simple guide:
Step 1: Connect the USB webcam and install the software
Plug your USB webcam into your computer via the USB port. Install the necessary webcam software or drivers from the official website.

Step 2: Install the HDMI capture card
Open the webcam software and adjust the settings (e.g., resolution, frame rate). Install an HDMI capture card into your computer's PCIe slot.

Step 3: Connect the HDMI capture card
Use an HDMI cable to connect the capture card’s HDMI output to your TV or monitor. Open the capture card's software to adjust video settings.
Step 4:Activate HDMI
Ensure your USB webcam is selected as the video source in the software. Enable the HDMI capture card to output the feed to your display.
Additional Tips:
- Ensure your computer meets the system requirements for the webcam and HDMI capture card.
- Experiment with settings to improve video quality.
Bonus: The Best AI 4K PTZ Webcam for Live Streaming
If you’re looking for a simple upgrade to make your live streams look more polished, the OBSBOT Tiny 3 4K PTZ Webcam is the ultimate choice.
Here are its standout features:
- Tiny in size, Titan in power: The smallest 4k PTZ Webcam featuring a 1/1.28" CMOS for stunning 4K 30fps and 1080p 120fps video.
- AI Tracking 2.0 & Perfect Framing: Automatically follows you with Human and Voice Tracking, ensuring you stay in the spotlight effortlessly.
- Immersive Stereo Mic & Voice Locator: Captures crystal-clear audio while accurately locating the speaker's voice.
- Superior Low-light Capability: With Dual Native ISO (100~12800), it maintains high dynamic range and low noise in dark settings.
- Multiple AI Modes: Boost productivity with specialized Whiteboard Mode, Desk Mode, and Hand Tracking.
A compact yet powerful webcam, the OBSBOT Tiny 3 4K redefines professional-grade live streaming and remote interaction.
Way 3: Using OBS for USB Webcam to HDMI Output
OBS is a powerful tool for converting your USB webcam to HDMI. Here’s how to use OBS to display your webcam feed on a second monitor connected to your computer.
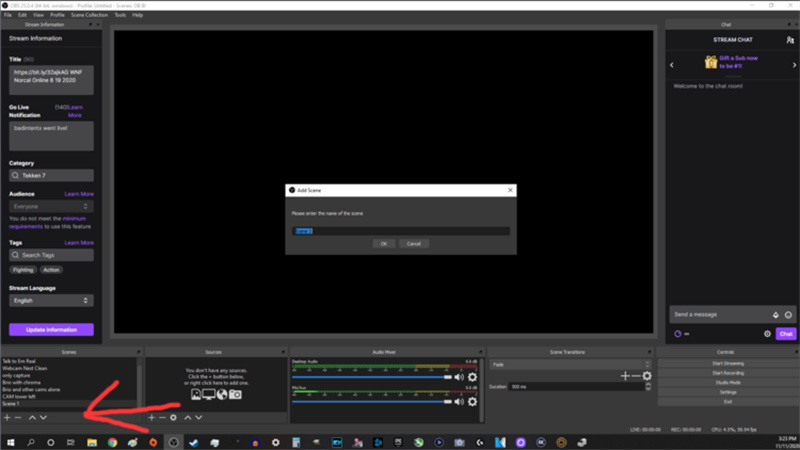
Step 1:Install OBS and create a new scene
Download and install OBS > Open OBS > click “Scenes” > Click “+” to create a new scene and name it (e.g., "Webcam").
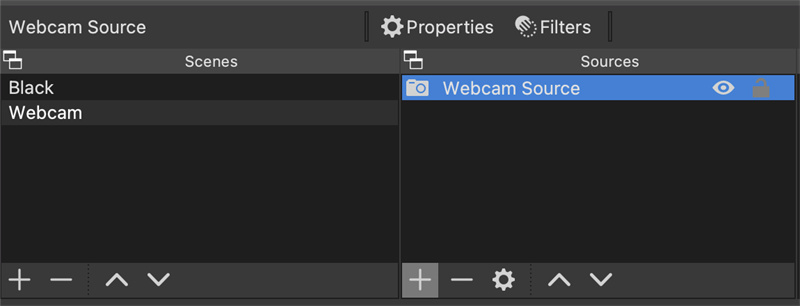
Step 2: Add your USB webcam as a video capture device
Under the “Sources” box, click “+” > “Video Capture Device.” > Name it (e.g., “Webcam Source”) and choose your USB webcam from the list.
Step 3:Adjust the video display size
Resize the video feed by dragging the corners of the video source in OBS to fit your screen, ensuring the resolution (e.g., 1920x1080) is correct.
Step 4:Configure the secondary monitor output
Right-click on the video window and select "Fullscreen Projector (Preview)." > Choose the secondary monitor connected to your computer as the output device.
Additional Tips:
- Make sure your computer has multiple monitors and the secondary monitor is connected via HDMI.
- Adjust settings in OBS, including audio, transitions, and any overlays for your stream.
This way, you can use OBS to display your USB webcam on a second monitor connected to your computer.
Way 4: Wireless HDMI Transmitter for USB Webcam
HDMI output, from a USB Webcam, can be wirelessly streamed in this method without having long cords.
Detailed Steps:
Step 1: Connect Your USB Webcam to a Laptop or Mini PC

Step 2: Connect the laptop's HDMI port to the HDMI transmitter. Power the transmitter using USB cables or adapters.

Step 3: Plug the HDMI receiver into your TV, monitor, or capture card. Ensure both transmitter and receiver are paired (many systems do this automatically, indicated by LED lights).
Step 4: Open your webcam software (like OBS, Zoom, etc.) and start broadcasting the feed wirelessly through the HDMI output from the receiver.
Additional Tips:
- For smooth streaming, use low-latency transmitters (≤30ms).
- Ideal for situations like conference rooms, events, or live broadcasts, where wired connections may not be feasible.
Way 5: USB to HDMI Encoder for Professional Broadcasting
A USB to HDMI Encoder gets the USB Webcam signal and converts it to an HDMI connection. This is the device that excels in broadcasting, live-casting, or connecting to projectors or TVs. This method can be somewhat challenging and costly, so I don't recommend it. However, I've found an encoder (TBS2603au) and included some guide videos below - feel free to use them if you find them helpful.
Here's a step-by-step guide:
Step 1: Connect the USB webcam to the encoder
- Plug your USB webcam (e.g., OBSBOT Tiny 3) into the USB input port on the HDMI encoder/decoder. Ensure the encoder is powered up either via USB or an external power source.

Step 2: Connect the decoder to the HDMI display
- Use an HDMI cable to connect the encoder’s HDMI output to your TV, monitor, or projector. Make sure your display is powered on and set to the correct HDMI input.
Step 3: Configure the IP address
- Connect the encoder to a network switch or router using a LAN cable. Power on the encoder and ensure it’s ready to stream. For detailed setup, refer to the guide video provided by the manufacturer.
Additional Tips:
- Make sure your encoder supports UVC webcams for optimal performance.
- Check the manufacturer’s guide for installation instructions if software or drivers are needed.
- Use webcams with 1080p resolution or higher for the best results.
Way 6: Professional Setup via ATEM Mini Pro
For a more advanced setup, like multi-camera streaming or live events, you can connect your USB webcam through an HDMI or iOS adapter to an ATEM Mini Pro. This setup gives you extra control and switching capabilities that a simple adapter can’t provide.
Step 1: Connect the webcam to the adapter
- Plug your USB webcam into a compatible HDMI or iOS adapter. Make sure the connection is secure.

Step 2: Connect the adapter to the ATEM Mini Pro
- Use an HDMI cable to connect the adapter to one of the HDMI inputs on your ATEM Mini Pro.

Step 3: Configure ATEM settings
- Open the ATEM software on your computer. Select the input channel where your webcam is connected, and adjust resolution, frame rate, and audio as needed.
Step 4: Output to display
- Connect the ATEM Mini Pro’s HDMI output to your TV, monitor, or capture device. Set the display to the correct HDMI input to see your webcam feed.
Part 3: FAQs About Convert USB Webcam to HDMI
1. Can I Convert a USB Webcam to HDMI for Display?
Yes, you can convert a USB webcam to HDMI, but it requires specialized equipment such as a USB-to-HDMI converter or an HDMI capture card. Direct connection isn't possible due to different signal protocols used by USB and HDMI. The OBSBOT UVC to HDMI Adapter 2nd Gen offers a convenient plug-and-play solution, maintaining 4K quality with minimal latency. Other methods include using capture cards, OBS software, wireless HDMI transmitters, USB-to-HDMI encoders, or professional equipment like the ATEM Mini Pro for seamless conversion.
2. Can a USB Be Converted to HDMI for Webcam Output?
Yes, a USB can be converted to HDMI using the right adapters or conversion devices. USB transmits digital data signals, while HDMI carries both audio and video signals, requiring a conversion bridge. USB-to-HDMI adapters like the OBSBOT UVC to HDMI Adapter ensure proper webcam feed display on HDMI monitors, TVs, or projectors. Always check that the converter supports your webcam's resolution and video format to ensure optimal performance and compatibility with your display devices.
3. Can You Connect a USB Webcam to a TV?
Yes, you can connect USB webcams to TVs using several methods: USB-to-HDMI adapters, HDMI capture cards that process USB signals, OBS software with HDMI output devices, wireless HDMI transmitters, USB-to-HDMI encoders for professional broadcasting, or professional equipment like the ATEM Mini Pro. Some modern smart TVs may support direct USB webcam connections, but HDMI conversion typically provides more reliable performance and compatibility with a variety of TV models and webcam types.
4. Why Won't My USB to HDMI Work for Webcam Connection?
There are several potential reasons why USB-to-HDMI conversion might fail. Common issues include using an incompatible adapter that doesn’t support your webcam’s resolution or video format, insufficient power supply to the converter, outdated drivers or firmware, incorrect HDMI input selection, or loose cable connections. Make sure your USB-to-HDMI converter supports UVC (USB Video Class) webcams, provides enough power, and maintains proper connections. High-quality adapters often solve most compatibility and performance problems.
5. Can USB Transmit a Video Signal to HDMI Displays?
Yes, USB can transmit video signals, but it needs to be converted to the HDMI format for compatibility with HDMI displays. USB ports carry digital data, including video from webcams, while HDMI ports expect audio/video signals in specific formats. Devices like USB-to-HDMI adapters, HDMI capture cards, or software like OBS bridge this gap. USB 3.0 ports support the higher bandwidth needed for 4K video. Professional broadcasting equipment and wireless HDMI transmitters also enable USB video signal conversion for display on HDMI-equipped monitors, TVs, and projectors.
Conclusion
With these six methods, you can easily convert a USB webcam to HDMI based on your setup and needs. If you want a smoother and more reliable experience, tools like the OBSBOT UVC to HDMI Adapter or the OBSBOT Tiny 3 4K PTZ Webcam offer great performance and flexibility.


