How to Test Your Webcam: Complete 2026 Guide

That moment of panic when you join an important video call and realize your webcam isn't working - we've all been there. Whether it's for a job interview, client meeting, or virtual family gathering, a malfunctioning camera can turn a smooth conversation into a frustrating experience.
Testing your webcam before important meetings takes just minutes but saves you from embarrassing technical difficulties. As someone who's helped hundreds of people fix their camera issues, I'll show you exactly how to test your webcam on any device and fix common problems quickly.
Quick Webcam Test: 30-Second Check
Before diving into detailed testing, try this quick checklist to identify obvious issues:
- Check physical connections - Is your external webcam properly plugged in?
- Look for indicator lights - Most webcams have a small light when active
- Test with different apps - Try multiple applications to isolate the problem
- Check privacy settings - Ensure camera access is enabled in system settings
If these quick checks don't solve your problem, don't worry - we'll cover each solution in detail below.
How to Test Your Webcam Using Built-in Applications
The simplest way to test your webcam is to use your computer's built-in camera application. Here's how to do it on both Windows and Mac.
Testing Webcam on Windows 10/11
Windows makes it incredibly easy to check your camera with just a few clicks:
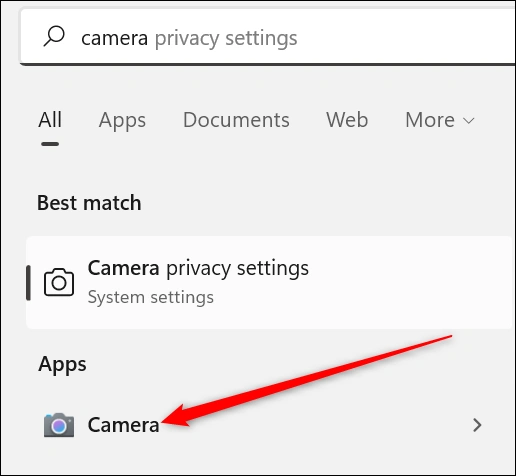
- Click the Start button or press the Windows key on your keyboard
- Type "camera" and select the Camera app from the results
- If your webcam is working properly, you should see yourself immediately
Pro Tip: If the Camera app doesn't open or shows an error, your webcam might be disabled in privacy settings or have driver issues - we'll cover fixes in the troubleshooting section.
Testing Webcam on Mac
Mac users have an equally simple process using the built-in Photo Booth app:
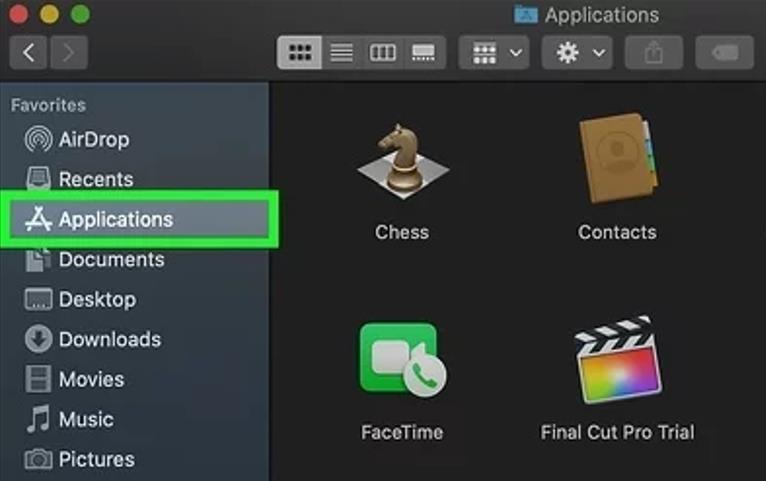
- Click the Finder icon in your Dock (the smiling face at the bottom of your screen)
- Select Applications from the left sidebar
- Double-click Photo Booth to launch the application
- Your webcam should activate automatically and display your video feed
For external webcams on Mac, ensure compatibility and install any necessary drivers before testing. Most modern USB webcams work plug-and-play, but some professional models require specific software.
Online Webcam Test Tools: No Software Required
When built-in apps aren't working or you want a second opinion, online webcam test tools are your best friend. These websites work directly in your browser and require no downloads.
| Tool | Best For | Ease of Use | Additional Features |
|---|---|---|---|
| Veed.io | Quick basic testing | Very Easy | Simple interface, one-click test |
| OnlineMicTest | Comprehensive testing | Easy | Detailed camera info, microphone test |
| WebcamTests.com | Video quality assessment | Medium | Resolution check, light testing |
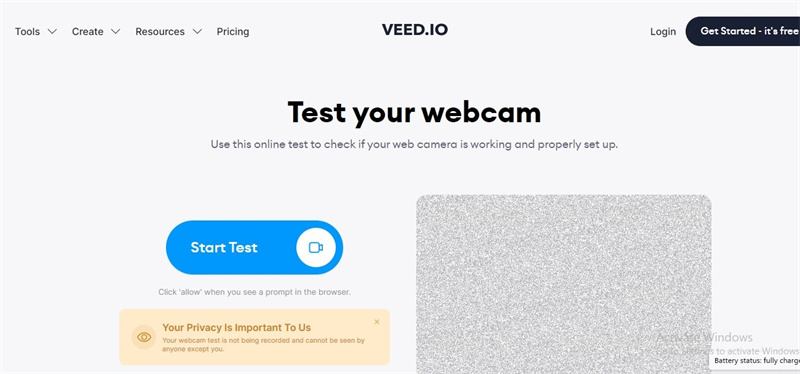
Using Veed.io Webcam Test
Veed offers one of the simplest online camera tests available:
- Visit veed.io and click "Start Test"
- Click "Allow" when your browser asks for camera permission
- Examine your video feed for quality, lighting, and focus
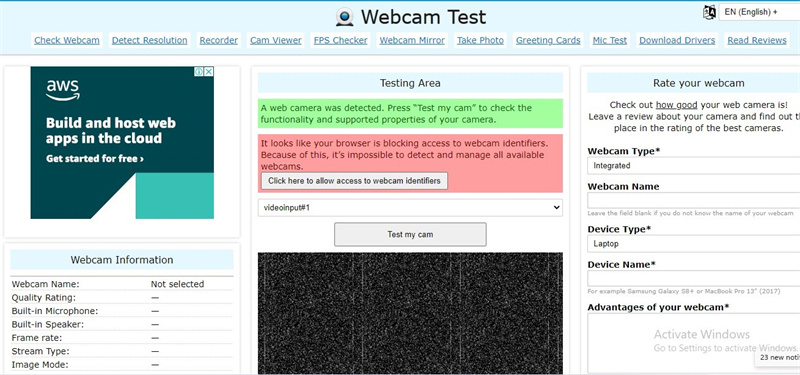
Using Webcam Test by OnlineMicTest
For more detailed camera information, this tool provides comprehensive testing:
- Go to onlinemictest.com/webcam-test
- Click the "Test my cam" button
- Select "Allow" when the permission pop-up appears
- The system will automatically detect your webcam's specifications
Key Features:
- 4K Video & Low-Light Performance – Sharp visuals even in dim environments.
- Immersive Stereo Mic System with Voice Locator – Captures clear, natural sound with spatial depth for professional calls.
- AI Tracking with Auto-Framing – Keeps you centered during calls and recordings.
- Whiteboard Mode & Desk Mode – Test clarity and versatility for presentations.
- Hands-Free Voice & Gesture Controls – Operate the camera without interrupting your workflow.
- Tiny in Size, Titan in Power – Compact design that fits anywhere without sacrificing performance.
Testing Webcams in Popular Apps (Zoom, Teams, Meet)
Since you'll primarily use your webcam for specific applications, testing within those apps ensures everything works where it matters most.
Testing Webcam in Zoom
Zoom provides built-in camera testing that mimics actual meeting conditions:
- Open Zoom and click the gear icon (Settings) in the top-right corner
- Select "Video" from the left sidebar
- Your webcam feed should appear in the preview window
Pro Tip: Test your video before joining a meeting by clicking "Test Speaker and Microphone" on the audio settings tab.
Testing Webcam in Microsoft Teams
Teams makes it easy to verify your camera setup before important meetings:
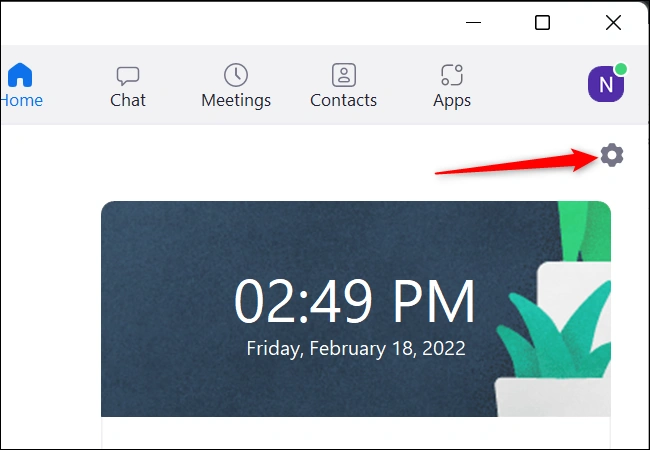
- Open Microsoft Teams and click your profile picture in the top-right corner
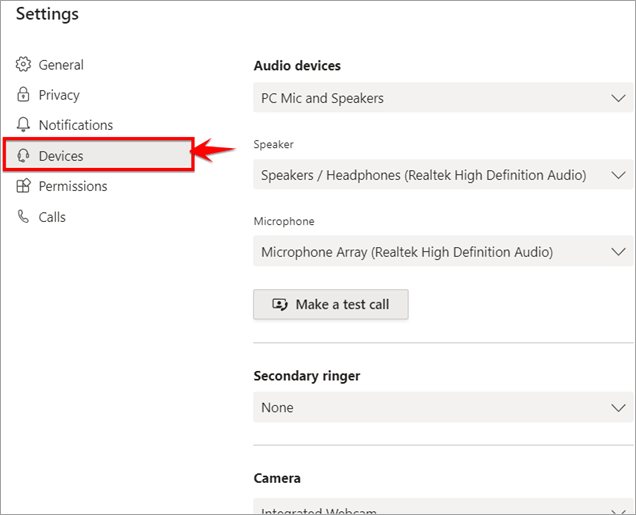
- Select "Settings" then choose "Devices"
- Your camera should automatically activate and show a preview
- Use the Camera dropdown to switch between available cameras if needed
Testing Webcam in Google Meet
Google Meet offers multiple ways to check your camera before joining a call:
- On the Meet homepage, click the gear icon in the top-right corner
- Select "Video" from the left menu to see your camera preview
- Alternatively, after joining a meeting, click "Check your audio and video"

Other Popular Applications
- Skype: Settings → Audio & Video → View camera feed
- Discord: User Settings → Voice & Video → Test Video
- Slack: Preferences → Audio & Video → Test camera
Webcam Not Working? Complete Troubleshooting Guide
If your webcam still isn't working after testing, don't panic. Most camera issues can be resolved with these systematic troubleshooting steps.
| Problem | Quick Fix | Advanced Solution |
|---|---|---|
| Webcam not detected | Restart the computer, try a different USB port | Update drivers, check Device Manager |
| Poor video quality | Clean camera lens, improve lighting | Adjust camera settings, update software |
| Camera access denied | Check app permissions in settings | Reset camera privacy settings |
| No picture/black screen | Test with different applications | Reinstall camera drivers |
| Flickering or distorted video | Check the connection cables | Update graphics drivers, lower resolution |
Step-by-Step Troubleshooting Process
Follow these steps to resolve most webcam issues:
- Basic Hardware Checks
- Ensure external webcams are properly connected
- Try different USB ports (preferably USB 3.0)
- Check for physical damage to cables or the camera
- Privacy and Permission Settings
- Windows: Settings → Privacy & Security → Camera → Ensure "Camera access" is on
- Mac: System Preferences → Security & Privacy → Privacy → Camera
- Ensure the specific applications you're using have camera access enabled
- Driver and Software Updates
- Update webcam drivers through Device Manager (Windows)
- Check the manufacturer's website for the latest drivers
- Update your operating system and video conferencing apps
- Application-Specific Fixes
- Close and reopen the application
- Check the application's audio/video settings
- Ensure no other applications are using the camera simultaneously
When to Consider Professional Help or Replacement
If you've tried all troubleshooting steps and your webcam still isn't working, it might be time to:
- Contact technical support for your computer or webcam manufacturer
- Visit a repair shop for hardware diagnostics (especially for built-in cameras)
- Consider upgrading to a new webcam if yours is more than 3-4 years old
For more detailed solutions to specific webcam issues, check out our comprehensive guide on fixing webcam not working problems.
FAQs About How to Test Webcam
1. How Do You Test a Webcam on Windows 10?
Testing your webcam on Windows 10 is easy using the built-in Camera app. Click the Start button, type "camera" in the search box, and select the Camera app. If your webcam is working, you’ll see yourself right away on the screen. This method works for both built-in laptop cameras and external USB webcams. If there’s an error, check your privacy settings or update your webcam drivers through Device Manager.
2. How to Test Webcam in Chrome?
You can test your webcam directly in Chrome using online tools without needing to install any software. Visit websites like Veed.io, OnlineMicTest, or WebcamTests.com, click "Start Test", and allow camera permissions. Chrome will access your webcam and show the video feed instantly. These tools are great for quick checks and often display detailed camera information. You can also test webcams in Chrome-based apps like Google Meet through the settings menu.
3. How Do I Open My Webcam?
Opening your webcam depends on your device and how you plan to use it. On Windows, type "camera" in the Start menu to open the Camera app. Mac users can open Photo Booth from the Applications folder. For external webcams like the OBSBOT Tiny 3, just plug them into a USB port and they should activate automatically. You can also open your webcam through video conferencing apps like Zoom, Microsoft Teams, or Google Meet via their video settings.
4. How to Test if a Camera Is On?
Most webcams have an indicator light that turns on when the camera is active. Look for a small LED light near the camera lens—if it’s on, the camera is working. You can also check camera activity by opening the Camera app on Windows or Photo Booth on Mac. In video conferencing apps like Zoom or Microsoft Teams, you can confirm the camera’s status by viewing the video preview. For external webcams like the OBSBOT Tiny 3, the indicator light clearly shows when the camera is in use.
5. How Do I Test a Webcam?
There are several easy ways to test your webcam. Use built-in apps like the Windows Camera app or Mac Photo Booth for a quick check. You can also test it using browser-based tools such as Veed.io or OnlineMicTest without any downloads. For a more realistic test, open video conferencing apps like Zoom, Microsoft Teams, or Google Meet and check the camera preview in settings. Make sure the video is clear, the lighting is natural, and the colors look accurate during the test.
Final Thoughts: Never Face Camera Issues Again
Testing your webcam should become as routine as checking your microphone before important calls. The few minutes spent verifying your camera works can prevent the frustration and professional embarrassment of technical difficulties during critical moments.
Remember these key takeaways:
- Test regularly - Don't wait until minutes before an important meeting
- Know multiple methods - Have backup testing options ready
- Keep drivers updated - Regular maintenance prevents most issues
- Consider an upgrade - Modern webcams offer significantly better quality and reliability
With this comprehensive guide, you're now equipped to confidently test your webcam on any platform and resolve common issues quickly. If you also want to make sure your camera is set up and used correctly from the start, this step-by-step guide on how to use a webcam on a laptop can help. Here's to crystal-clear video calls and never saying "can you see me?" again!


